¶ Workflow Guide: How to Set Up Workflow Goal Events
How to Set Up Workflow Goal Events
Goal Events are powerful tools for automating and optimizing workflows. They serve as triggers that advance contacts through various stages in a workflow, making processes more efficient and user-friendly. In this comprehensive guide, we’ll discuss everything you need to know about Goal Events, from setting them up to their applications and FAQs for each type.**
**_Please Note: _
For version 1, we restricted Goal Event filters to email events _,_adding or removing tags _,__trigger link clicks,_and appointment status only. We plan to add more goals events in the future, such as form submissions, etc.
¶ Also, currently, we are restricting to** ONE** Goal Event per workflow.
How to Set Up Goal Events in Workflows
- Navigate to Automation > Workflows
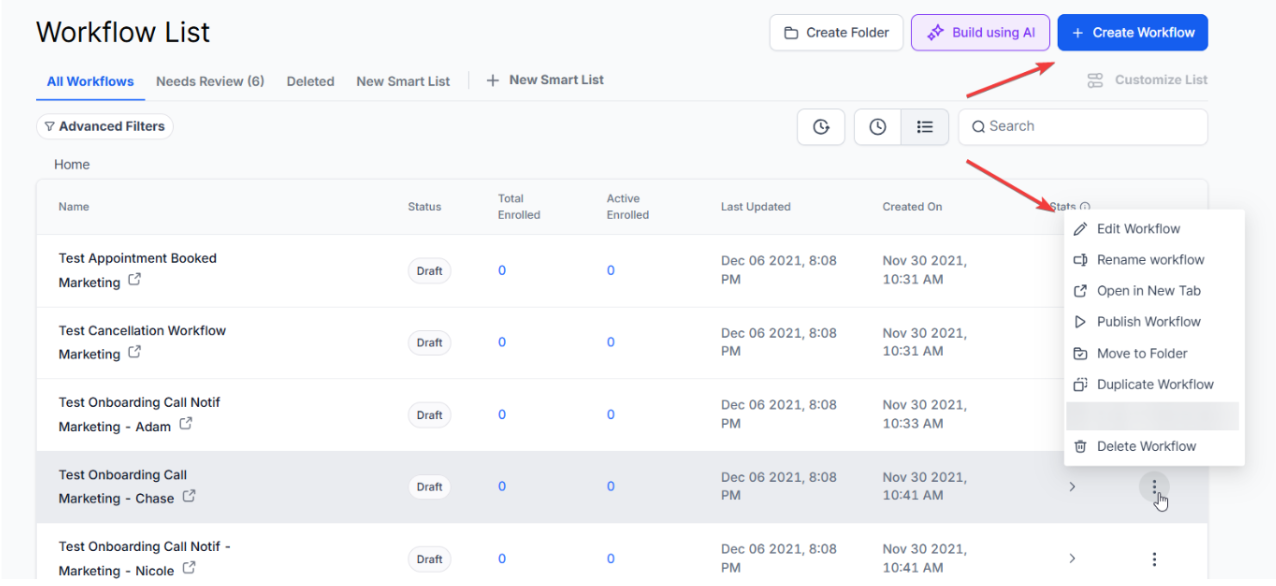
- Identify the Workflow: Determine the workflow where you intend to incorporate the Goal Event.
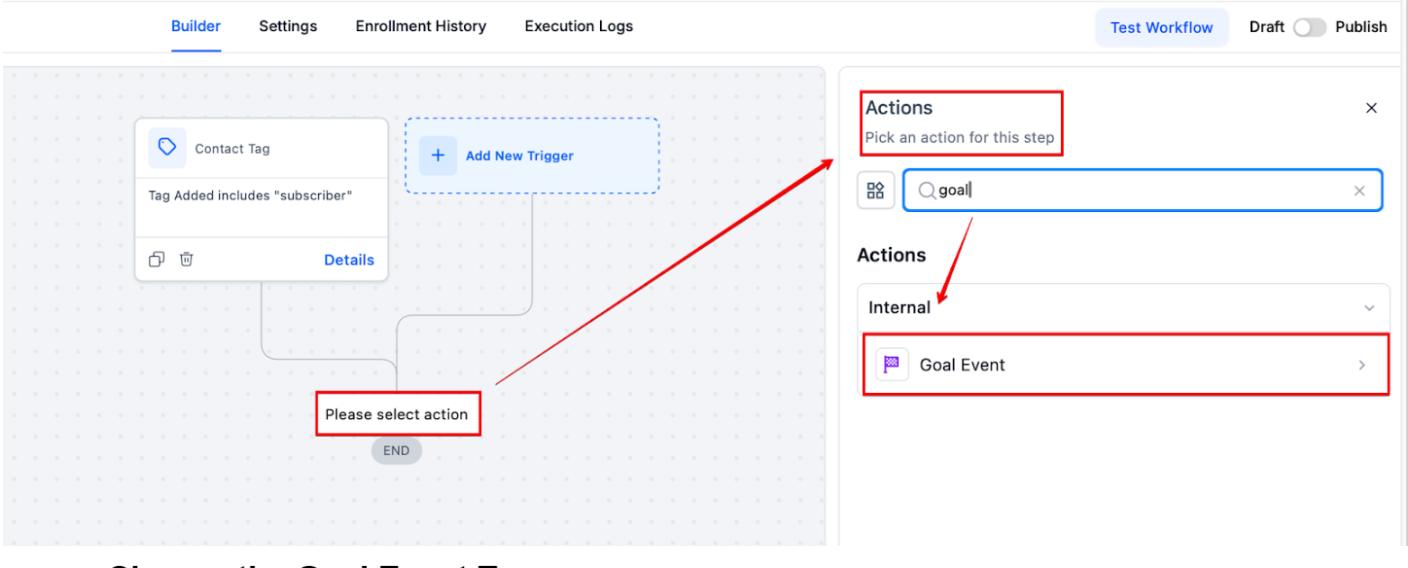
- Select the Goal Event Action
-
Choose the Goal Event Type:
-
Decide which type of Goal Event will be used, such as:
Received an Email
Clicked a Trigger Link
Added/Removed Contact Tag
Appointment Status
Payment Received
**Form Submitted **
Document Status
Invoice Paid
Review Request Clicked
- Insert the Goal Event: Place the Goal Event at the suitable phase within your workflow.
- Set Conditions: Specify the conditions that must be met for a contact to reach the Goal Event.
- Test: Before fully implementing, conduct tests to ensure the workflow functions as anticipated.
¶ How do Goal Events Work?
Goal Events serve as milestones in your workflow. When a contact meets the conditions set for a Goal Event, they are automatically moved to the respective goal step, skipping any intermediate steps.
¶ What happens if the contact reaches a Goal Event without meeting its conditions?
If a contact reaches a Goal Event without satisfying its conditions, it will not proceed to the goal step and will instead continue following the existing workflow steps. There would be three options to select from:
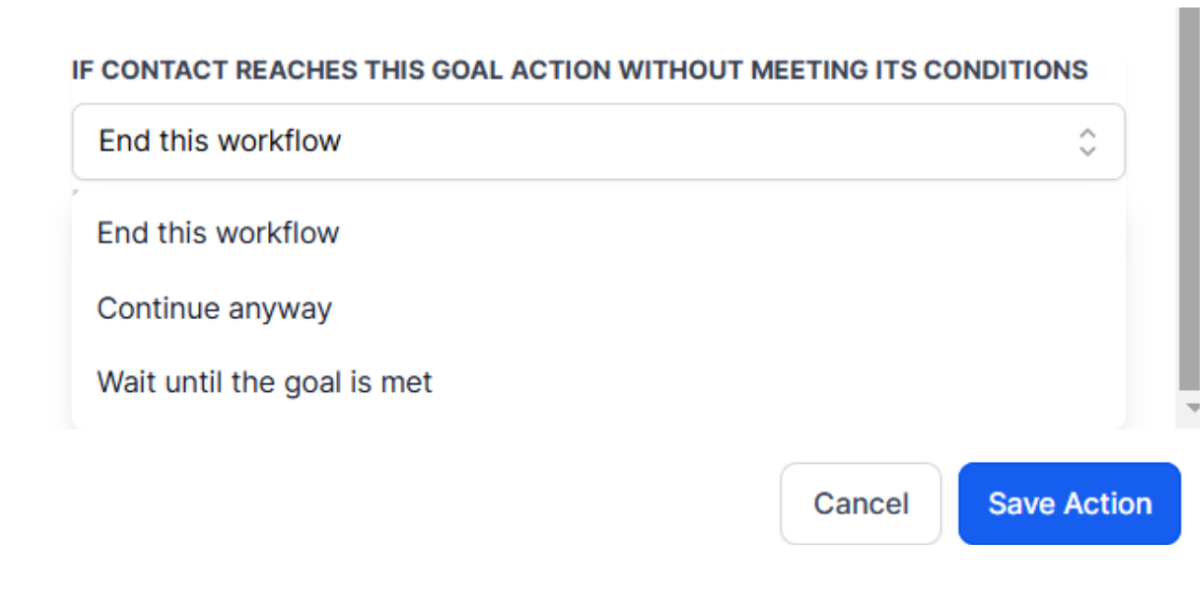
1. End this workflow
2. Continue Anyway
3. Wait until the Goal is met
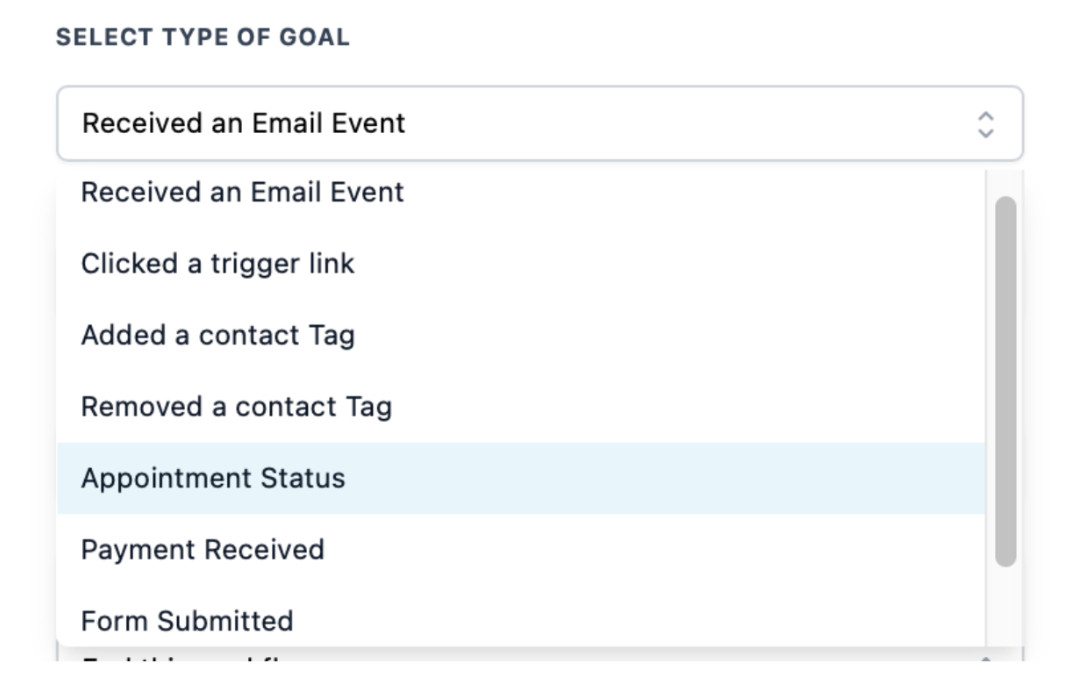
What Goal Events are Currently Supported
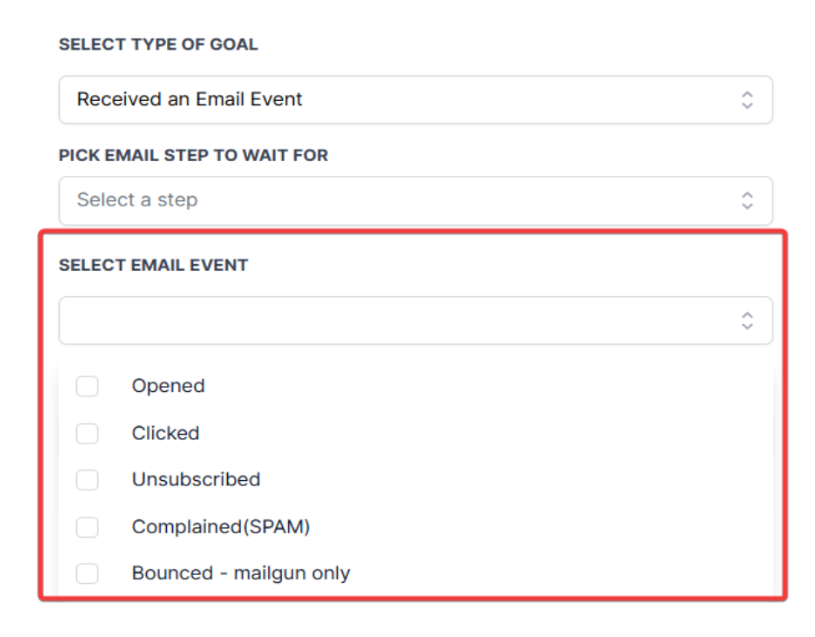
1. Received an Email Event**
**For the “Email Received Event” setting, choose the specific actions you want the system to track. Your options include:
- Clicked
- Opened
- Unsubscribed
- Complained (Spam)
- Bounced (Exclusive to Mailgun)
Usage Cases
Newsletter Sign-Up: Move contacts who have received a welcome email to a new subscriber nurturing campaign.
FAQ:
Can this handle multiple email receipts?
Yes, the system can move each contact independently based on the email they receive.
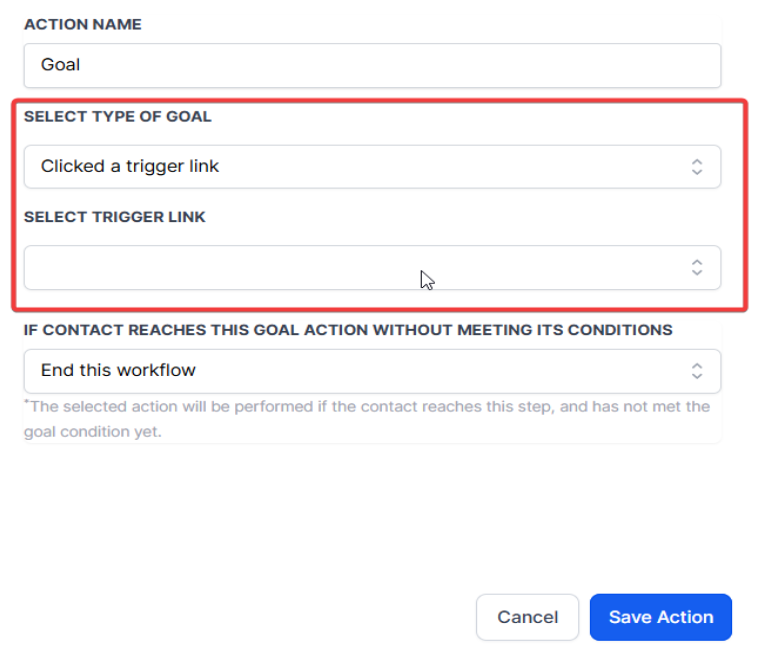
2. Clicked a Trigger Link**
**For the “Trigger Link Clicked” option, kindly choose from the trigger links available in the dropdown list.
Usage Cases
E-commerce: Customers clicking on a promotional link can be moved to a targeted marketing campaign.
FAQ:
What if a contact clicks multiple trigger links?
Each trigger link could have its own Goal Event, and the system will move the contact accordingly.
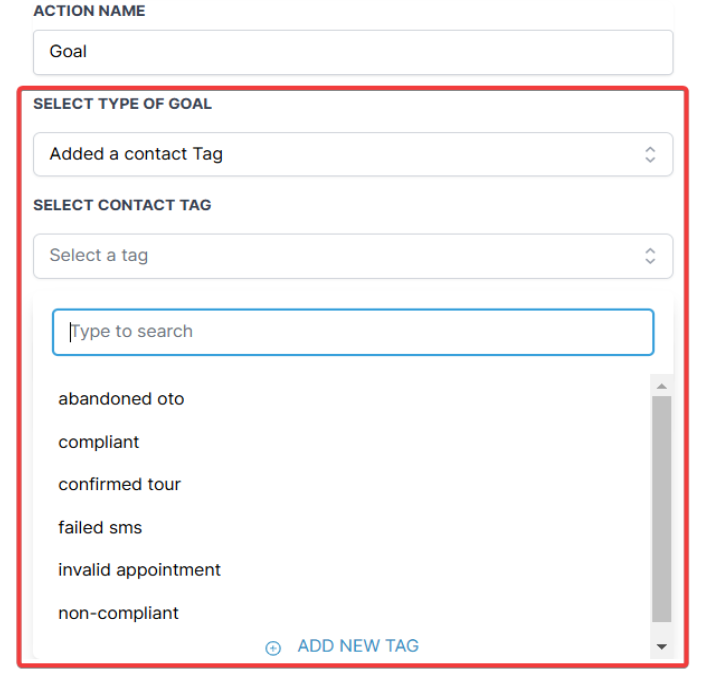
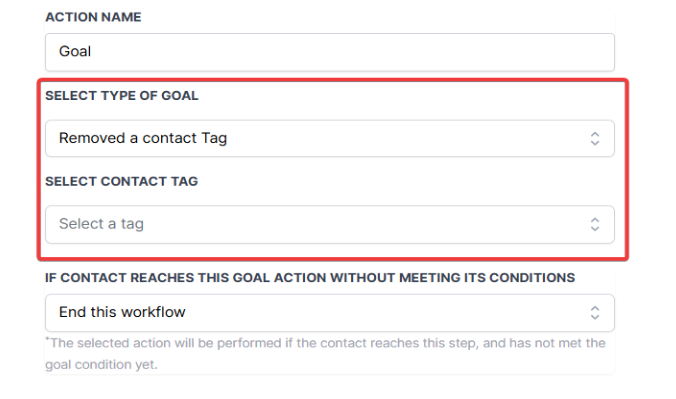
3. Contact Tags (Add & Remove)
When a specific tag is applied to a contact, they are moved to the designated goal step — this is what happens under the**“Contact Tag Added”** setting.
When a designated tag is taken off a contact, they are automatically shifted to the targeted goal step — this is the function of the “Contact Tag Removed” option.
Usage Cases
Membership Levels: Upgrade or downgrade members automatically based on added or removed tags.
FAQs
Can tags be dynamically added?
Yes, tags can be manually or automatically added and will still trigger the Goal Event.
4. Appointment Status**
**For the “Appointment Status” option, first choose a Calendar using the dropdown list, and then pick any combination of the “New,” “Confirmed,” and “Showed” statuses.
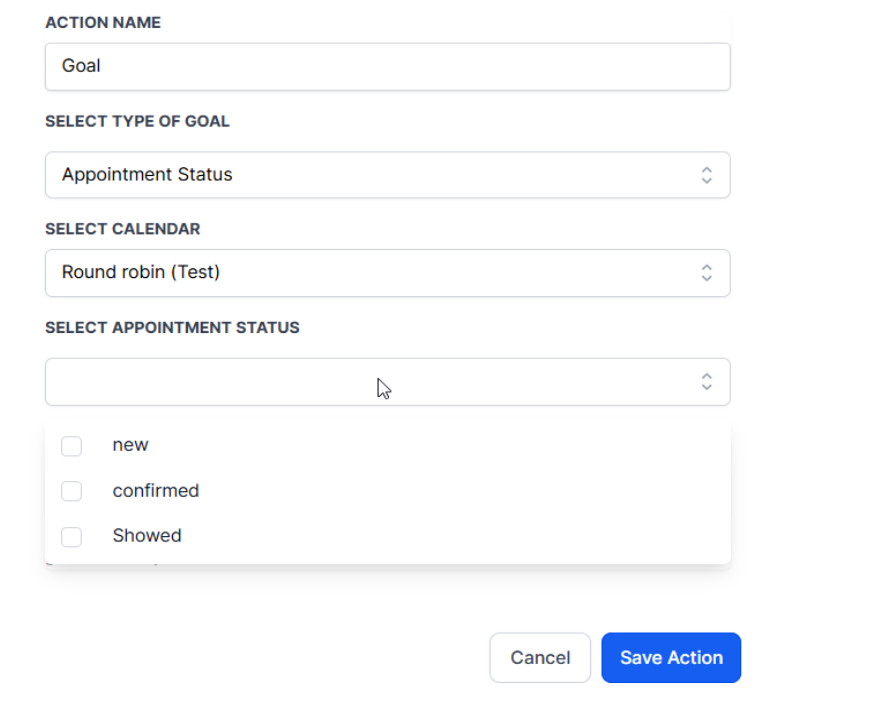
Usage Cases
Client Onboarding: Automatically move new clients to the next phase after a ‘Confirmed’ introductory meeting.
FAQs
What if an appointment is canceled?
If an appointment is canceled, the Goal Event stays as is, and additional workflows may be required to manage this change.
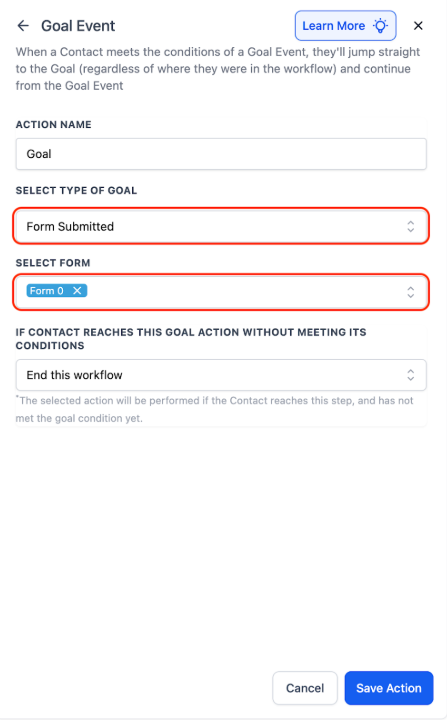
Form Submitted (Multi-Select Support)
You can trigger a goal when any of multiple selected forms are submitted, ideal for businesses managing multiple opt-ins or lead magnets.
Highlights:
- Choose one or more forms using a new multi-select dropdown
- Goal is achieved when a contact submits any of the selected forms
Use Case:
Universal Opt-In Handler
Context: A marketing agency wants to follow up with users who submit any newsletter or lead magnet form
Automation: Uses “Wait until form submitted” with multiple forms selected
Benefit: Eliminates branching logic and unifies opt-in triggers
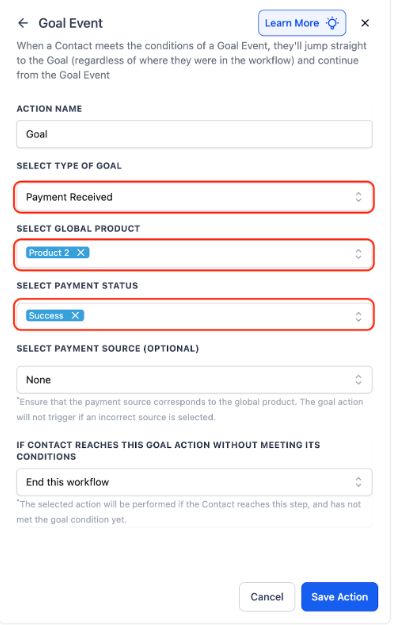
6. Payment Received / Invoice Paid
Workflows can respond to payment and invoice events, perfect for onboarding, reminders, or billing follow-ups.
Highlights:
- New goal type in the “Select Type of Goal” dropdown
- Trigger logic activates when payment matches selected filters (e.g., Product, Payment Status = Success/Failed)
Use Cases:
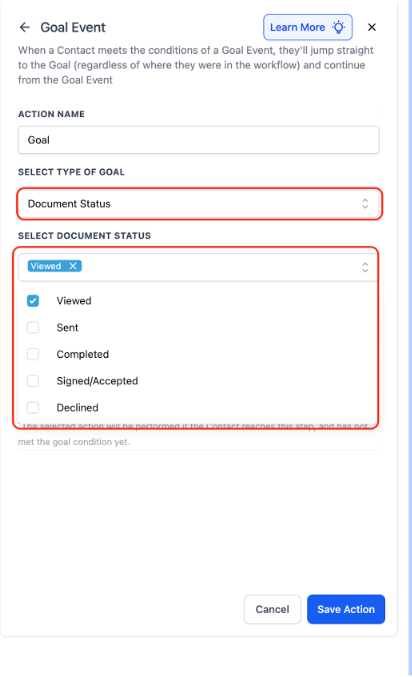
7. Document Status (Opened, Signed, Completed, etc.)
Track proposals and contracts throughout their lifecycle, all inside your workflow builder.
Highlights:
- New goal type for key document stages: Signed/Accepted, Declined, Completed, Sent, Viewed
- Optionally filter by template
- Triggers when document status matches selected condition (applies globally if no template is chosen)
Use Cases:
- Send follow-ups 24h after a proposal is opened but not signed
- Start onboarding automatically when a contract is marked “Completed”
¶ Why Would You Want to Use Goal Events?
Goal Events not only make your workflow more efficient but also eliminate the need for multiple secondary workflows. They allow you to design workflows that adapt dynamically to your contacts’ behaviors and actions, making the entire process more seamless and efficient.
¶ Pro Tips
- Plan Your Goals Wisely: Before setting up Goal Events, carefully plan how each event fits into your overall workflow. Clearly define what conditions will trigger each goal to ensure smooth transitions and avoid potential bottlenecks.
- Test Thoroughly: Always test Goal Events in a controlled environment before fully deploying them. This helps verify that the conditions and actions work as expected, minimizing disruptions to your live workflows.
- Utilize Conditional Logic: Leverage the options for handling contacts that don’t meet Goal Event conditions, such as choosing to “Wait until the Goal is met” or “Continue Anyway.” This flexibility can help you create more robust workflows.
- Monitor and Adjust: Regularly review the performance of your Goal Events and workflow. Monitor how well contacts are progressing through the workflow and make adjustments as needed based on performance data and feedback.
¶ FAQ’s
Question: How does the “Form Submitted (Multi-Select)” goal work?**
**Answer: This goal allows you to trigger an action when any of multiple selected forms are submitted, making it ideal for managing multiple opt-ins or lead magnets without complex branching logic.
Question: What is the use case for the “Payment Received / Invoice Paid” goal?**
**Answer: This goal helps automate processes like onboarding, payment reminders, or follow-ups based on payment or invoice events, such as when a payment is successful or an invoice is paid.
Question: How can I track the status of documents within a workflow?**
**Answer: The “Document Status” goal type allows you to track key stages of documents (e.g., Signed, Completed, Viewed), with triggers activated based on the selected status, such as sending follow-ups or starting onboarding.
Question: Can multiple Goal Events be added to the same workflow?**
**Answer: Currently, only one Goal Event is allowed per workflow, as stated in the restrictions for version 1. However, future updates may allow for more flexibility in this regard.
Question: How can I monitor and improve Goal Event performance?**
**Answer: Regularly review workflow metrics to track contact progress, identify bottlenecks, and optimize conditions for better automation outcomes.
Question: Can I use Goal Events to move a contact** backward**in a workflow?
Answer: No. Goal Events are designed to advance contacts forward toward a milestone. They cannot be used to move a contact to a previous step. To repeat steps, you would typically use a “Go To” event or re-add the contact to the start of the workflow.
Question: What happens to a contact who is currently in a “Wait” step when they meet a Goal?**
**Answer: They immediately exit that “Wait” step and skip all following steps until they reach the Goal. This is ideal for stopping “Nurture” emails the moment a lead finally books an appointment or pays an invoice.