¶ Advanced Builder: A Workflow Design
Advanced Builder: A Workflow Design
Workflows form the backbone of automation in any system, enabling streamlined processes that save time and improve efficiency. With the introduction of the Advanced Builder for workflows, users gain a powerful tool that takes workflow design to the next level. By offering a fully visual, flexible, and freeform way to design automations, this feature transforms the process of building workflows into an intuitive and seamless experience. In this article, we’ll explore the key features, how to use the Advanced Builder, and why it’s the best tool for your automation needs.
¶ Key Features and Benefits
The Advanced Builder is designed to simplify the creation and management of workflows by giving you complete control over the layout and structure. Here’s what makes it stand out:
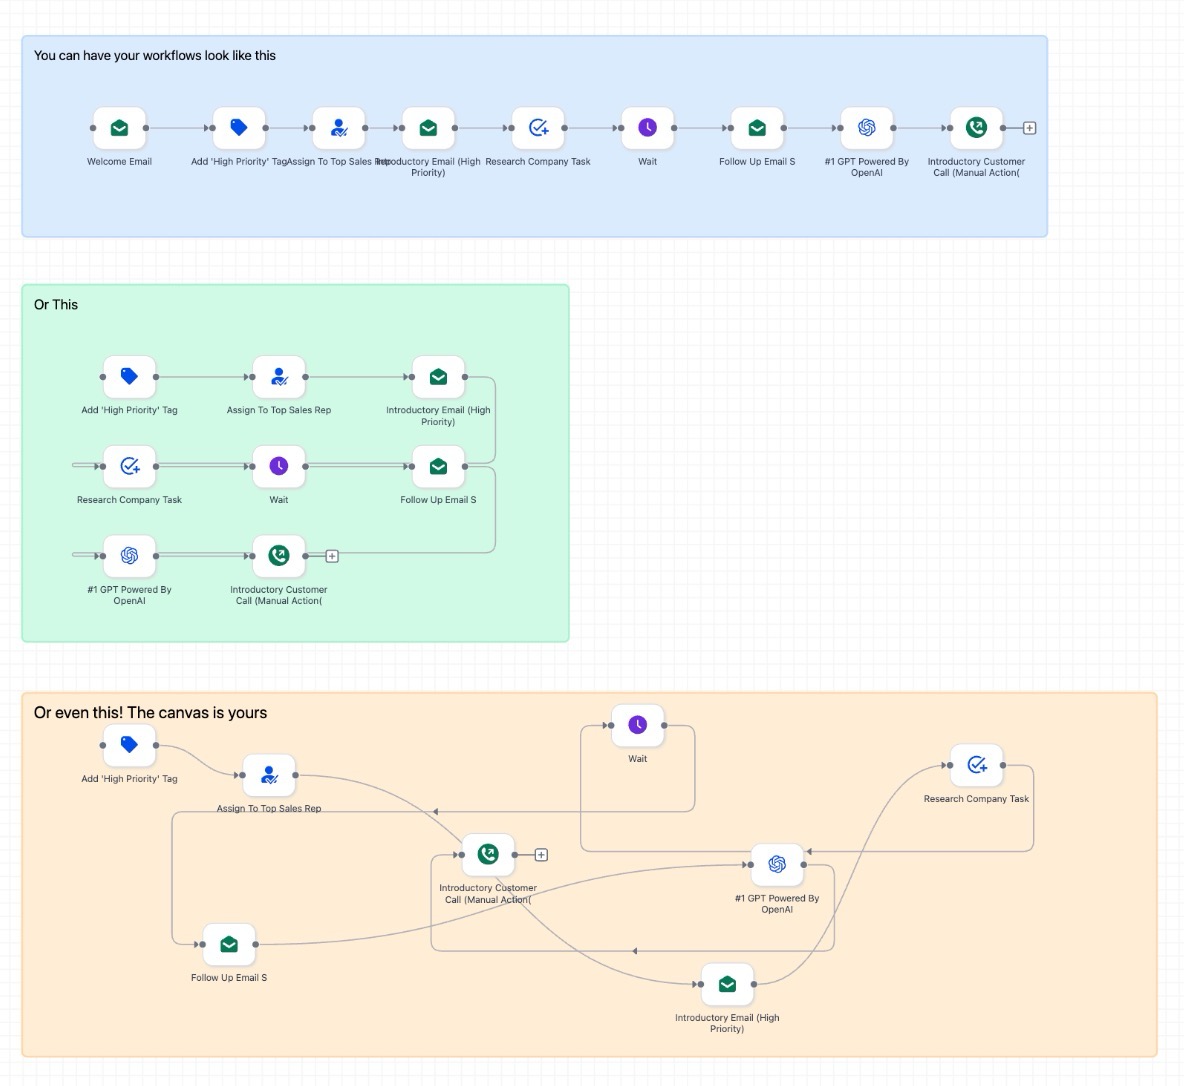
- Visual Workflow Design**
**Say goodbye to scrolling through long lists of actions and conditions. The Advanced Builder features an open canvas where you can drag, drop, and arrange triggers and actions freely. This visual approach offers a clearer view of your workflow, making it easier to create, troubleshoot, and modify complex automations. - Multiple Paths and Independent Branches**
**With the Advanced Builder, you can design workflows with multiple trigger paths and independent branches, all on one canvas. This flexibility allows you to create more dynamic workflows, with multiple paths running concurrently, making it perfect for handling various user interactions and responses. - Go-To Triggers for Flexible Entry Paths**
**No longer do you have to rely on complicated if/else conditions. The Advanced Builder enables you to set specific entry points for triggers. Each trigger can be directed to a specific action, giving you total control over how contacts enter your workflow and ensuring a smoother and more efficient process. - Delinked Nodes for Independent Paths**
**This feature allows you to build independent workflows side by side in the same canvas. By adding delinked triggers, you can easily separate different tasks or processes, ensuring your workflow remains organized and manageable. - Enable/Disable Nodes**
**A useful feature for testing and debugging, the Advanced Builder allows you to enable or disable individual actions without deleting them. This means you can pause certain actions during testing or troubleshooting without disrupting the entire workflow. - Sticky Notes and Color Coding**
**Keep your workflow organized and clear by using sticky notes and color-coding. These tools help you annotate different sections, making collaboration easier and helping you keep track of complex logic. - Keyboard Shortcuts**
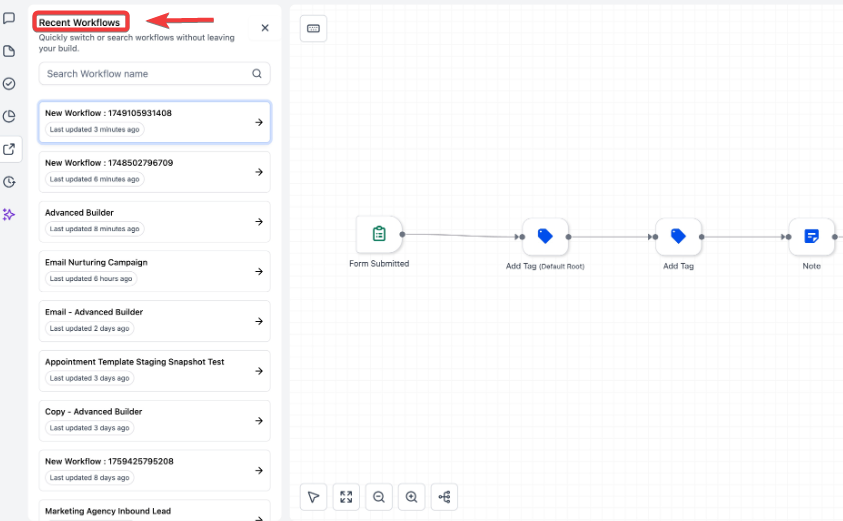
**For those who want to speed up the design process, a full set of keyboard shortcuts is available. These shortcuts allow for faster navigation, editing, and connection of nodes, increasing your efficiency as you build workflows. - Workflow Switcher**
**Managing multiple workflows has never been easier. The Workflow Switcher lets you quickly navigate between workflows without leaving the builder. You can search for workflows, open them in new tabs, and continue your work seamlessly without losing your place.
¶ How to Use the Advanced Builder
Getting started with the Advanced Builder is simple. Just follow these easy steps:
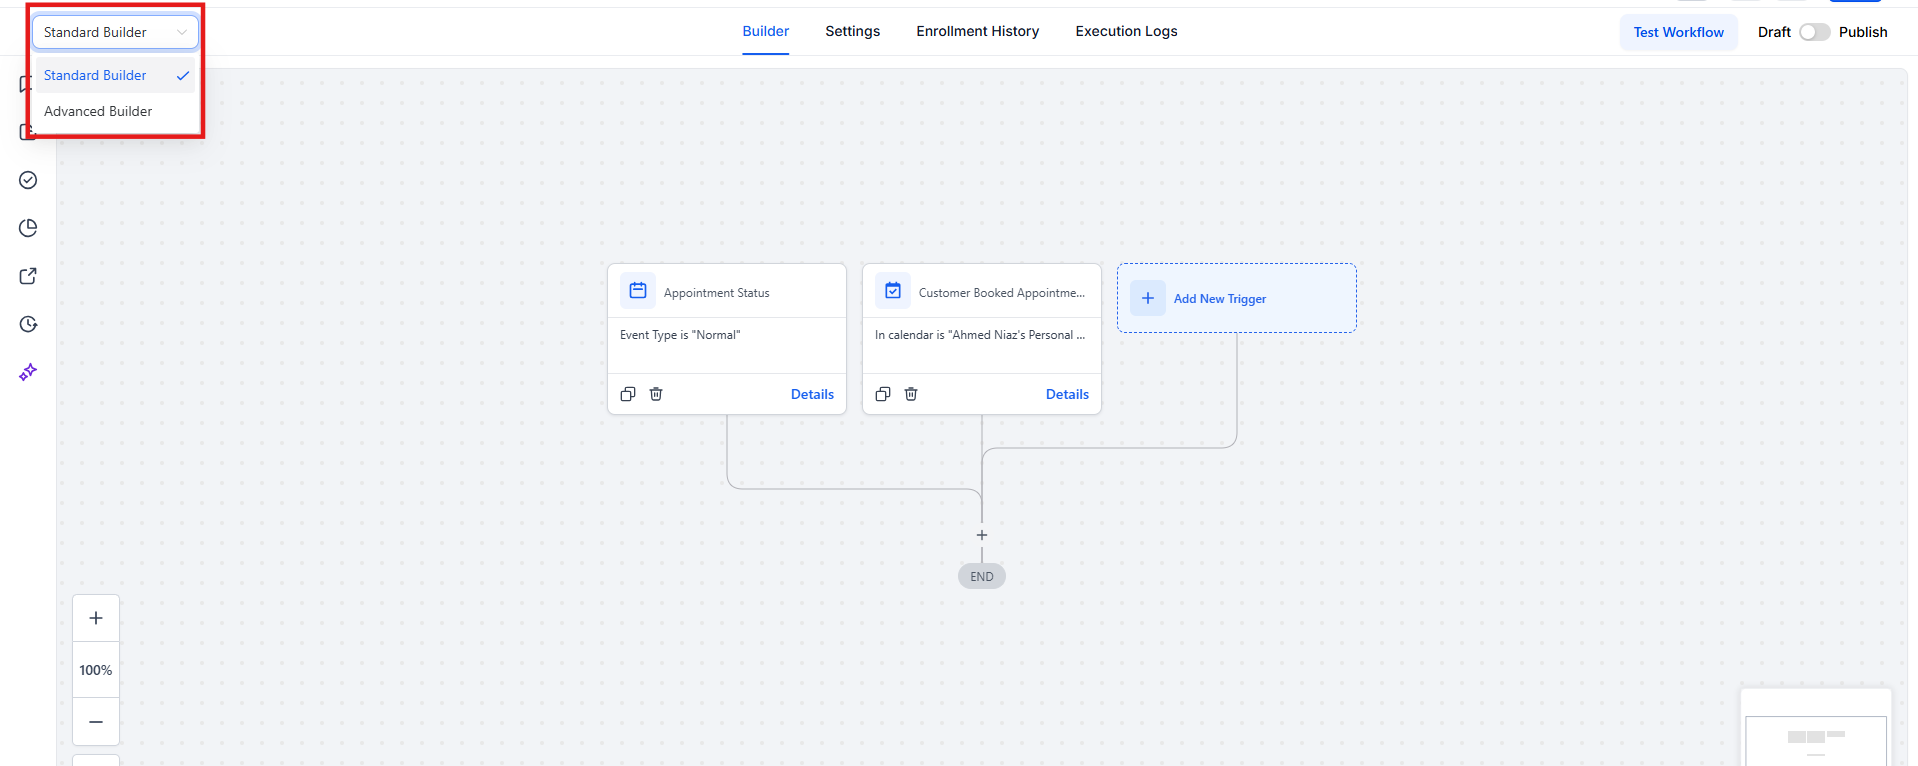
1- Switch to Advanced Builder**
**Once you navigate to Automations > Workflows, open your desired workflow and toggle to the Advanced Builder view. This will transition your workflow to the visual canvas, where you can start building and arranging your workflow with ease.
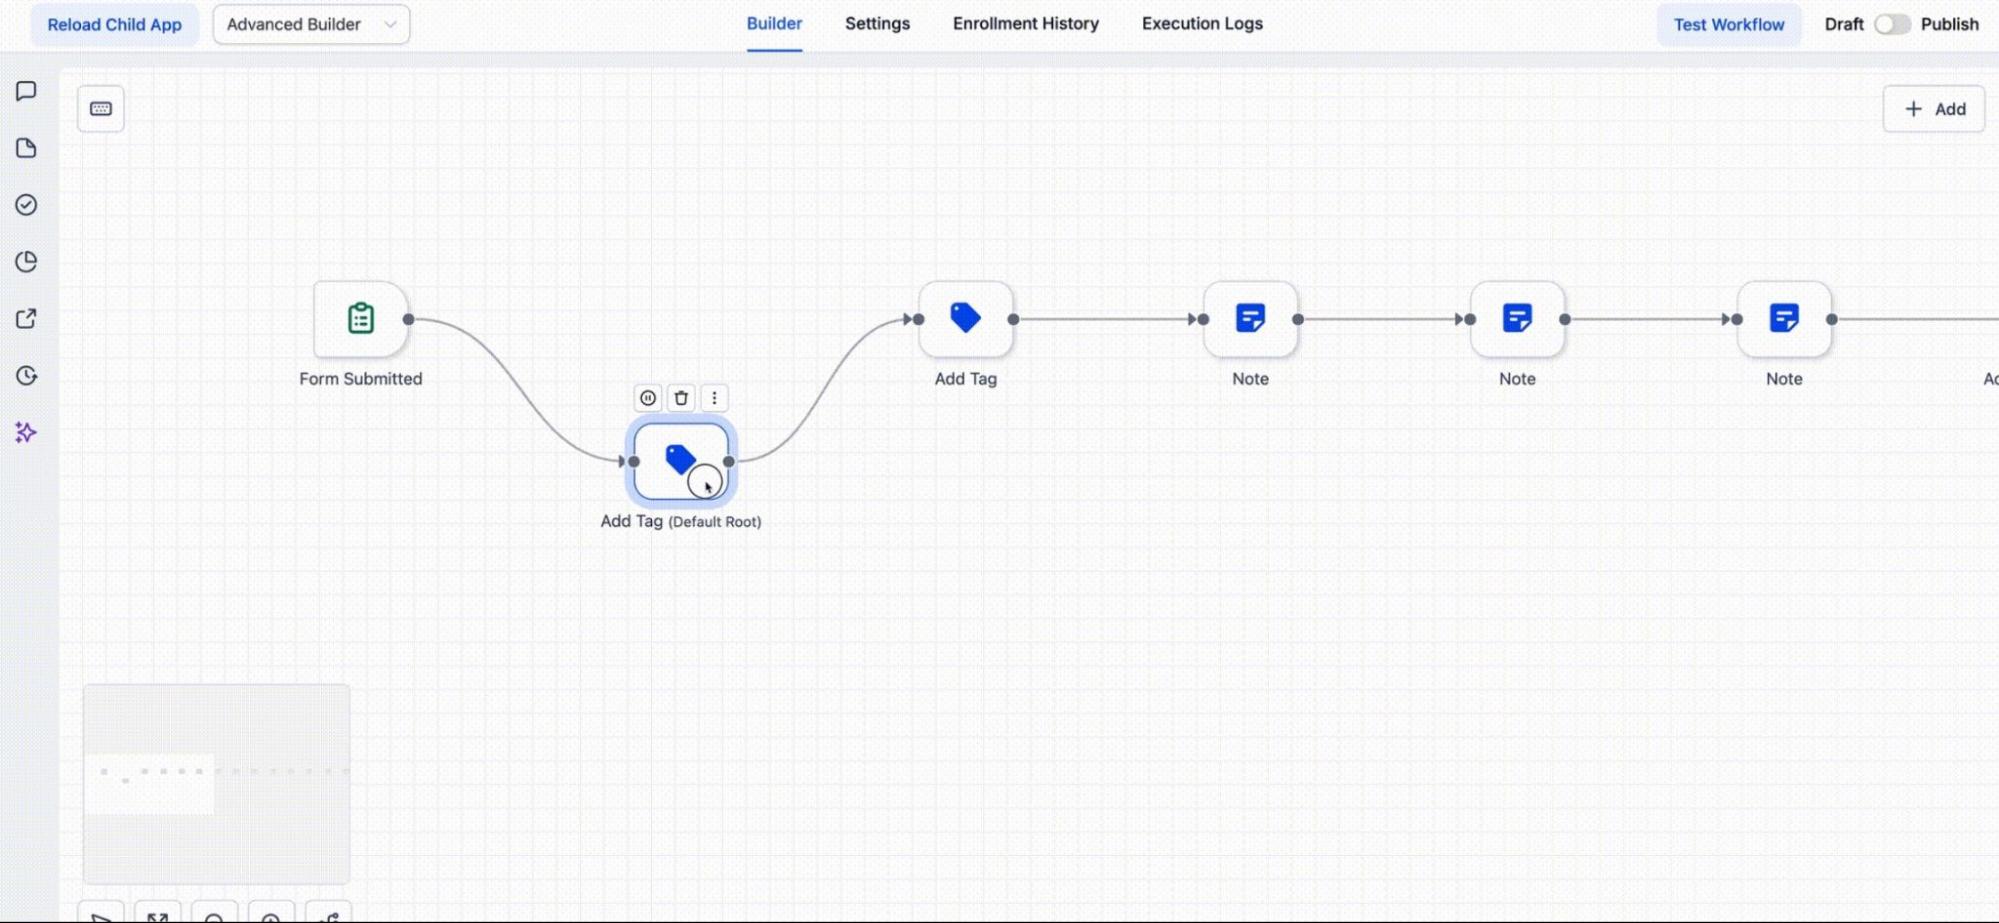
2- Drag and Drop Triggers and Actions
From the trigger and action panel, drag the necessary elements onto the canvas. You can arrange them as needed and connect them visually by dragging connectors between the nodes.
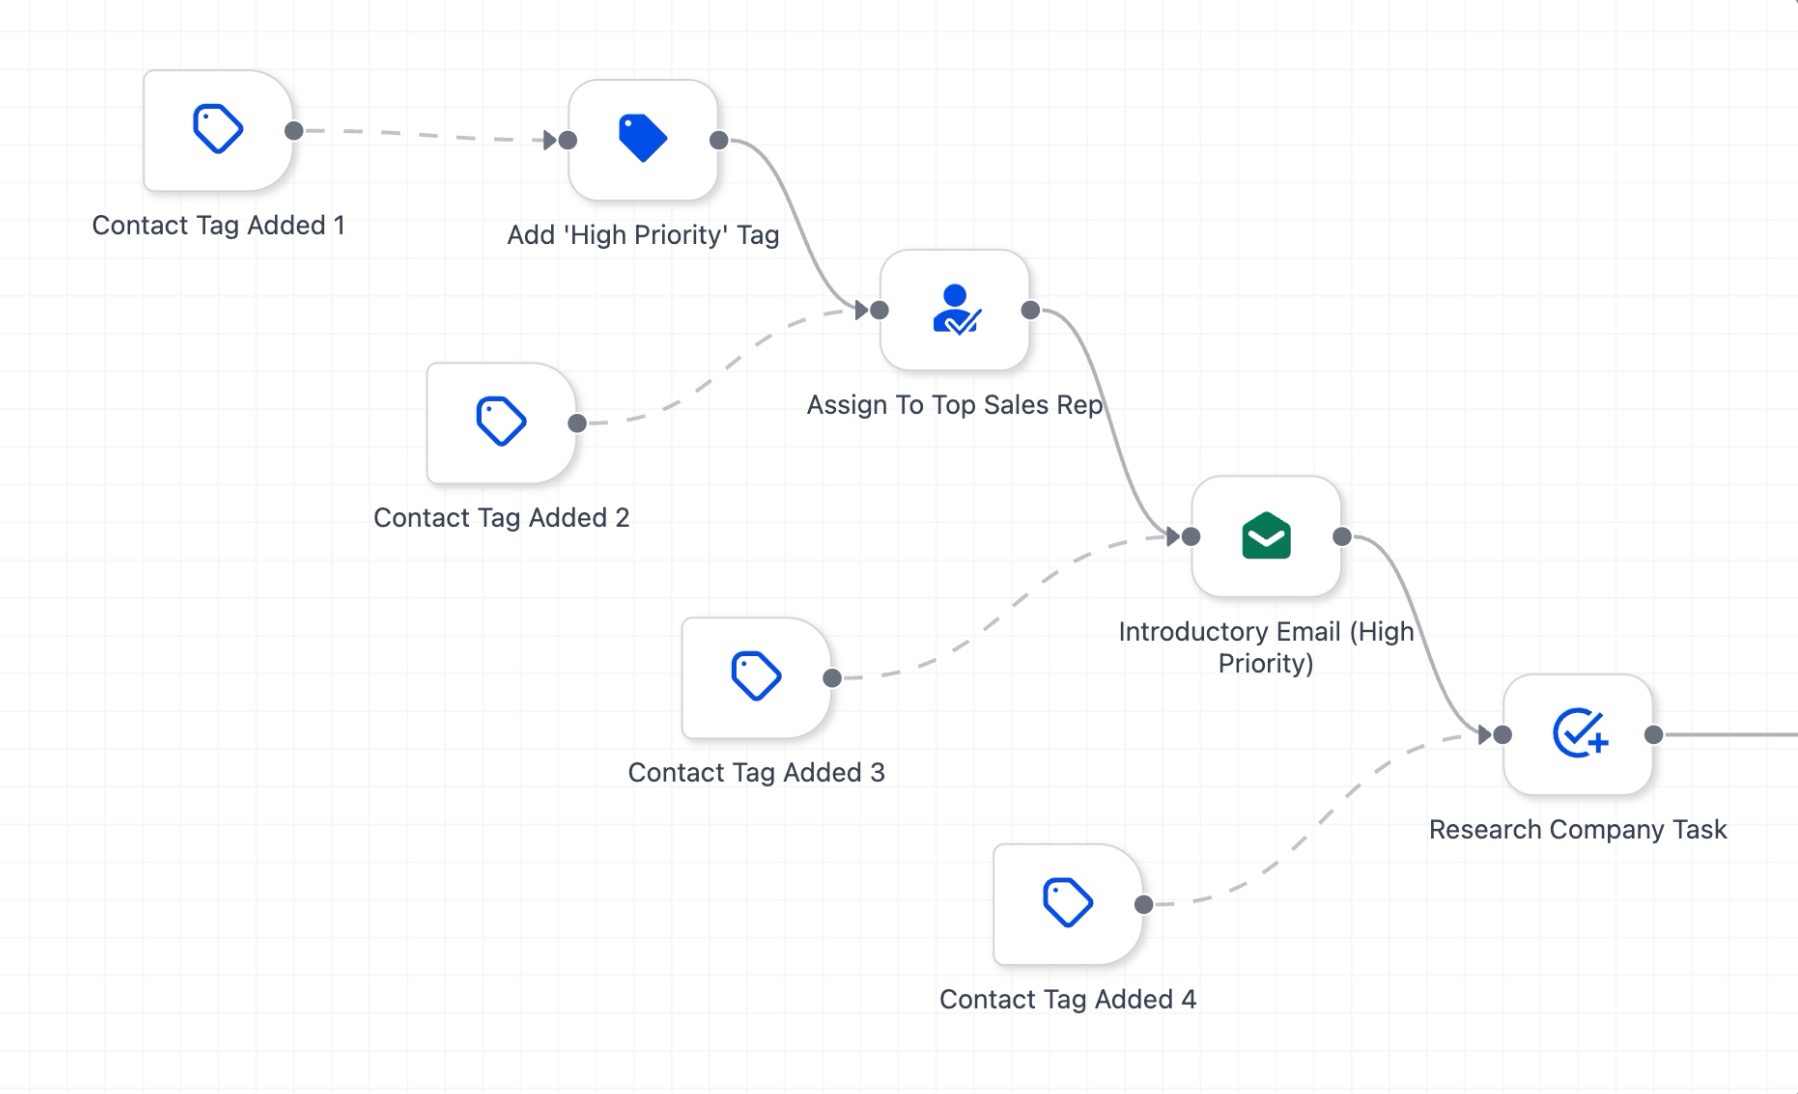
3- Use Go-To Triggers
For each trigger, drag the Go-To connection to the action where you want that trigger to start. This helps direct contacts to the appropriate path in your workflow, ensuring a more streamlined experience.
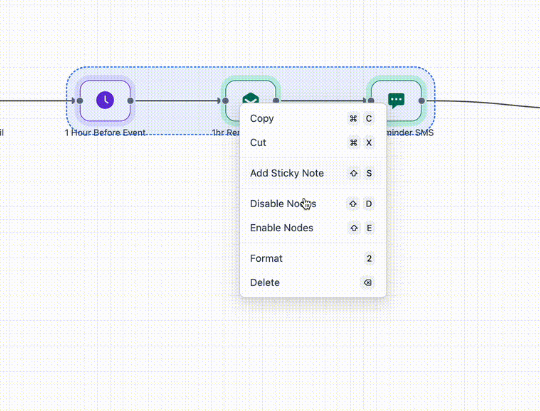
4- Enable/Disable Nodes
You can bulk enable/disable a selected section, clean up spacing only in the chosen area.To use it, select nodes on the canvas, right-click, and choose the bulk toggle.
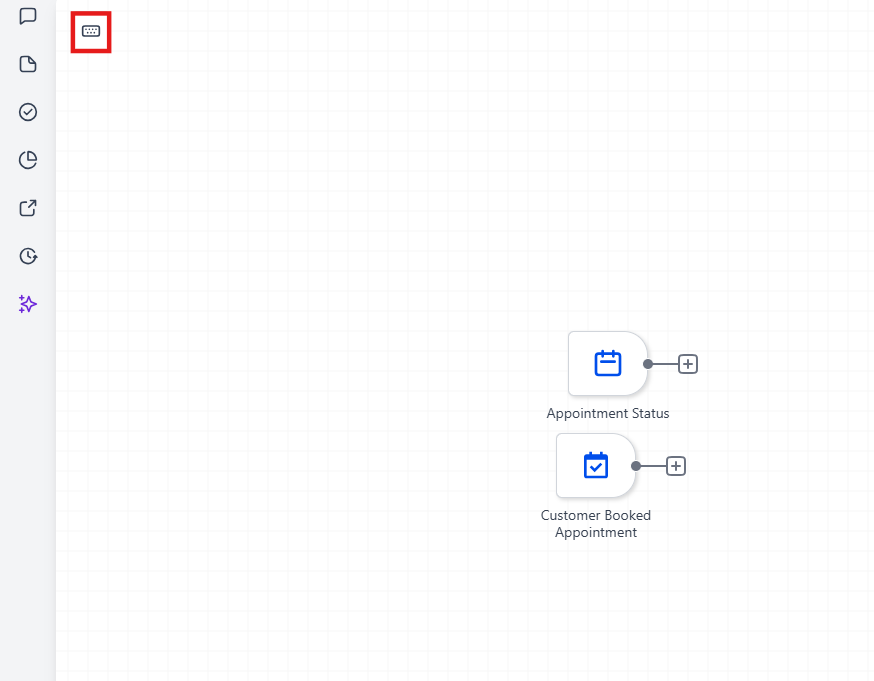
5- Organize with Sticky Notes and Colors
Use sticky notes and color codes to label sections of your workflow, making it easier to manage complex logic and collaborate with your team. You will find the sticky notes option on the left hand side of the builder
6- Keyboard Shortcuts
The keyboard shortcuts feature streamlines your workflow-building process by allowing quick navigation, editing, and view controls without needing to reach for the mouse. With shortcuts for cutting, copying, pasting, zooming, and jumping between nodes, users can save time and improve efficiency when building workflows. These shortcuts are grouped by function, and the overlay toolbar makes it easy to access commands.
How to Use It:**
**
- To activate keyboard shortcuts, open a workflow in the advanced builder and press “K” (or click the Keyboard Shortcuts pill).
- Use the commands to quickly edit nodes, navigate between steps, or save your work. Shortcuts are available for both Mac and Windows/Linux users.
**7-**Version History
You can view and restore workflow versions created in either the Standard or Advanced builder, and the system will automatically open the appropriate builder for the selected version.
8- Save and Publish
Once you’re satisfied with your workflow design, save your changes and publish the workflow to implement it in your automation system.

Pro Tips for Advanced Workflow Design
- Tidy Up with Auto Layout**
**When working with large or complex workflows, use the Tidy Up feature to automatically organize your canvas. This will help maintain a clean and easily readable layout, which is essential when working with multi-branch workflows. - Use Parallel Paths Wisely**
**Although you can create multiple independent branches, remember that each contact will only process through one path at a time. Keep this in mind when designing workflows that involve multiple paths or actions. - Optimize with Shortcuts**
**Speed up your workflow design by mastering keyboard shortcuts. These can help you quickly navigate, copy/paste nodes, and make adjustments without relying on the mouse. This can be especially helpful when working on larger, more complex workflows. - Leverage Workflow Switcher**
**If you manage several workflows, use the Workflow Switcher to move between them effortlessly. This feature is especially useful when you need to compare workflows or reuse elements from one workflow in another.
¶ FAQs
Question: Can I use the Advanced Builder for all types of workflows?**
**Answer: Yes, the Advanced Builder works with all types of workflows, whether they are simple or complex. It allows for greater flexibility in creating dynamic, multi-path automations.
Question: Can I switch back to the Standard Builder once I’ve used the Advanced Builder?**
**Answer: Yes, you can toggle between the Advanced Builder and the Standard Builder. However, certain features like Go-To Triggers and Delinked Nodes are exclusive to the Advanced Builder, so they will need to be removed before switching back to the Standard Builder.
Question: What happens if I disable a node?**
**Answer: When you disable a node, it is skipped during workflow execution. The disabled node will be dimmed on the canvas, and when you re-enable it, it will run as part of the workflow again.
Question: How do I organize my workflow for team collaboration?**
**Answer: You can use sticky notes and color coding to annotate and organize your workflow. This makes it easier to share ideas and collaborate on complex workflows.
Question: Is there a limit to how many workflows I can manage using the Advanced Builder?**
**Answer: There is no specific limit to how many workflows you can manage, but it’s important to keep in mind that each workflow should be manageable and easy to navigate, especially when working with multiple independent branches or paths.
Question: What happens to disabled nodes when I publish the workflow?**
**Answer: Disabled nodes remain inactive in both draft and published versions. Contacts will not pass through them until you manually enable and republish them.
Question: Will my old workflows look different in the Advanced Builder?**
**Answer: Yes. When you switch an existing workflow to the Advanced Builder, the system will spread out your steps on a visual canvas. It might look a bit spread out at first, but you can use the “Tidy Up” button to instantly snap everything into a clean, easy-to-read layout.