¶ Using the Social Planner Social Media Tool: A 101 Guide
Using the Social Planner Social Media Tool: A 101 Guide
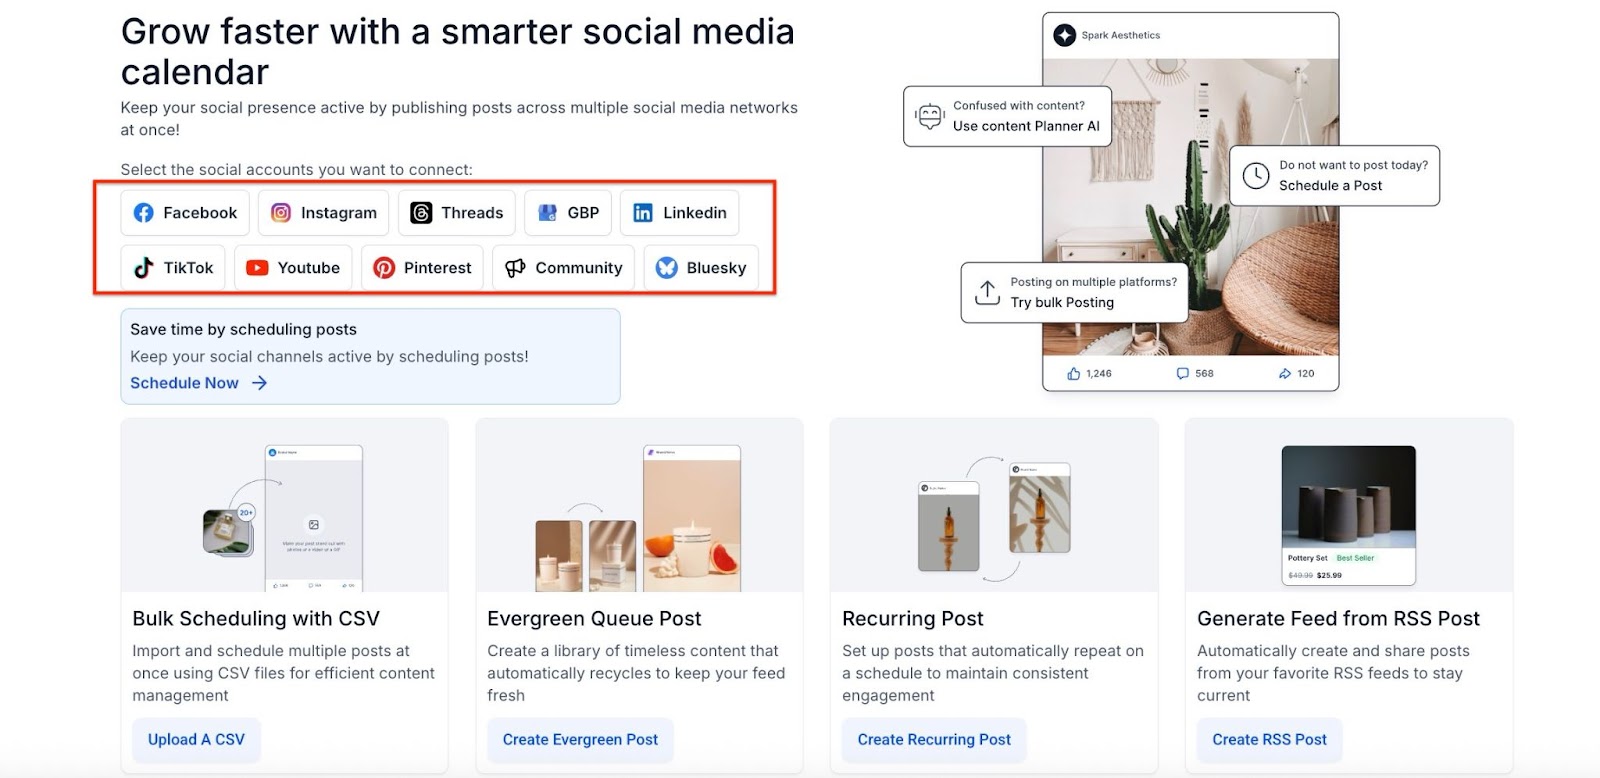
Use our Social Planner social media tool to keep all your social media managed in one spot. You can manage your social accounts, save time by scheduling posts, and learn what your social media audience thinks. Follow these steps to get started:
¶ Step 1: Connect Your Social Media Accounts
- Go to the Social Planner via the Marketing tab
- Integrate the account(s) you wish to use. Click the icons to integrate Facebook, Google Business Profile, Instagram, LinkedIn, TikTok, YouTube, Pinterest, Threads, Community or Bluesky.
NOTE: This pop-up will only appear the 1st time you access the Social Planner. To add or change connected accounts later, please use the Settings feature within the Social Planner.

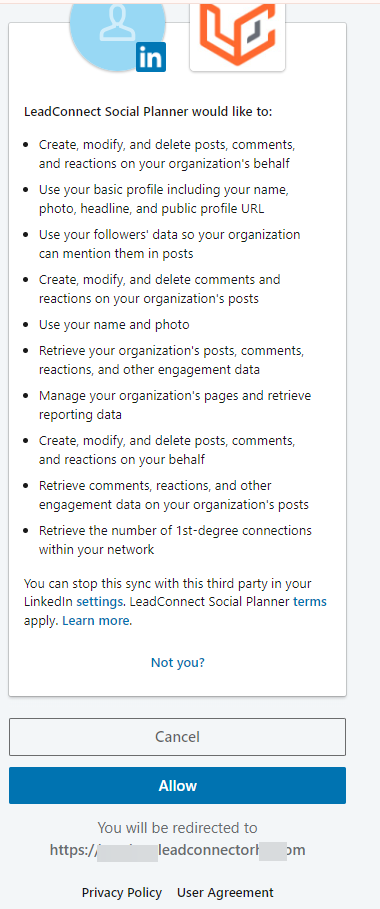
- When you integrate an account, a popup window will appear asking you to give permission to LeadConnector. Granting the permissions requested will allow the integration to be completed.
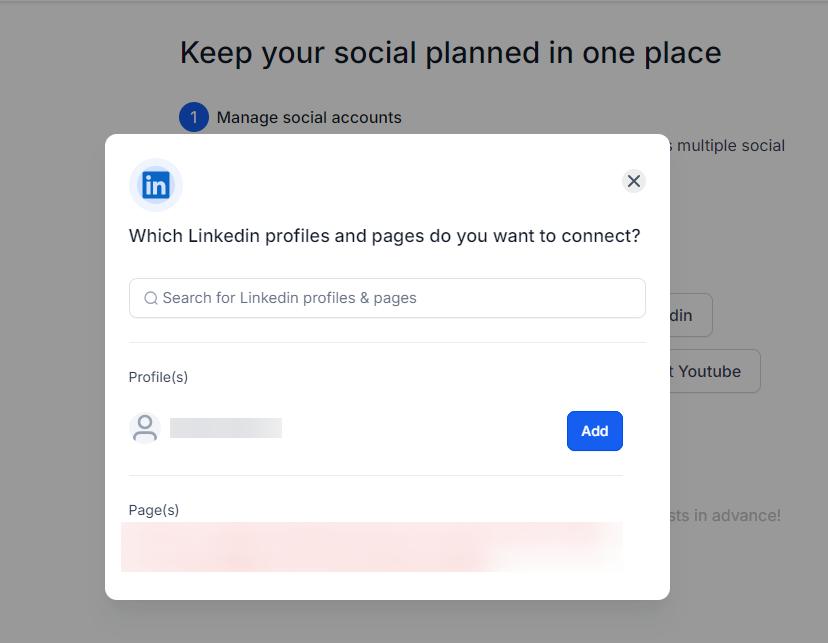
- Select one or multiple Facebook, GBP, Instagram, and LinkedIn, among other account pages to integrate. Click “Next”.
- Click “OK” and LeadConnector will be integrated with LeadMagicX
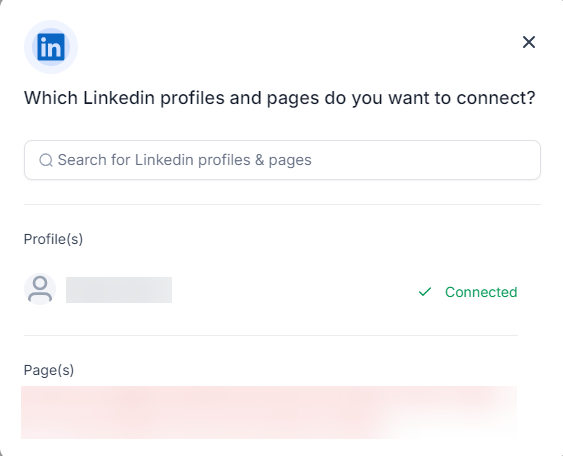
- The page(s) you selected above to allow permissions for are now ready to connect. Select one or multiple and click “Allow”. The integration will now be complete. (The following shows an example of connecting Facebook pages):
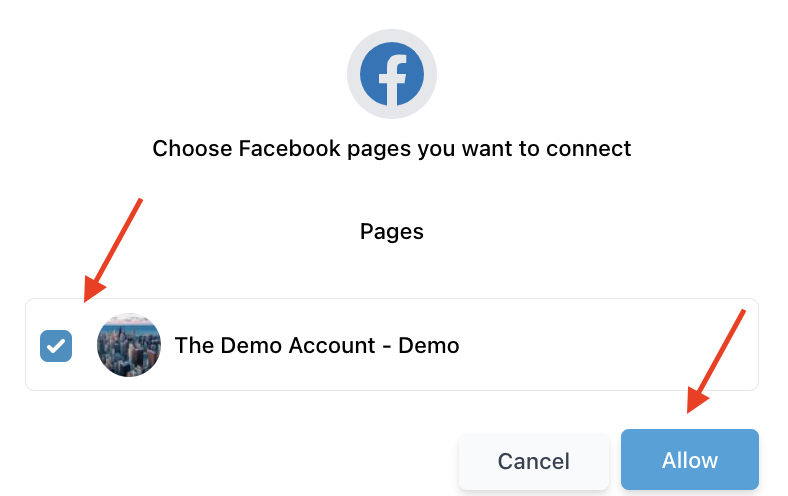
- NOTE : You may have multiple accounts from the same source connected (i.e. multiple Facebook pages, GMB pages, etc.)
¶ Step 2: Navigate Through the Social Planner Dashboard
- In the top left corner, you can search through your existing, connected accounts or add a new account.
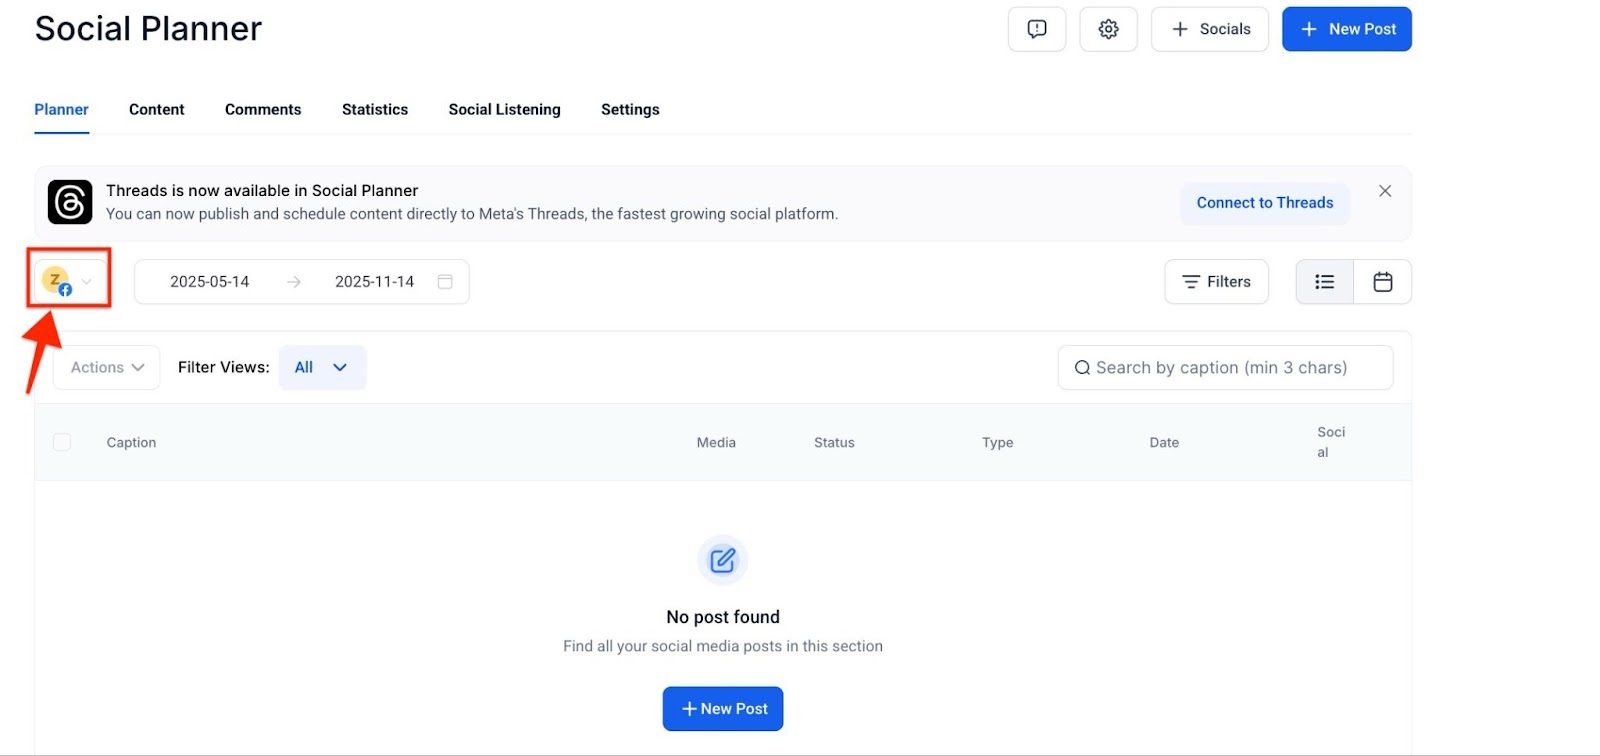
On top of the screen, an in-app notification banner will alert you when one or more of your connected social media accounts become disconnected.

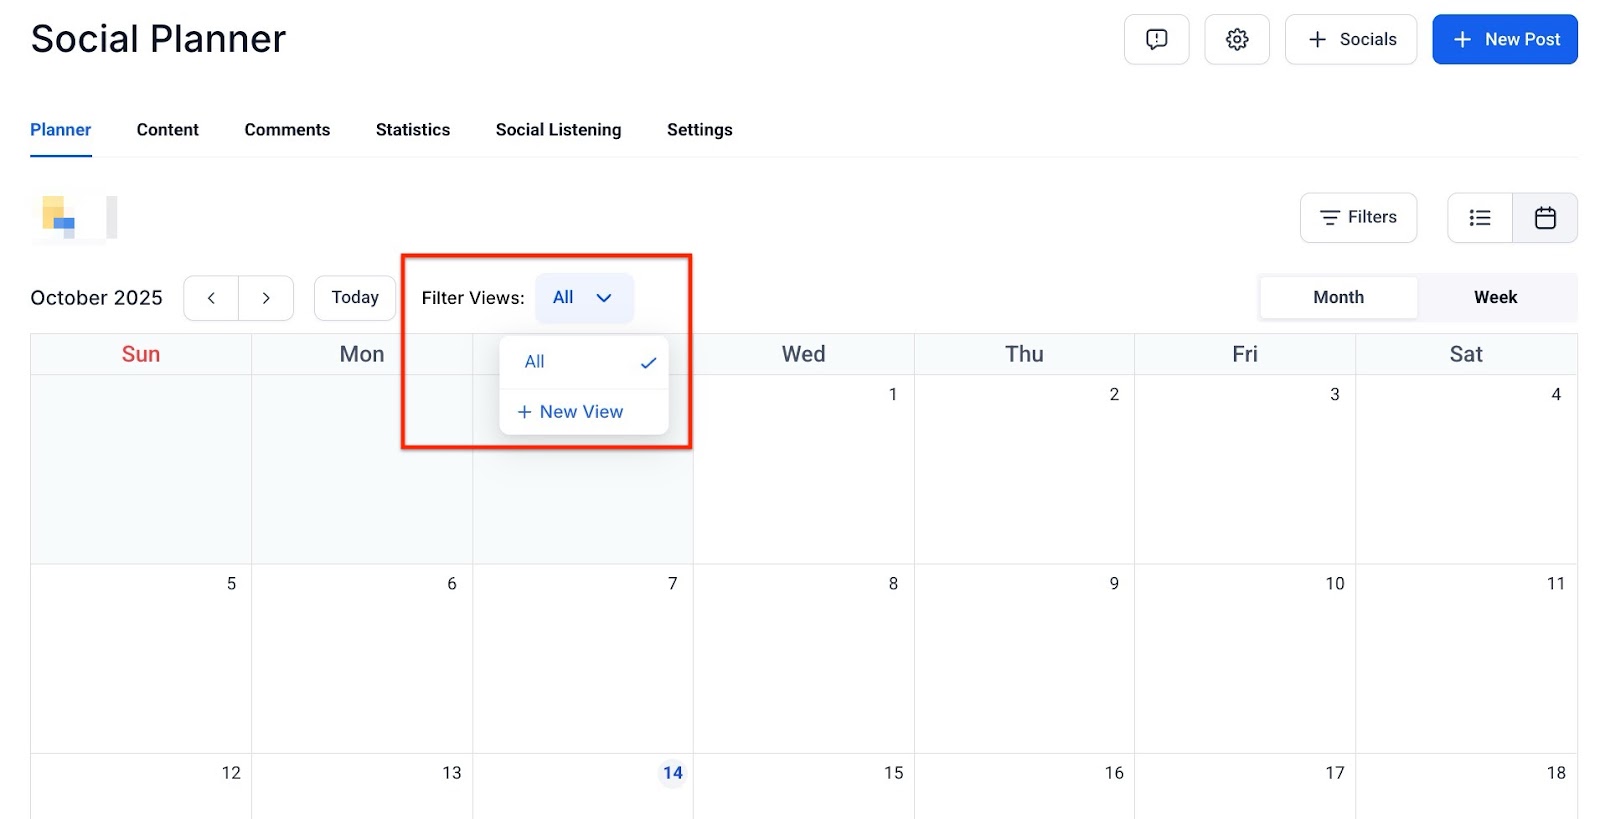
- In the top right corner, the calendar view offers a visual timeline, displaying post details such as date, time, and engagement metrics.
- This feature helps in planning and refining future content based on audience preferences and performance trends.

- The smart filter views in the social planner make it easier to find specific posts or tasks without endless scrolling.
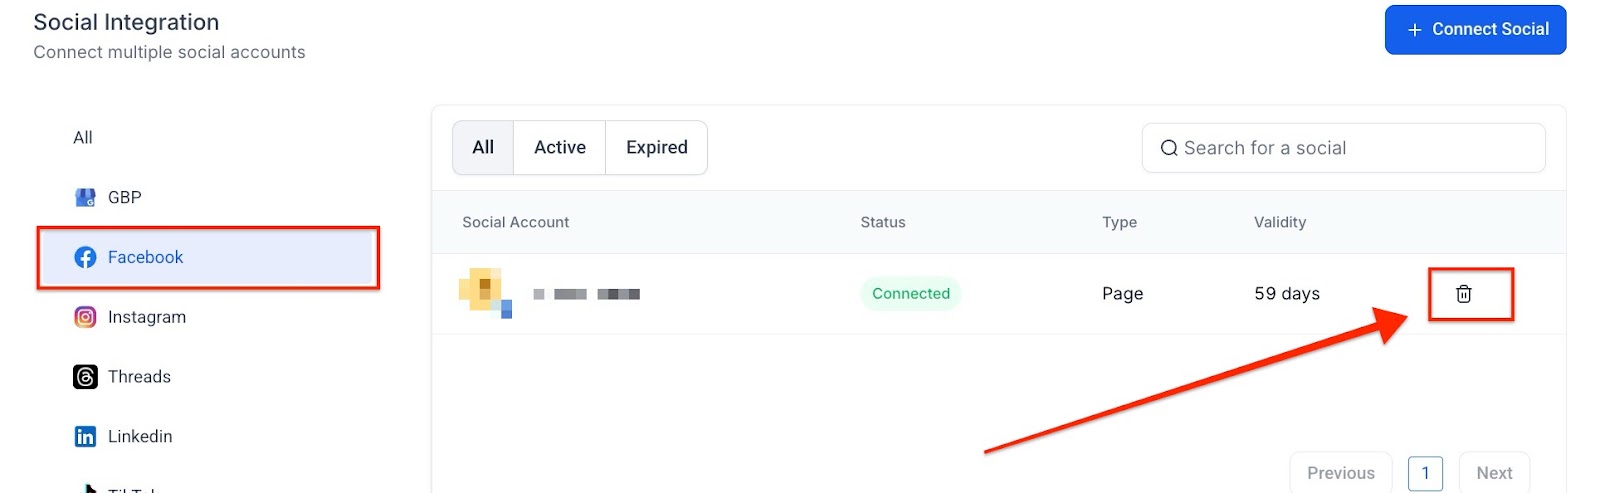
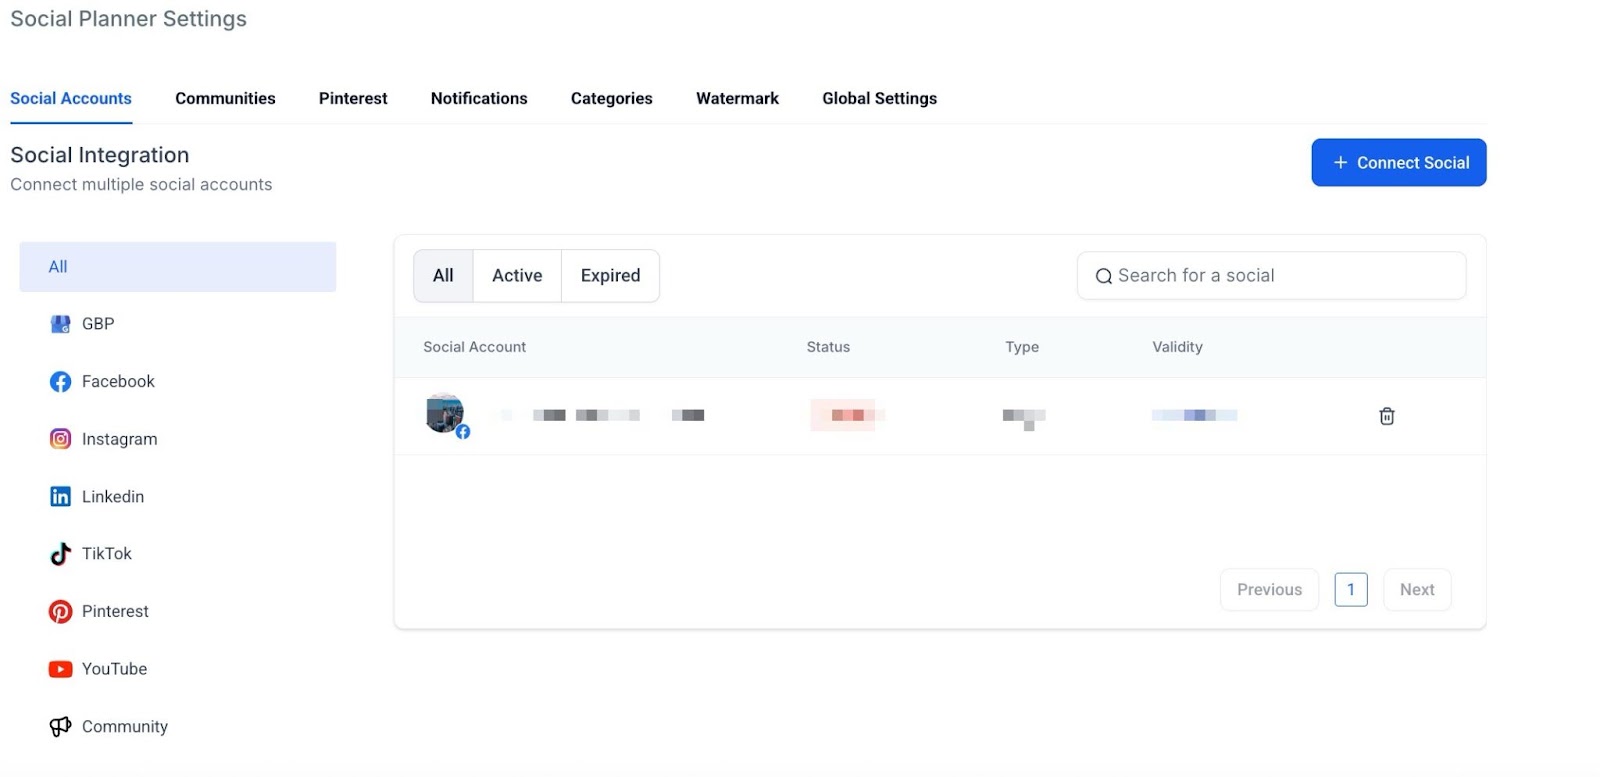
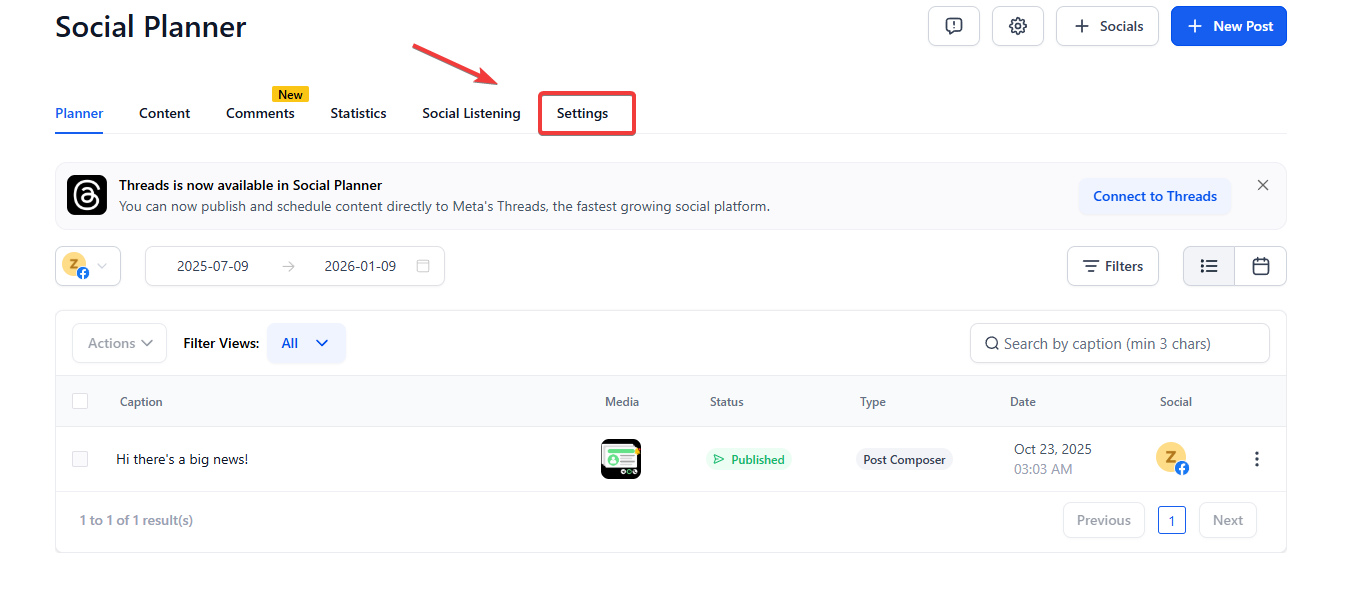
- Click Settings to Manage your Social Media Integrations.

- Click the + Connect Social button (like the example shown below).
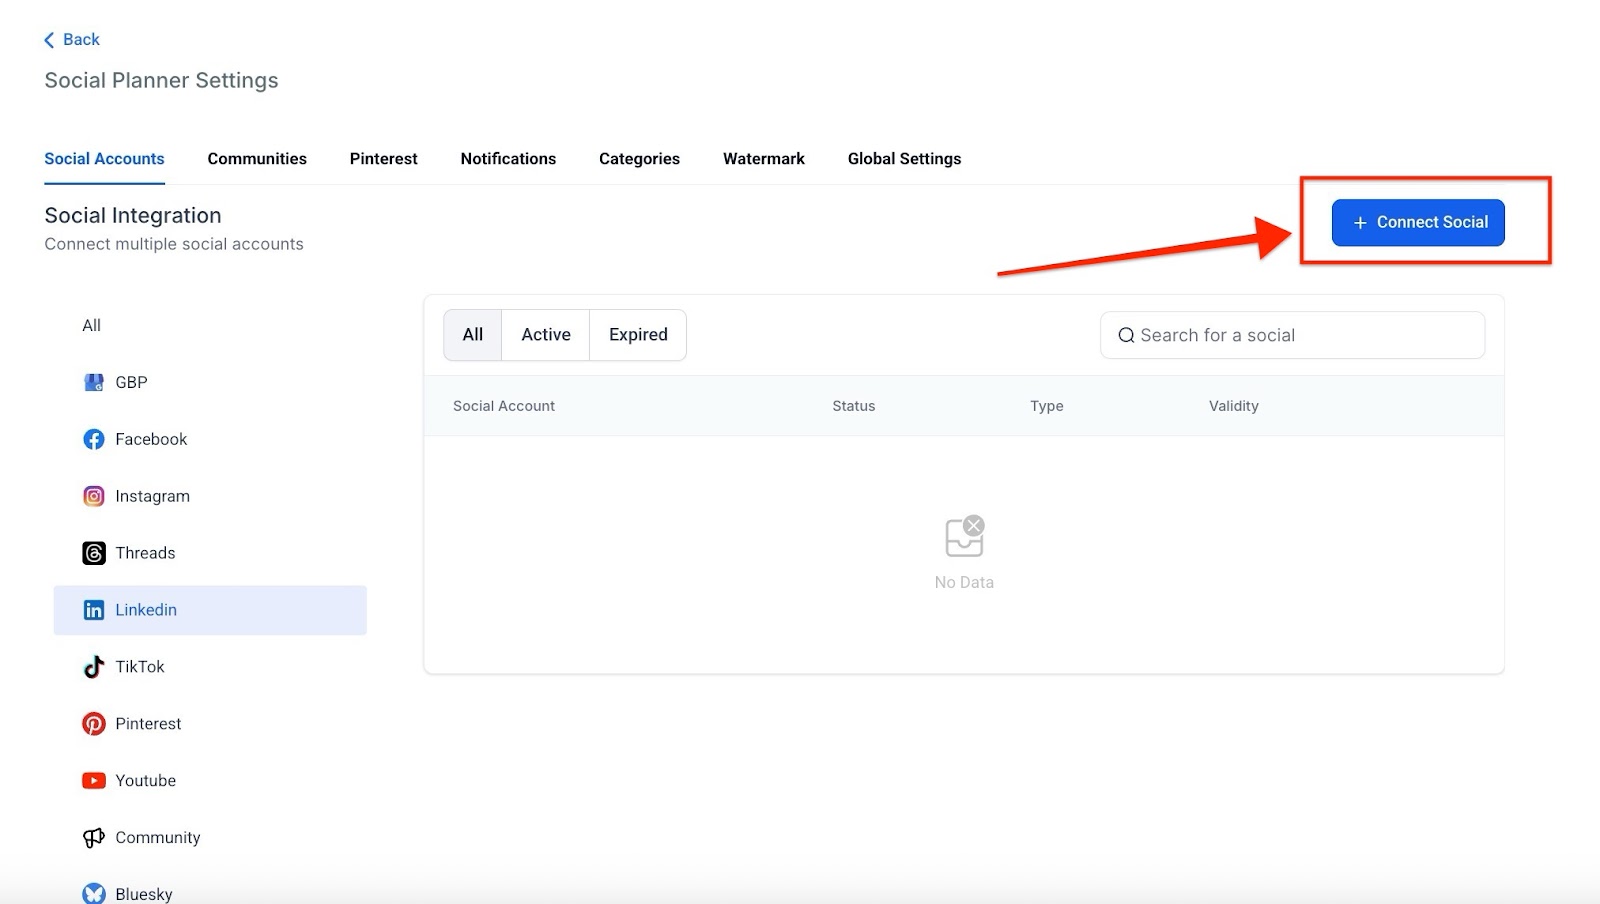
- Using the trashcan icon you can remove an account.
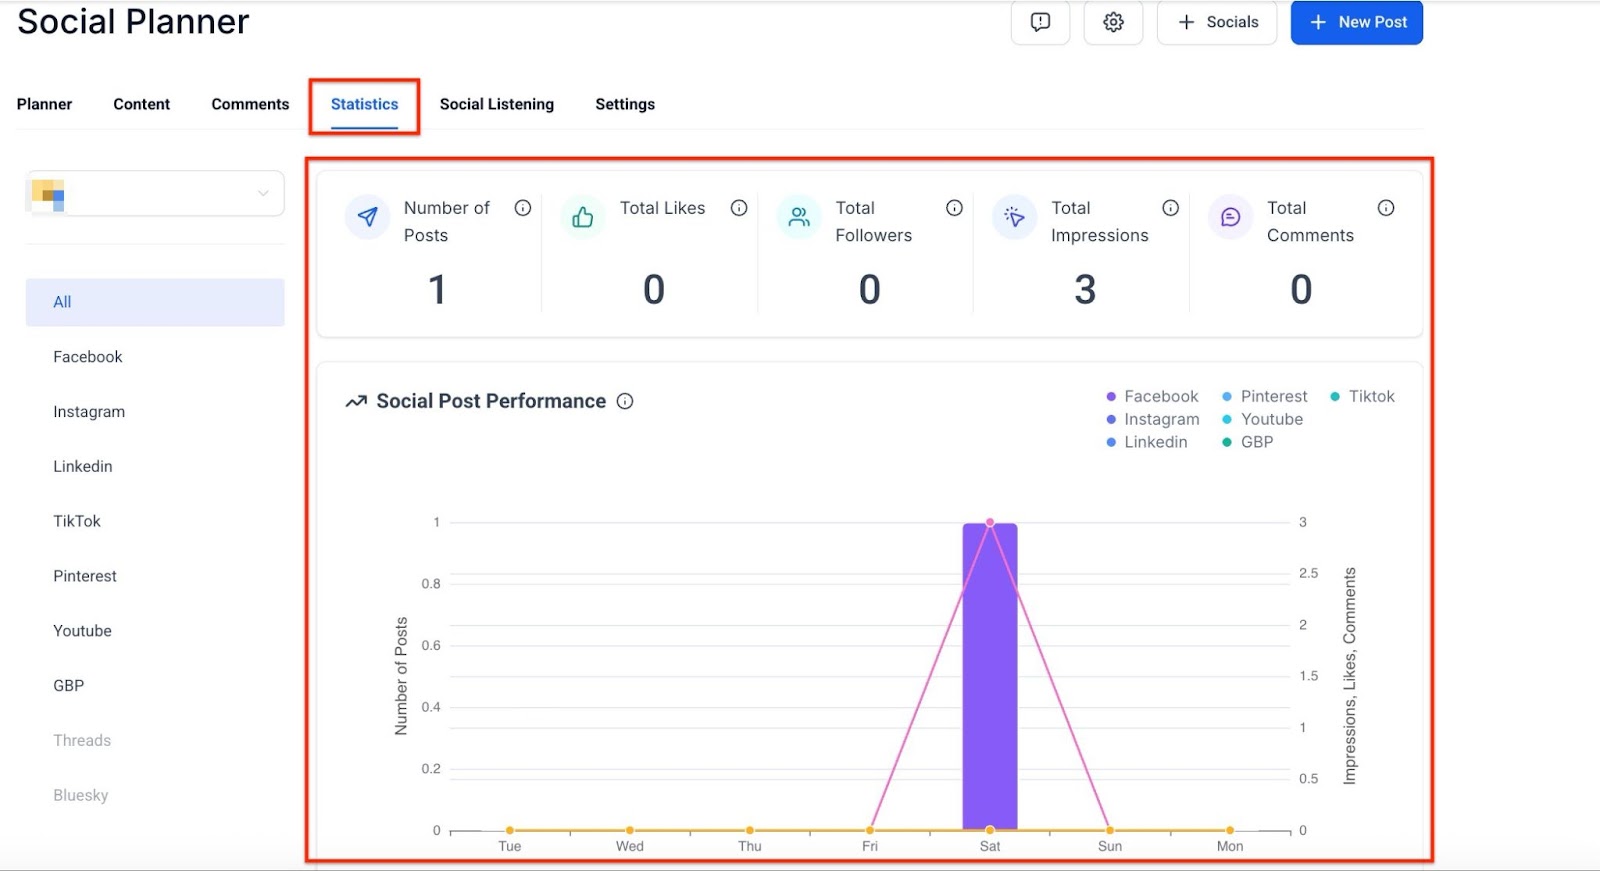
- The Statistics Tab in LeadMagicX highlights top-performing posts by tracking likes, shares, and comments.
- Users can click on specific posts to see more detailed information and analyze performance.
- Recent posts are also shown, making it easy to compare newer content’s performance.
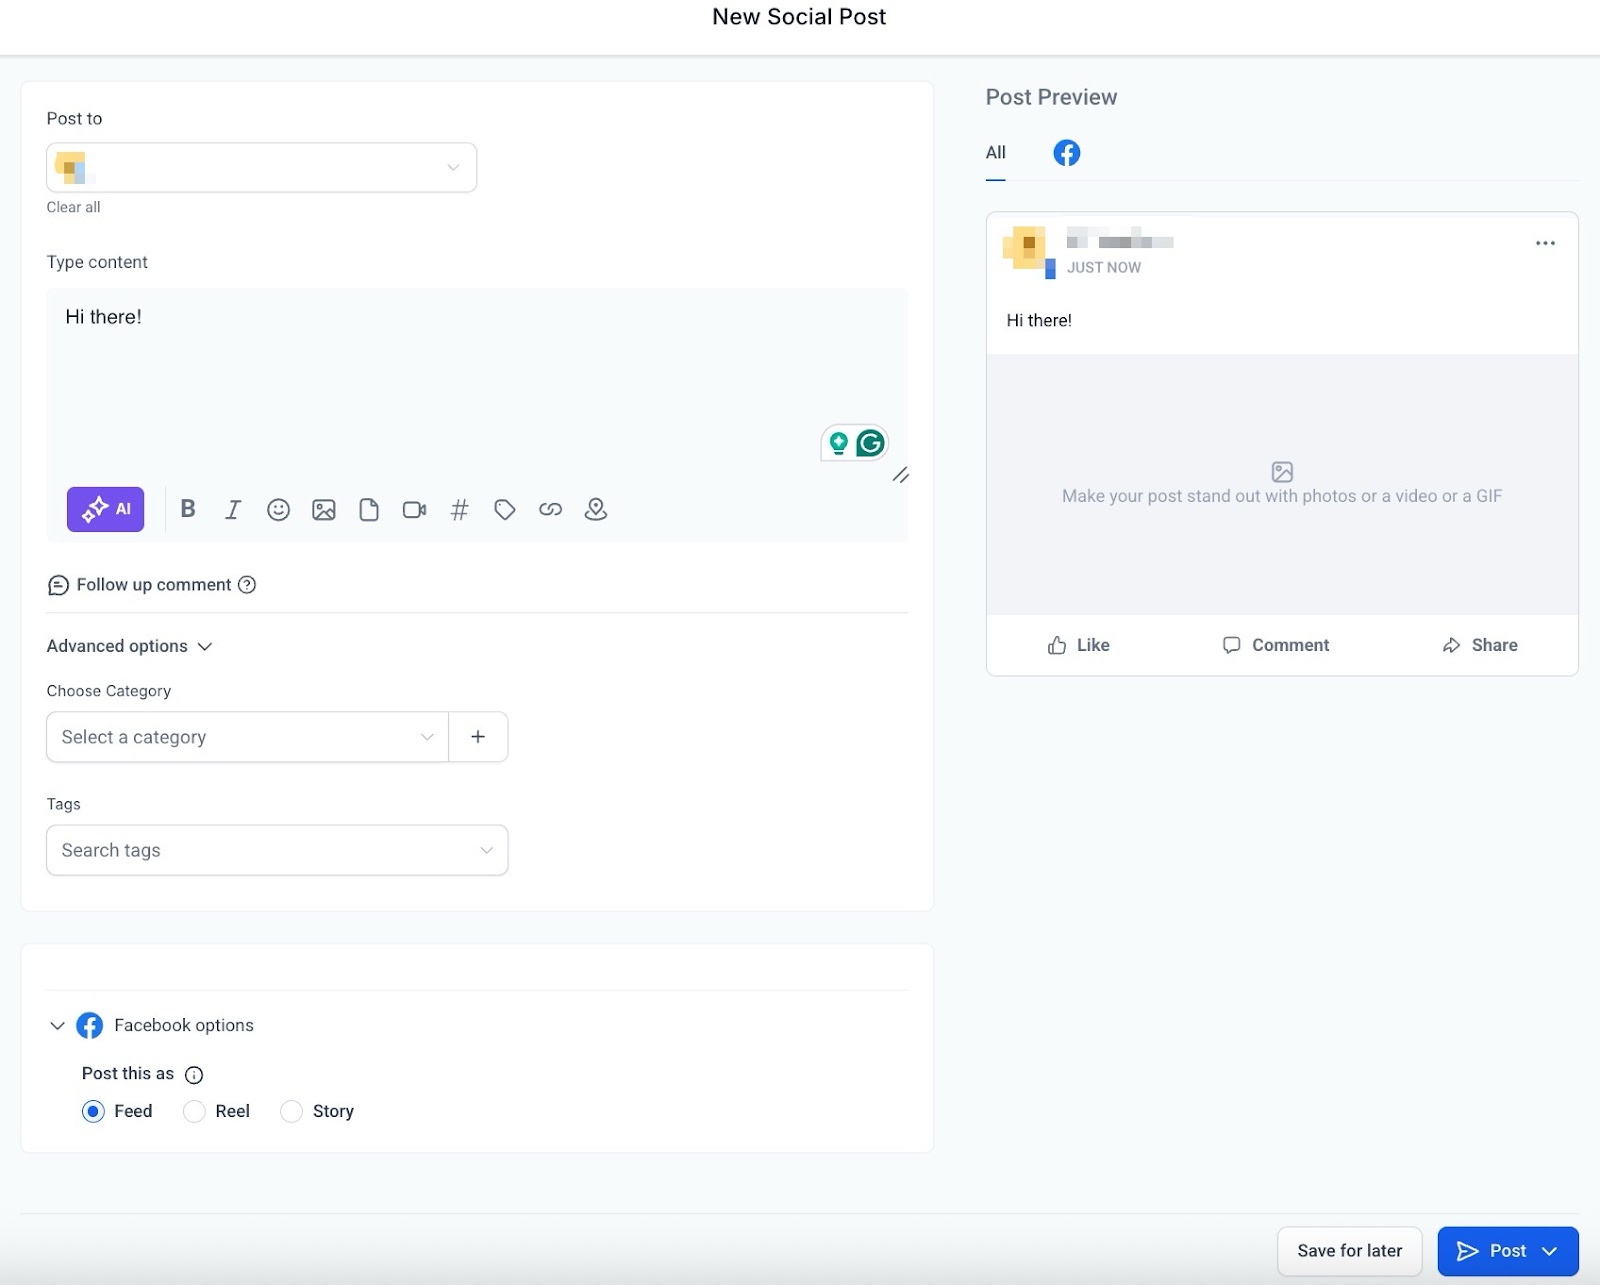
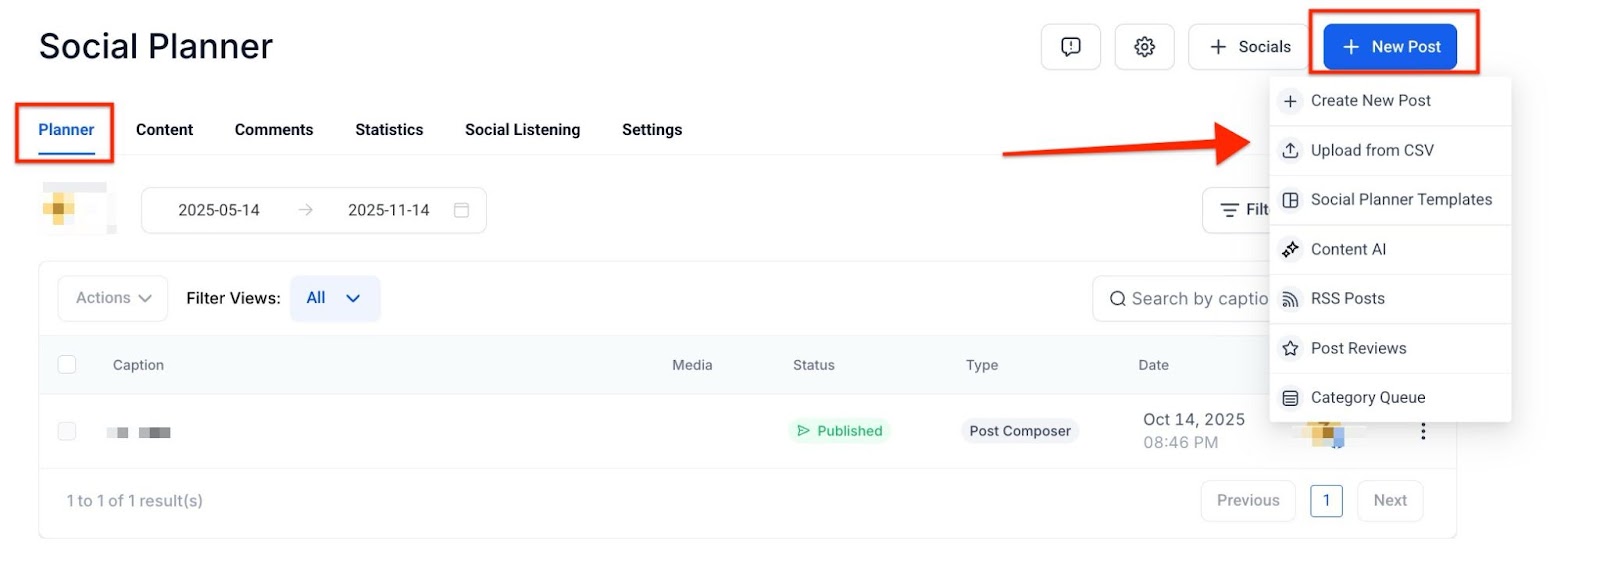
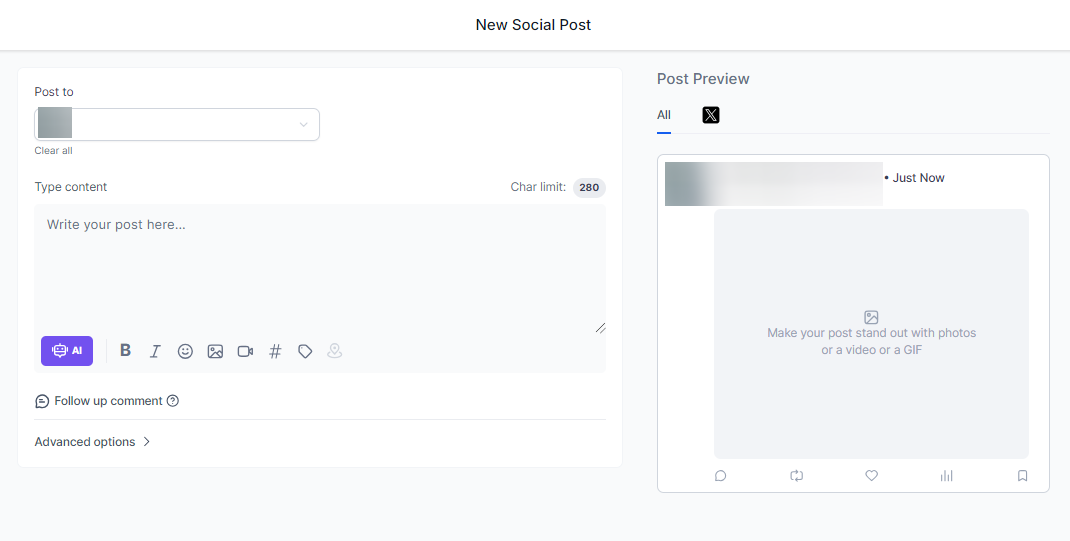
¶ Step 3: Compose a Post
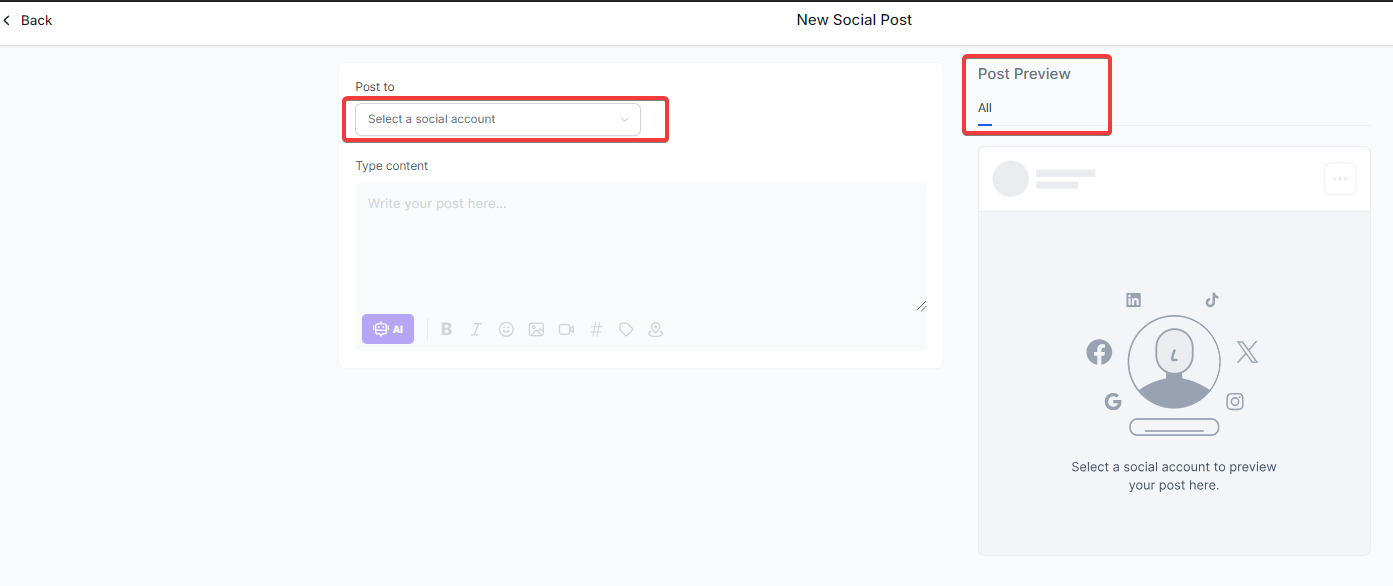
- Click “Create New Post” or “New Post” to add a post.

- In the new window, choose which account you would like to post to.
- Type out and customize the content.
- Preview it on the right-hand side of the screen.
- You can either “post” to share now, or “save for later” to schedule for a later time.
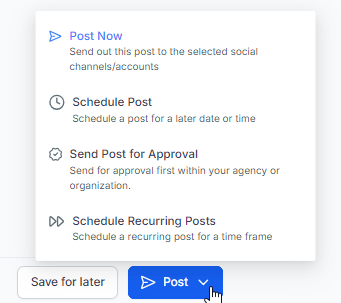
**Manage your scheduled posts from the Social Planner dashboard in the list **
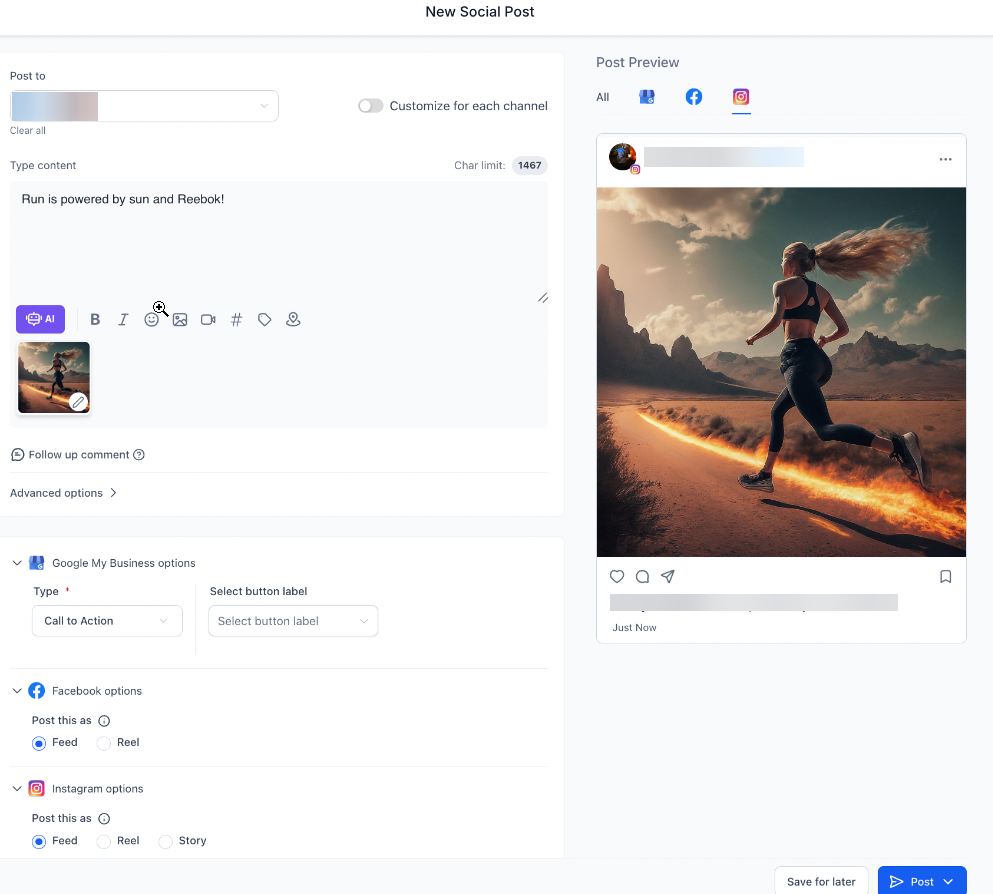
- Alternatively, Users can also create a single post that includes both images and videos, allowing simultaneous scheduling across platforms like YouTube, Instagram, and TikTok, saving time by avoiding multiple individual posts.
This functionality entails the following benefits:
Enhanced Preview and Slider
Preview posts in high resolution, view them in a slider format and edit directly within the composer for a more streamlined experience.
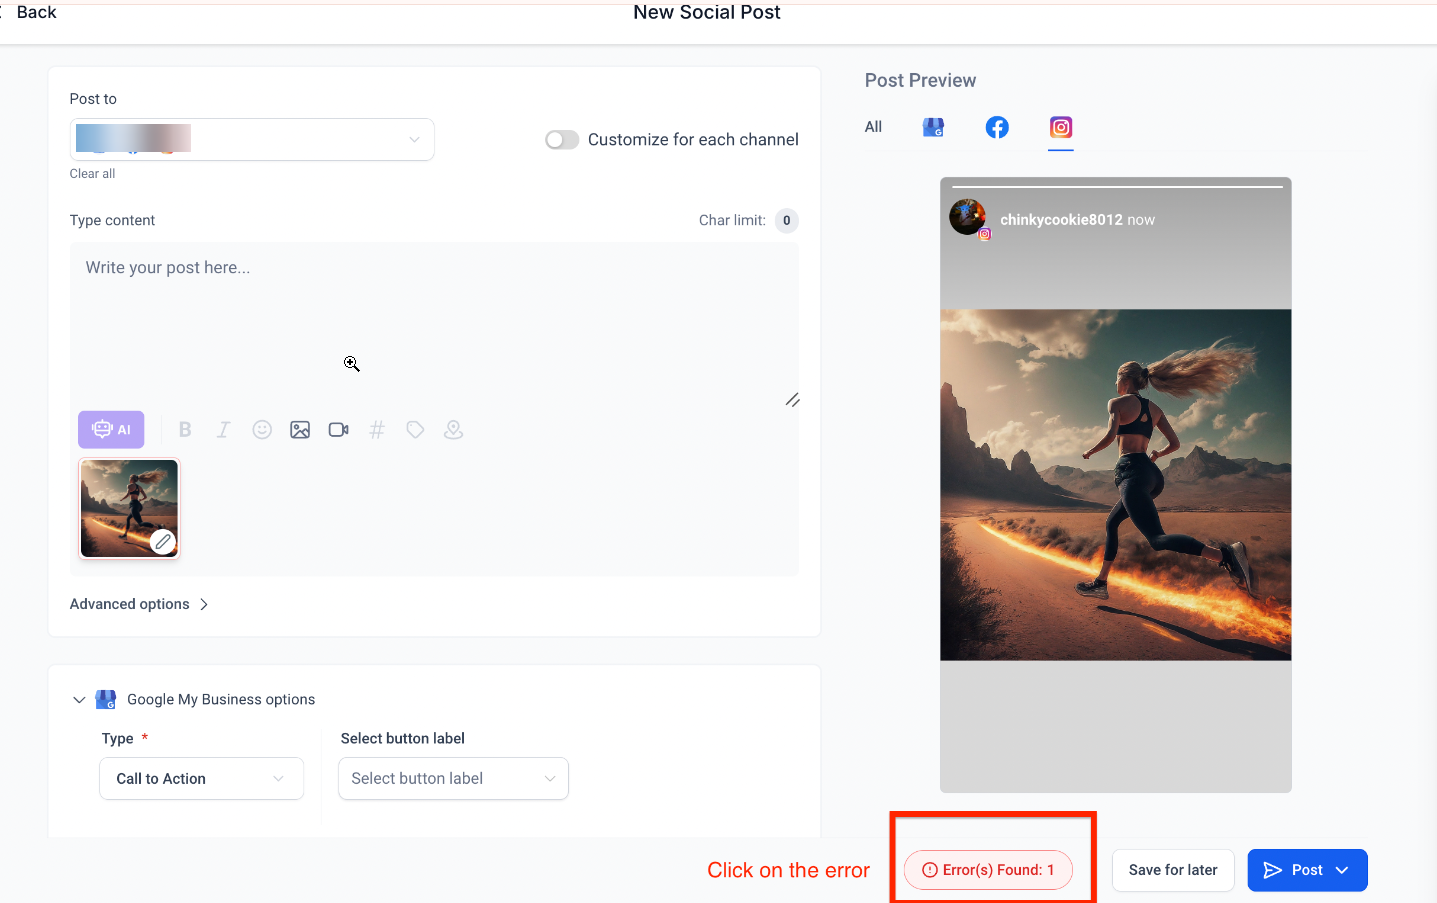
Error and Warning Management**
**Color-coded error and warning messages allow quick identification. Click on the error to scroll directly to the issue for easy correction.
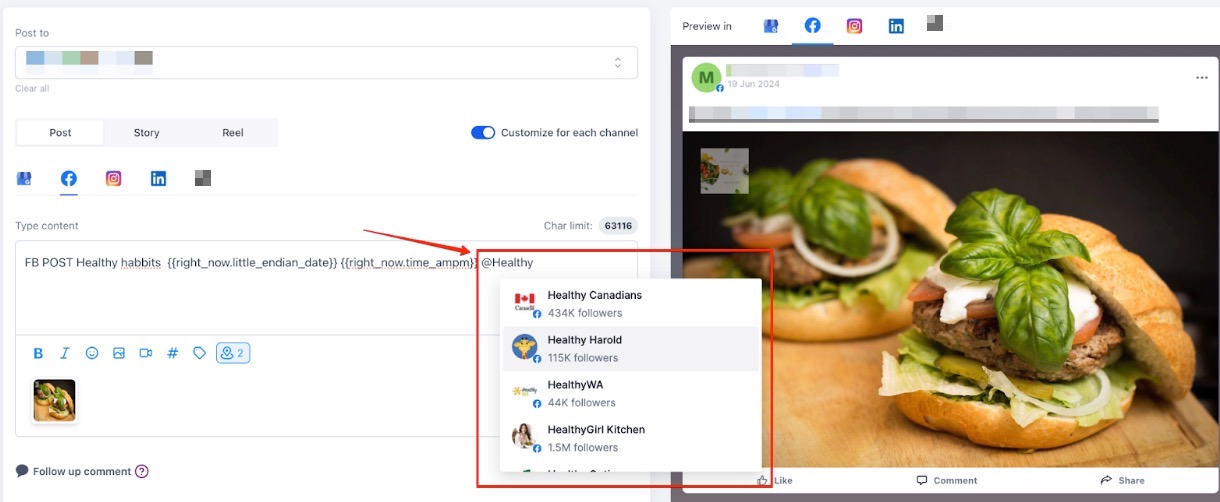
Custom Values Support**
**Add dynamic content like names or dates in posts using custom values for personalized engagement.
Hover to Enlarge and Resize Input Box**
**Hover to enlarge images for easier editing, and adjust the text block size for better content management.
Watermark and Certification Notification**
**While scheduling, users will see a watermark and certification message to ensure clarity and transparency in content management at the bottom of the page, or in the Planner calendar.
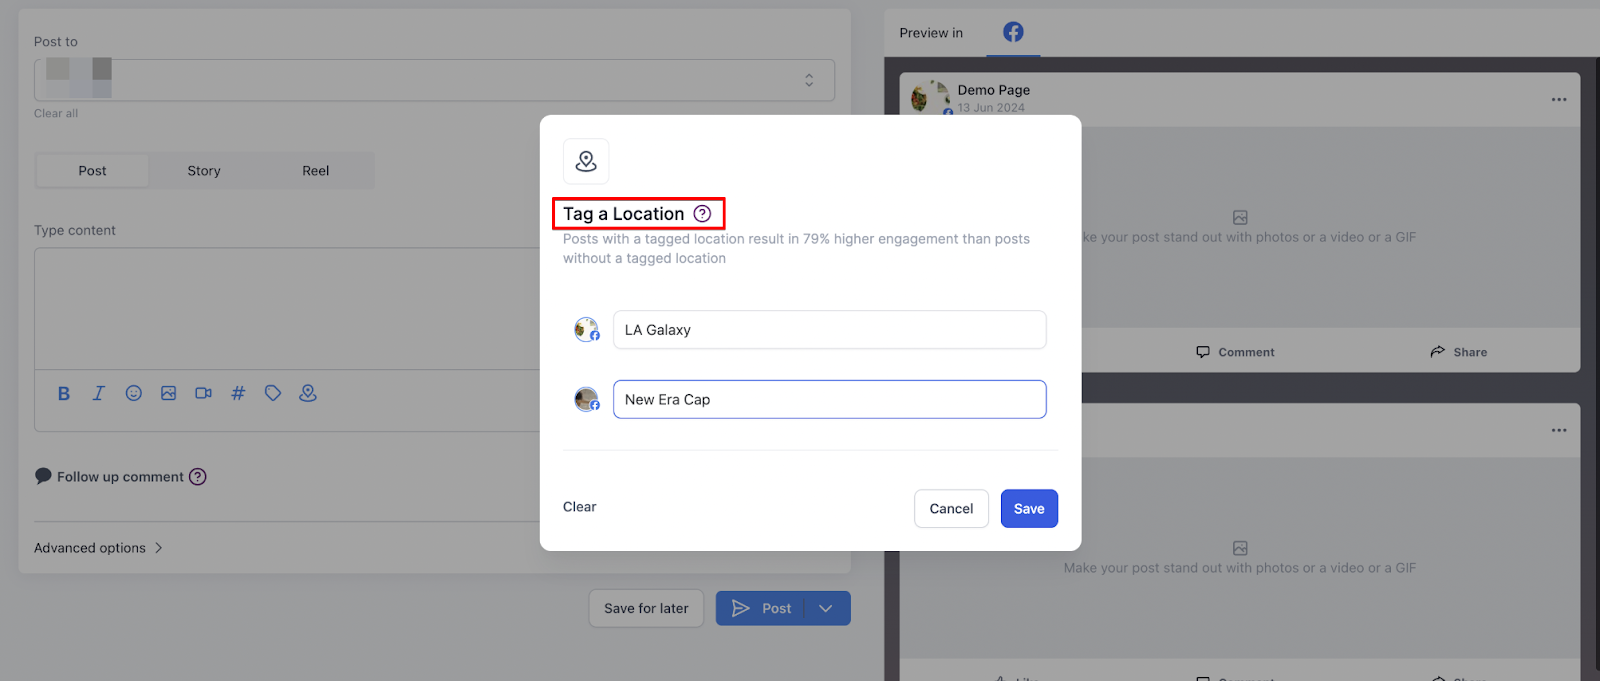
¶ Location Tagging for Enhanced Engagement
Location tagging boosts visibility, especially for local businesses, enhancing SEO and targeted marketing.
1- Access Social Planner : Go to LeadMagicX’s Marketing section and click on Social Planner.
2- Create Post : Click on Create New Post and select the social accounts to post to.
3- Add Content : Write your post and upload images if needed.
Note: Images selected from third-party providers like Unsplash or Pixabay are automatically copied to your servers, ensuring they remain visible even if the original source is deleted.
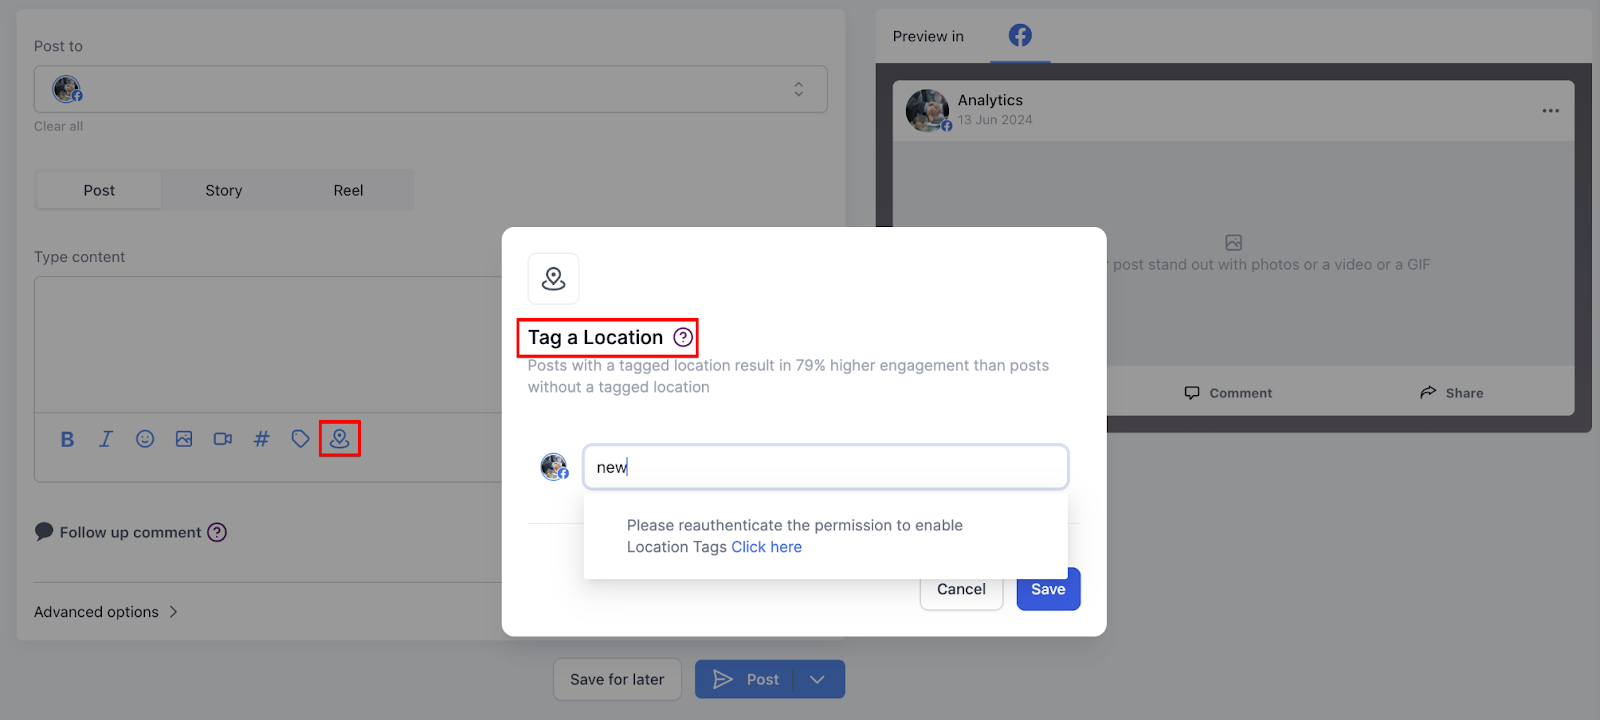
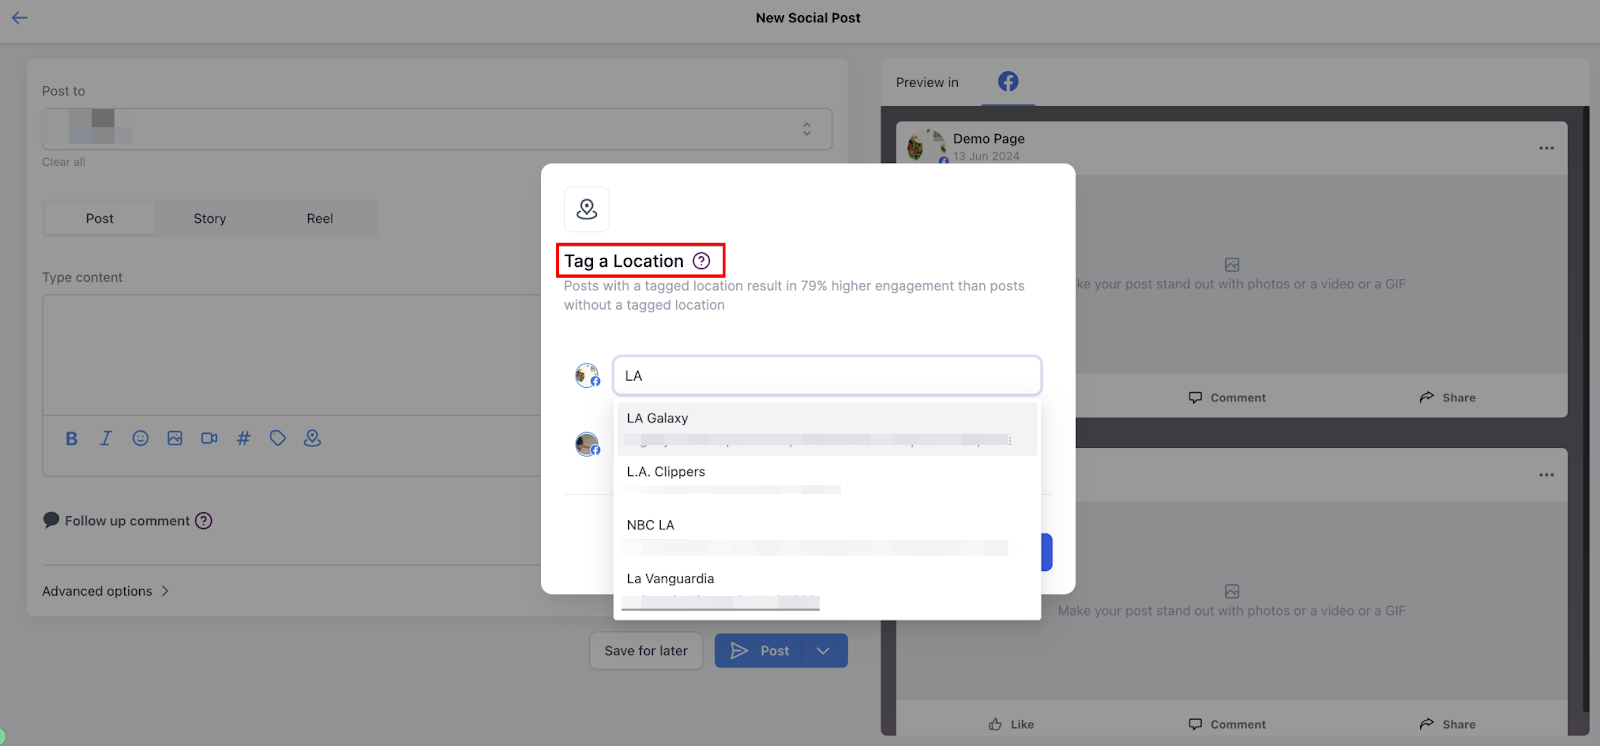
4- Tag Location : Use the location option to add tags for Facebook or Instagram (among others) by selecting from a drop-down menu.
5- Customize & Post: Preview, adjust settings, and either post immediately or schedule it for later.
Note: You will need to authenticate to get more scope to allow location tagging.
STEP 1
STEP 2
STEP 3 _
_
_
_
STEP 4 _
__
__
_
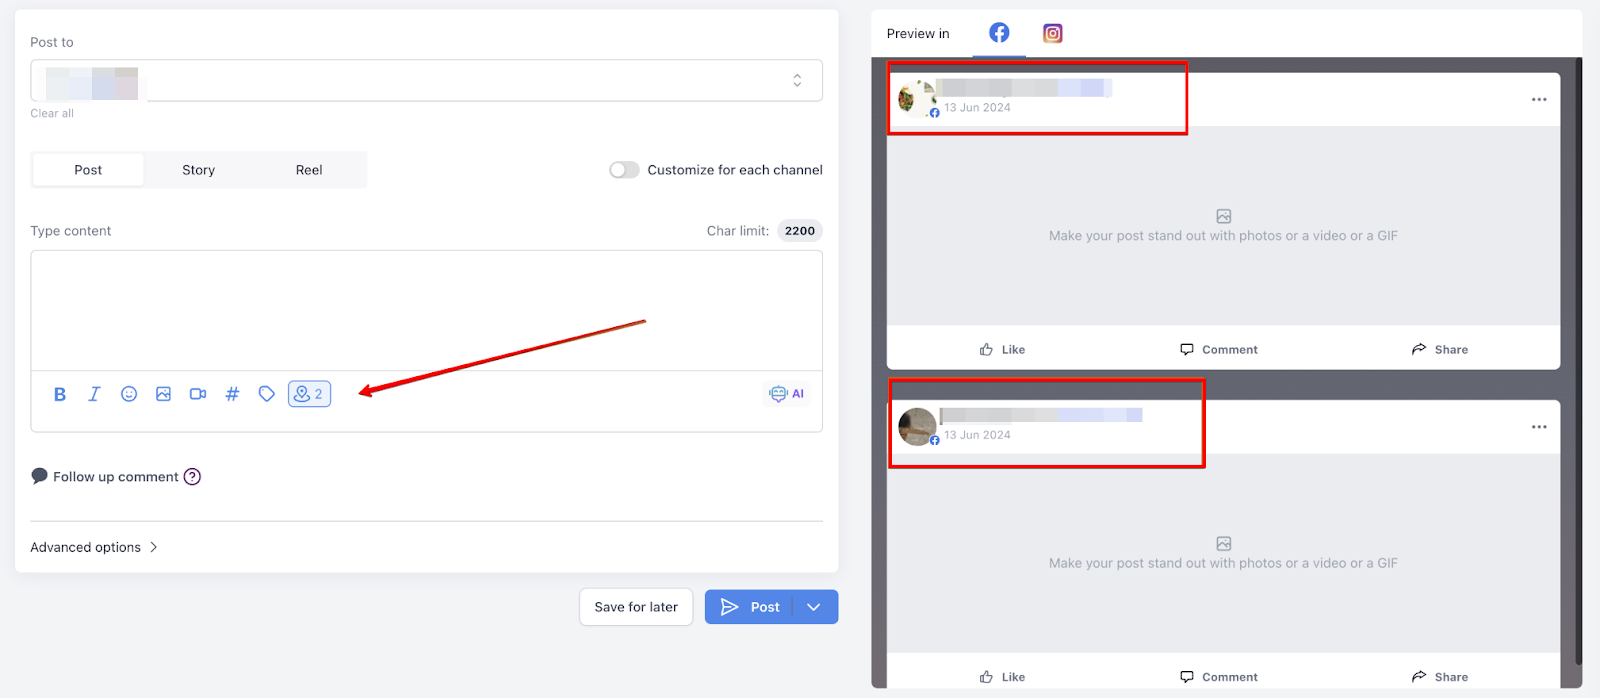
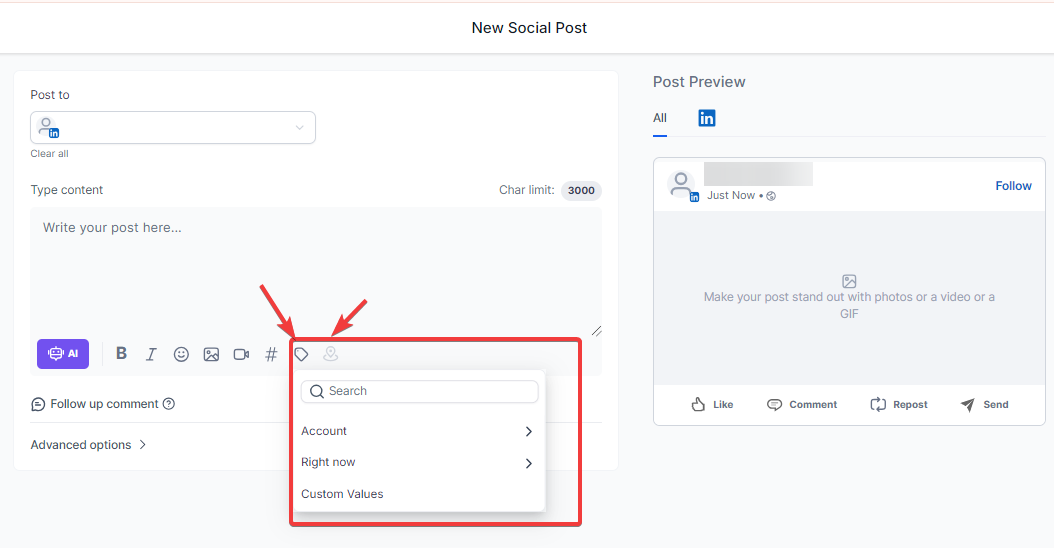
¶ @Mention or Tag Profile in Social Planner
The Social Planner allows you to add @Mentions in posts, tagging public profiles on platforms like Facebook and LinkedIn. This boosts engagement and cross-promotion. To use, go to Marketing > Social Planner, create a post, and enable customization to tag profiles for each platform.
Note that this feature does not work in CSV and other options.
Step 4. Review the Social planner settings
The Social Planner has been designed to improve user experience. This feature introduces a more intuitive connect screen, better categorization, tagging options, and enhanced pagination, making it easier to manage your social media accounts.
1. Connecting Social Media Accounts: Easily connect accounts using the updated connect screen by selecting the icon and following the prompts.
2. Categorizing and Tagging : Organize accounts into categories and add tags for better management.
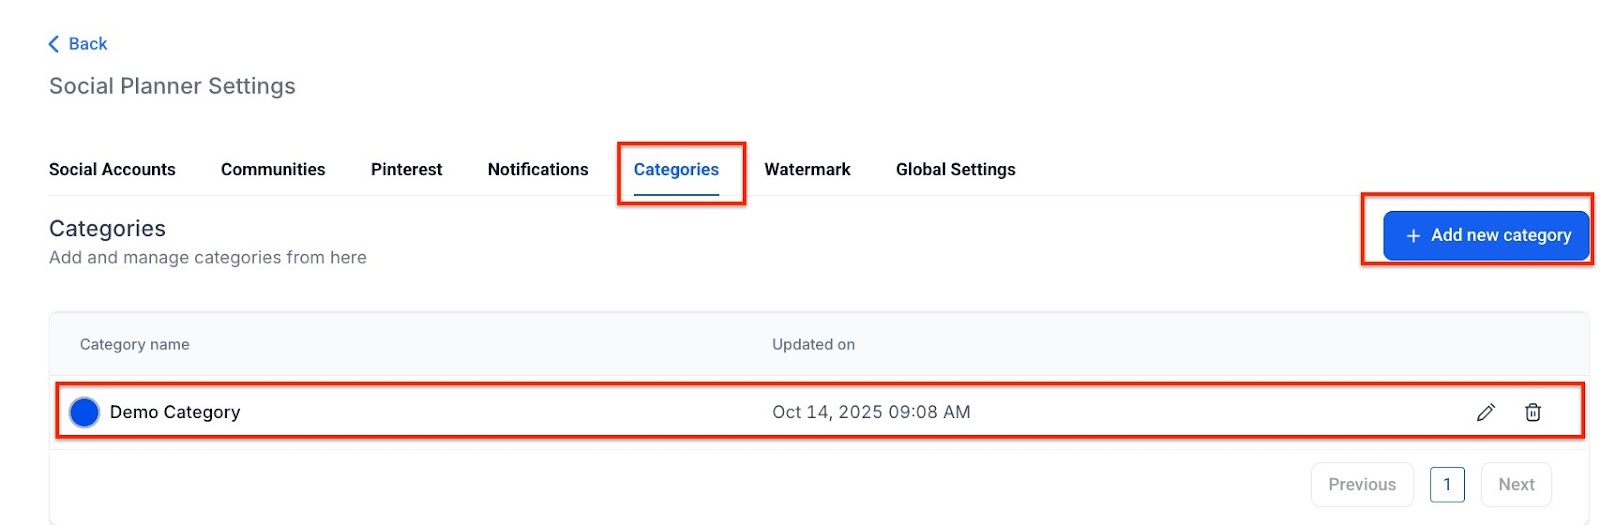
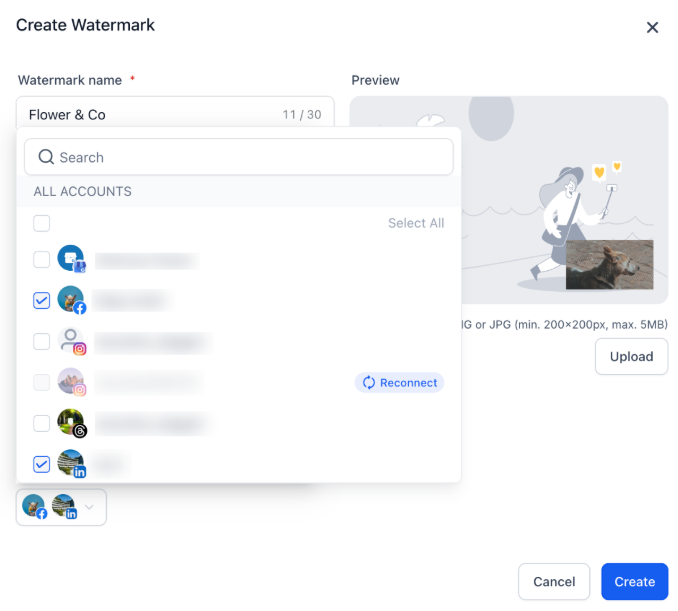
3. Watermark Management : Go to Marketing → Social Planner → Settings → Watermark. Add and customize watermarks for posts within the planner.
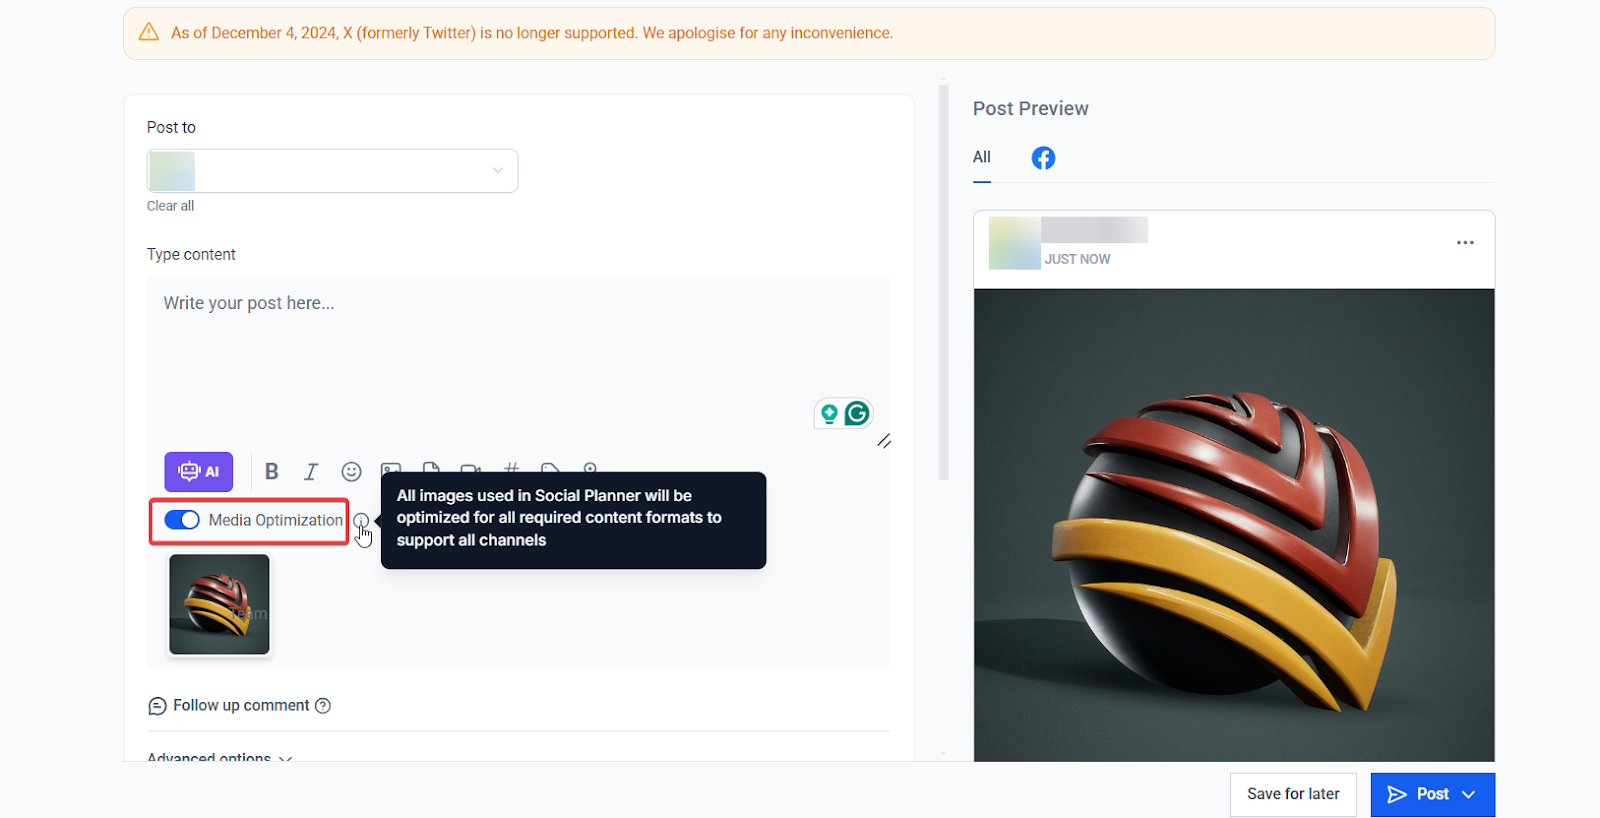
4. Media Optimization: Automatically resizes and formats images to meet platform-specific requirements. It is toggled on by default.
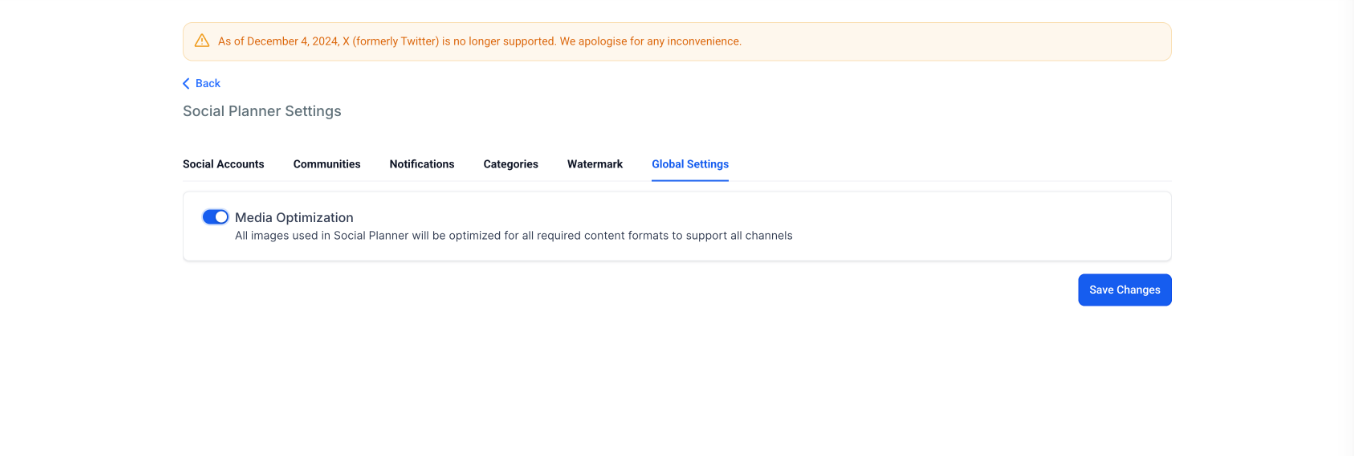
Note: You can also enable or disable the feature when creating a New Post to retain original media sizes if needed.
5. Navigation : Use the sidebar to access and manage active or expired accounts with a simplified interface.
¶ Public API Support for CSV Management in Social Planner:
The Social Planner now supports CSV management via the Public API in its Phase 3 release. This allows developers to easily fetch, upload, delete, and manage CSV files and associated social media posts using API scopes and endpoints.
- API Scopes : socialplanner/csv.readonly, socialplanner/csv.write
- Key API Endpoints :
- Fetch CSV list and status: GET /social-media-posting/:locationId/CSV
- Retrieve CSV by ID: GET /social-media-posting/:locationId/csv/:id
- Upload CSV: POST /social-media-posting/:locationId/CSV
- Assign accounts to CSV: POST /social-media-posting/:locationId/set-accounts
- Delete CSV by ID: DELETE /social-media-posting/:locationId/csv/:id
- Publish CSV posts: PATCH /social-media-posting/:locationId/csv/:id
- Delete CSV post by ID: DELETE /social-media-posting/:locationId/csv/:csvId/post/:postId
Why it Matters : Developers can now interact seamlessly with CSV files through APIs, improving automation and integration in social media planning.
Benefits :
- Streamlined CSV management for posts.
- Improved API usability for handling social media content.
¶ FAQs
Question: How do I connect my social media accounts?**
**Answer: Go to the Social Planner , select the social media icons, and follow the prompts to connect accounts.
Question: Can I connect multiple accounts from the same platform?**
**Answer: Yes, you can connect multiple accounts (e.g., several Facebook or Instagram pages) and manage them in the settings.
Question: Can I schedule posts for later?**
**Answer: Yes, after creating a post, you can either post immediately or schedule it for a later time.
Question: How can I preview my posts before publishing?**
**Answer: Use the preview feature to see posts in high resolution and make edits before publishing or scheduling.
Question: Can I tag locations or @mention profiles in posts?**
**Answer: Yes, add location tags and @mentions for platforms like Facebook and Instagram. Authenticate if needed for extra permissions.
Question: Is @mentioning available for cross-promotion?**
**Answer: Yes, you can tag public profiles on Facebook and LinkedIn to boost engagement and cross-promote content.
Question: How do I manage watermarks on posts?**
**Answer: You can add and customize watermarks directly in the Social Planner during post-creation.
Question: What does the CSV management feature do?**
**Answer: It allows you to upload, delete, and manage CSV files for social media posts via APIs for bulk content handling.
Question: Can I categorize social media accounts?**
**Answer: Yes, you can organize accounts into categories and tag them for better management.
Question: How do I view top-performing posts?**
**Answer: Check the Statistics Tab for top-performing posts, showing engagement metrics like likes, shares, and comments.
Question: Can I tag locations in my posts?**
**Answer: Yes. Use the location tagging feature to add location tags for platforms such as Facebook or Instagram. This helps boost visibility and engagement. You may need to authenticate again to grant permission for location tagging.
Question: Does the Social Planner optimize images for each platform?**
**Answer: Yes, media optimization automatically resizes and formats images to meet platform requirements by default. You can toggle this feature off if you prefer to retain original media sizes.
Question: What happens if I use an image from a third-party provider like Unsplash and it gets deleted from their site?
Answer: Don’t worry; when you select images from third-party providers like Unsplash or Pixabay, they are automatically copied to your own servers. This ensures the images remain visible in your posts even if the original source is deleted
Question: What happens if a scheduled post fails to publish?
Answer: If a post fails, you will see a red notification on the Social Planner dashboard. Clicking on the failed post will show you the specific error message from the social platform (e.g., “Image size too large” or “Invalid token”). You can then fix the error and click “Reschedule.”
Question: Will I be notified if one of my social media accounts gets disconnected?
Answer: Yes. An in-app notification banner will appear at the top of your Social Planner screen to alert you if one or more of your connected accounts require reconnection.