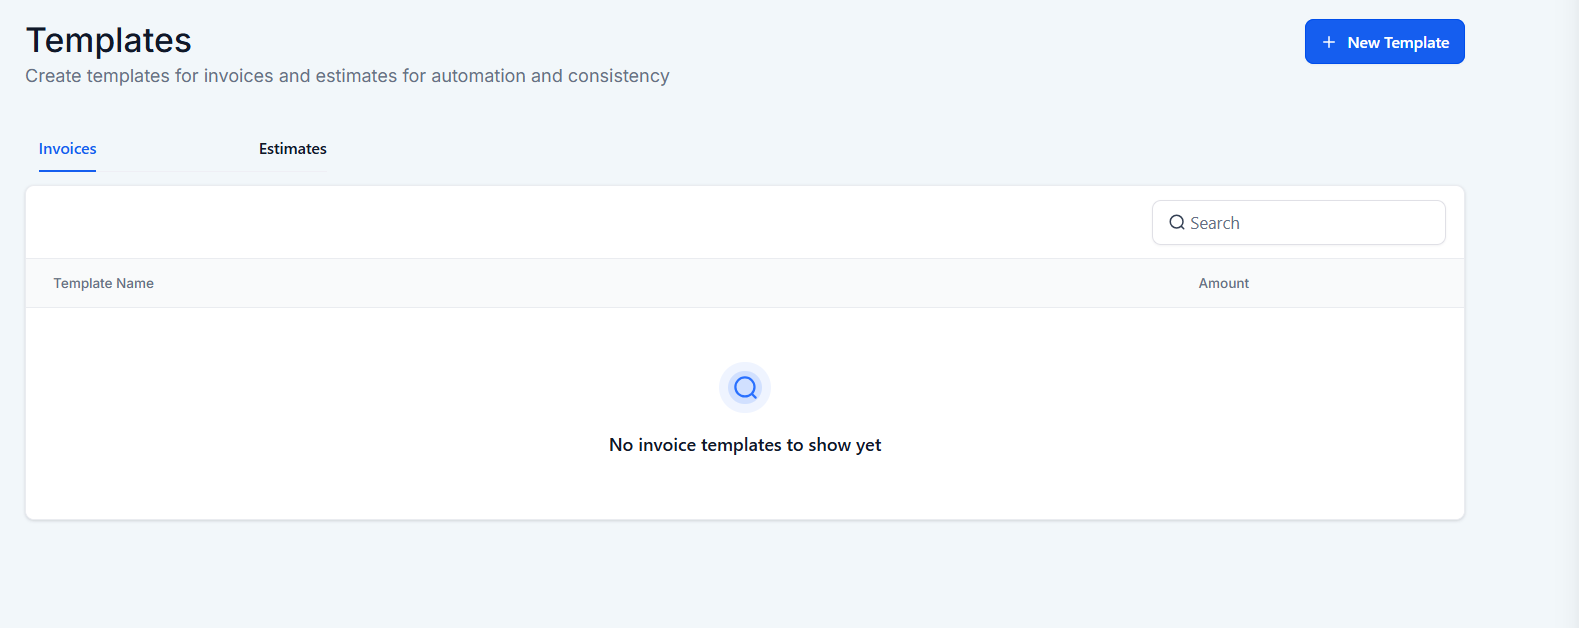
¶ The Estimates Feature in Payments
The Estimates Feature in Payments
The Estimates feature allows businesses to create and share estimates with clients, offering a seamless way to confirm project details before moving forward with invoicing. With the Estimates feature, businesses can easily manage proposals, track their status, and convert accepted estimates into invoices, all within the same platform.
¶ Key Features and Benefits
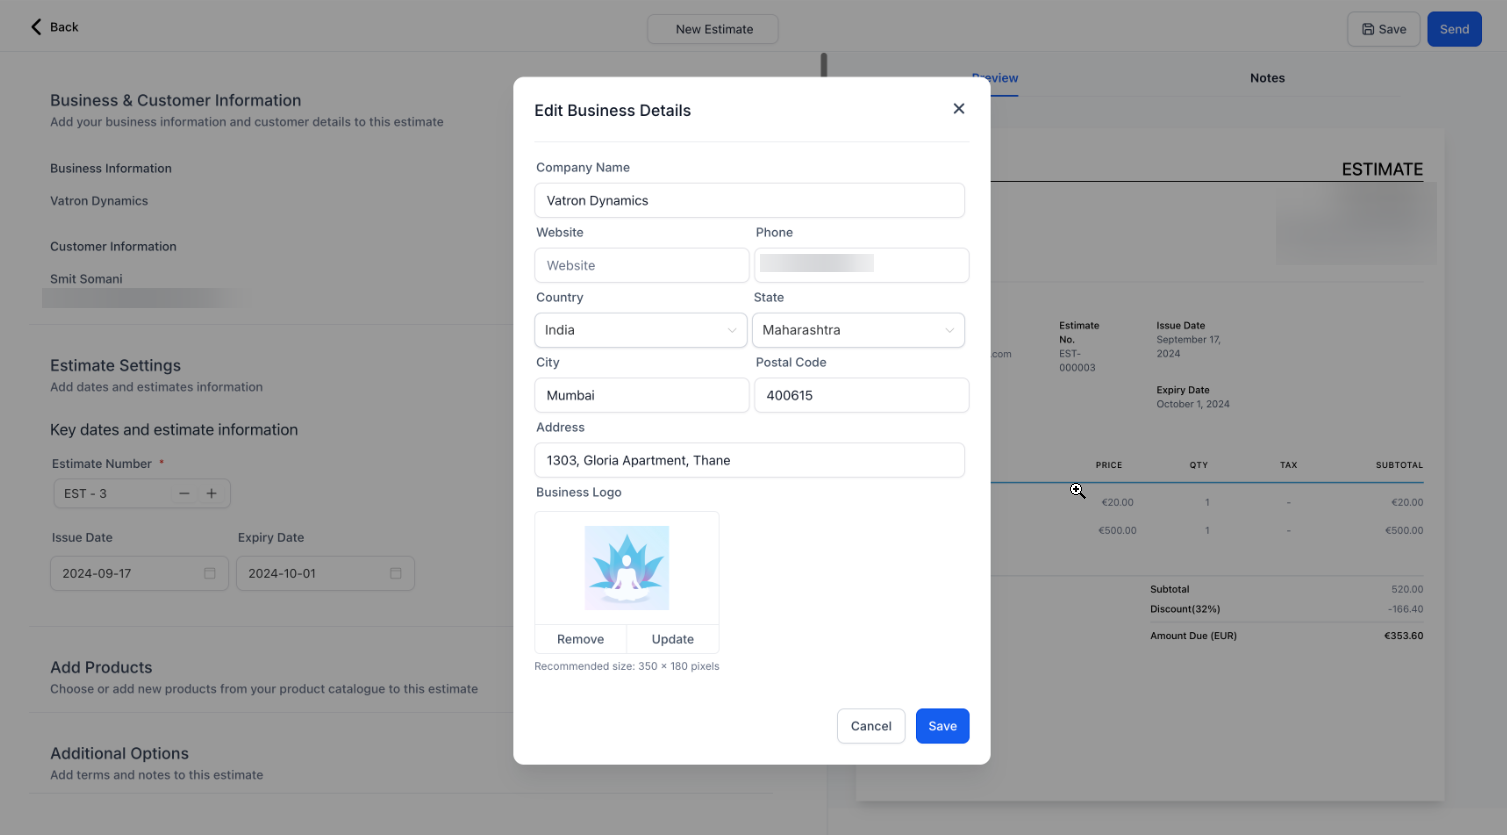
- Create and Share Estimates : Generate detailed estimates with essential information, such as business details, customer information, and itemized products or services. Share these estimates via email or SMS, providing a clear and professional proposal for your clients to review.
- Client Interaction : Clients can accept or reject estimates directly, streamlining the approval process. This interaction can be done electronically, allowing clients to respond quickly and without hassle.
- Add Photos in Estimates :
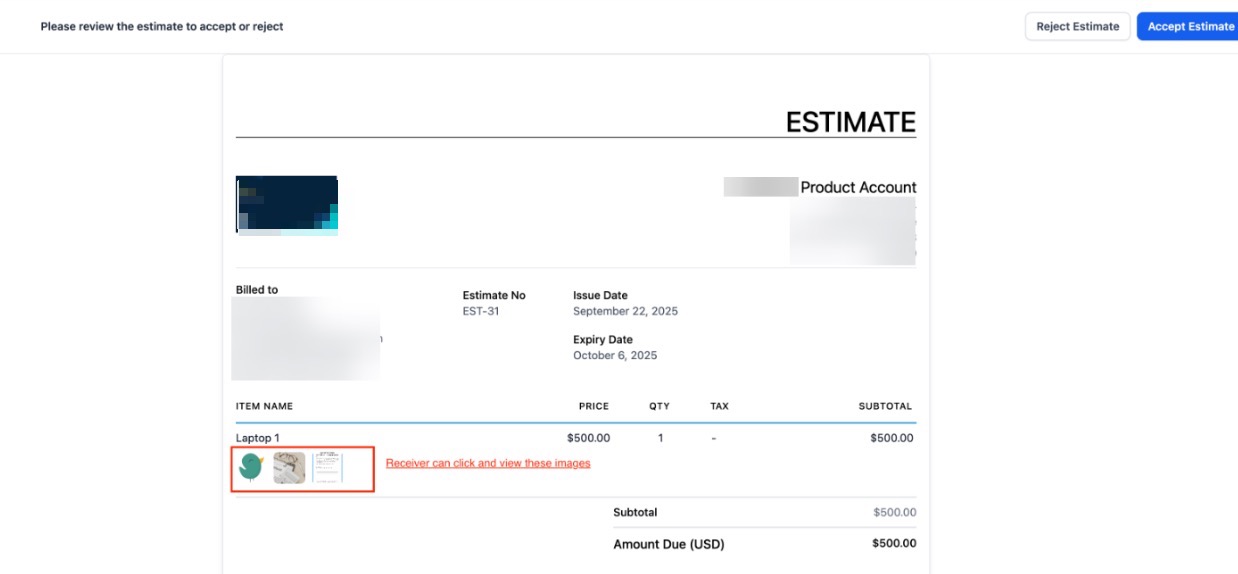
Attach up to 4 photos per line item on an estimate. Customers can see thumbnails under each item and click to view a full-screen gallery. This feature allows you to showcase options like color, model, or before/after photos, making estimates more visually compelling and clear to clients. - Easy Conversion to Invoices : Once an estimate is accepted, it can be directly converted into an invoice. This feature eliminates redundant data entry, saving time and reducing errors, ensuring a smooth transition from proposal to payment.
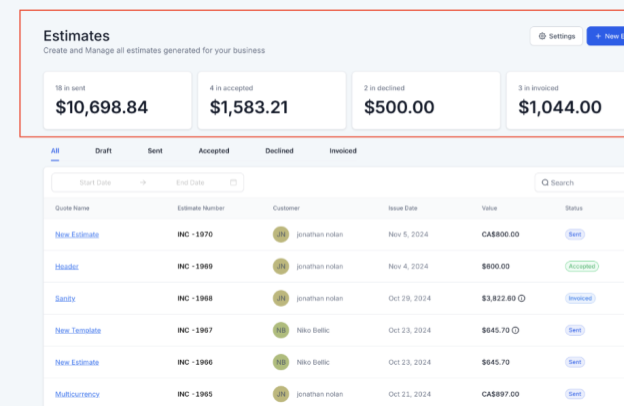
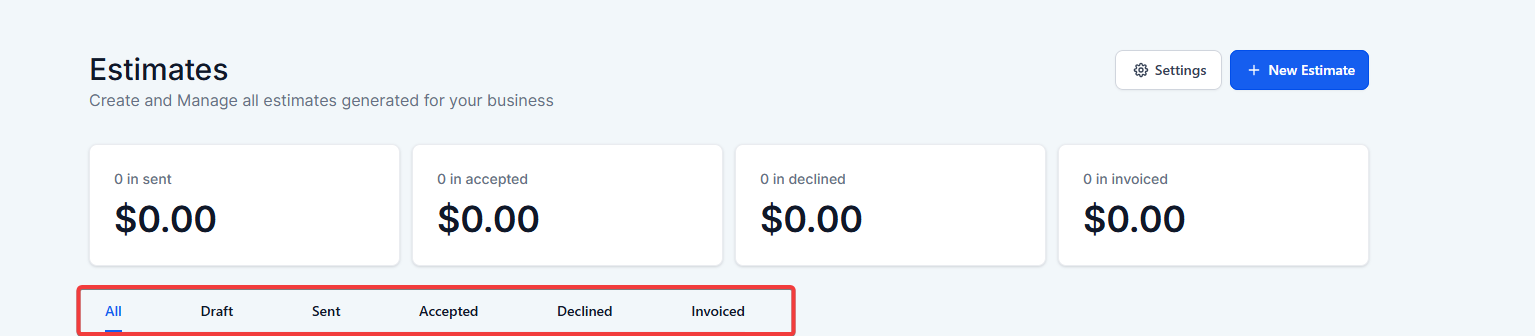
- Tracking and Management : Easily track the status of all estimates, whether they are in draft, sent, accepted, declined, or invoiced. This visibility helps businesses manage their sales pipeline effectively and keep a record of all client interactions.
- Customization Options : Personalize your estimates with your company’s branding, terms, and other relevant information. Customization helps maintain a professional appearance and ensures that all communications align with your brand.
- **Real-time Multi-Currency Supported Dashboard Stats: **
The dashboard supports real-time multi-currency conversions for invoice and estimate statistics, ensuring all values are displayed in a single, consistent currency based on the account’s location. This provides an accurate overview by converting different currencies, like CAD to USD, at real-time rates, and combining them for a unified total.
¶ How to Use the Estimates Feature
Step 1: Access the Estimates Section
- Navigate to your account within LeadMagicX.
- Select ‘Payments’ on the left and then hover on ‘Estimates’ by the drop-down icon in ‘Invoices & Estimates’
.png)
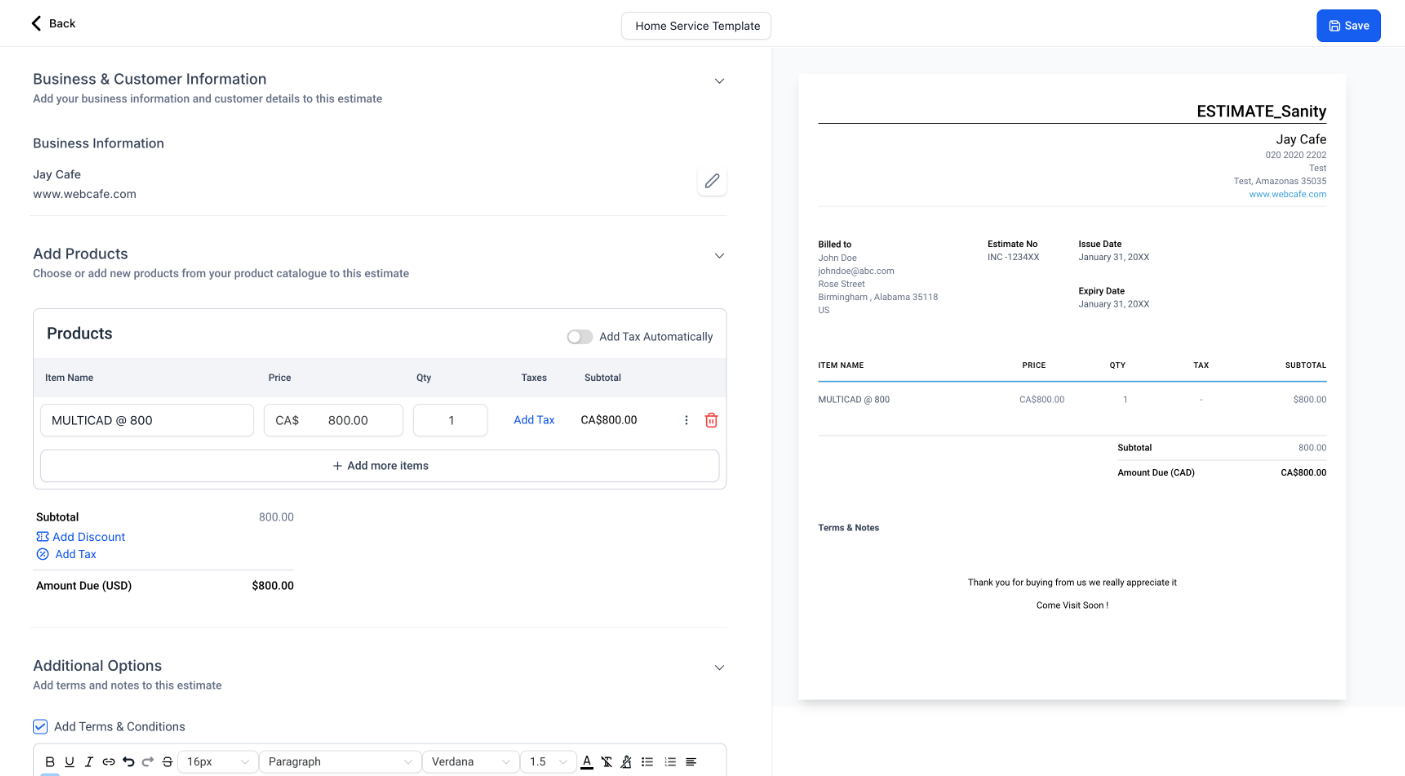
Step 2: Create an Estimate
- Click on the ‘New Estimate’ button to begin creating an estimate.
- Fill in the necessary details, including business information, customer information, estimate number, and expiry date.
-
Add products or services to the estimate.
-
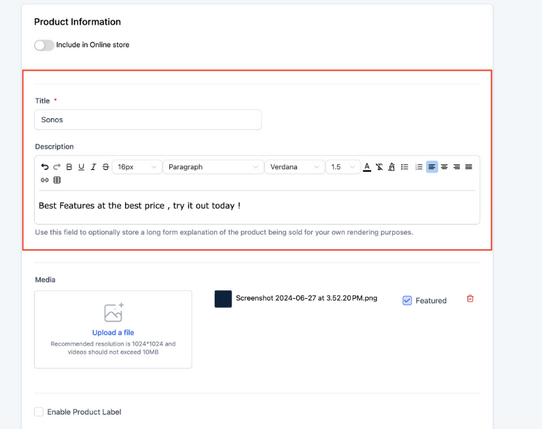
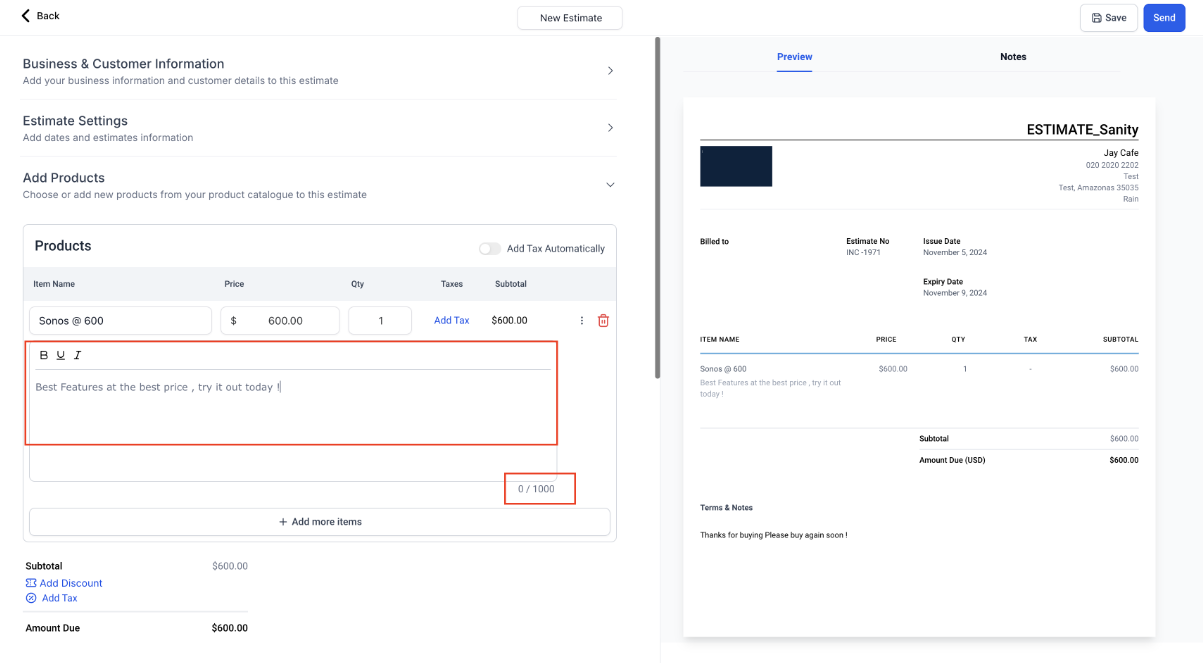
You can also import product descriptions whenever a new item is added to an estimate, ensuring consistency and reducing manual entry. This enhances accuracy and efficiency, especially for businesses handling detailed product lists, by allowing a higher character limit for descriptions in estimates.
-
To use, toggle on the Import Description feature on in > invoice settings > product settings > import product description.
-
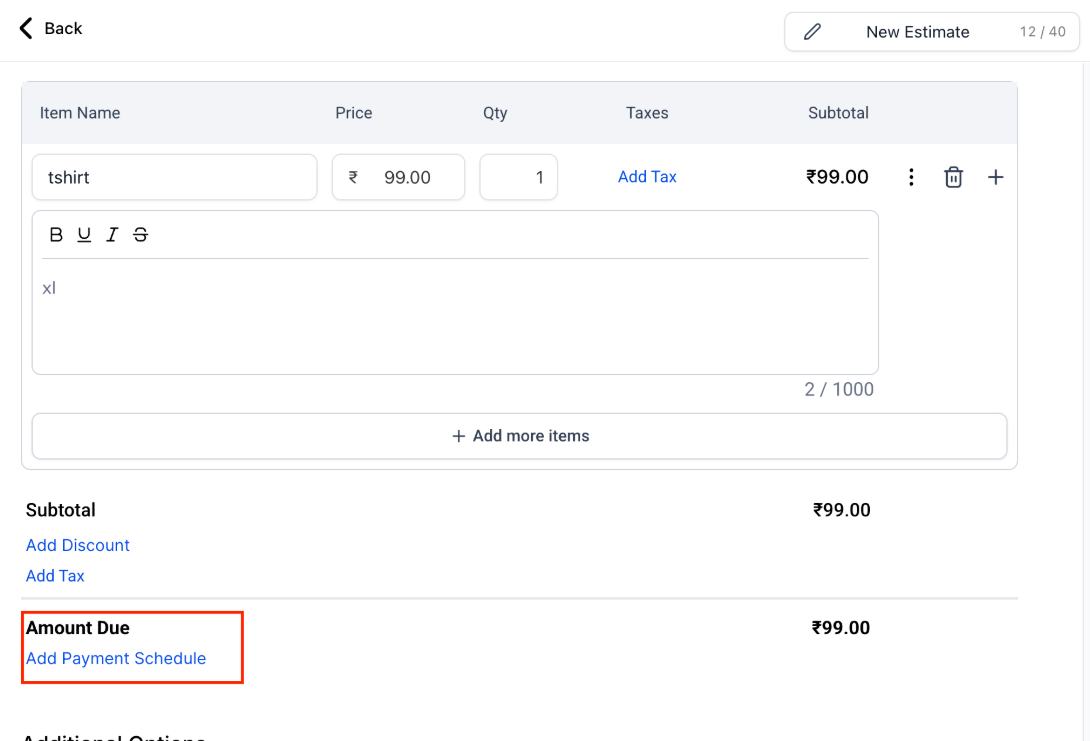
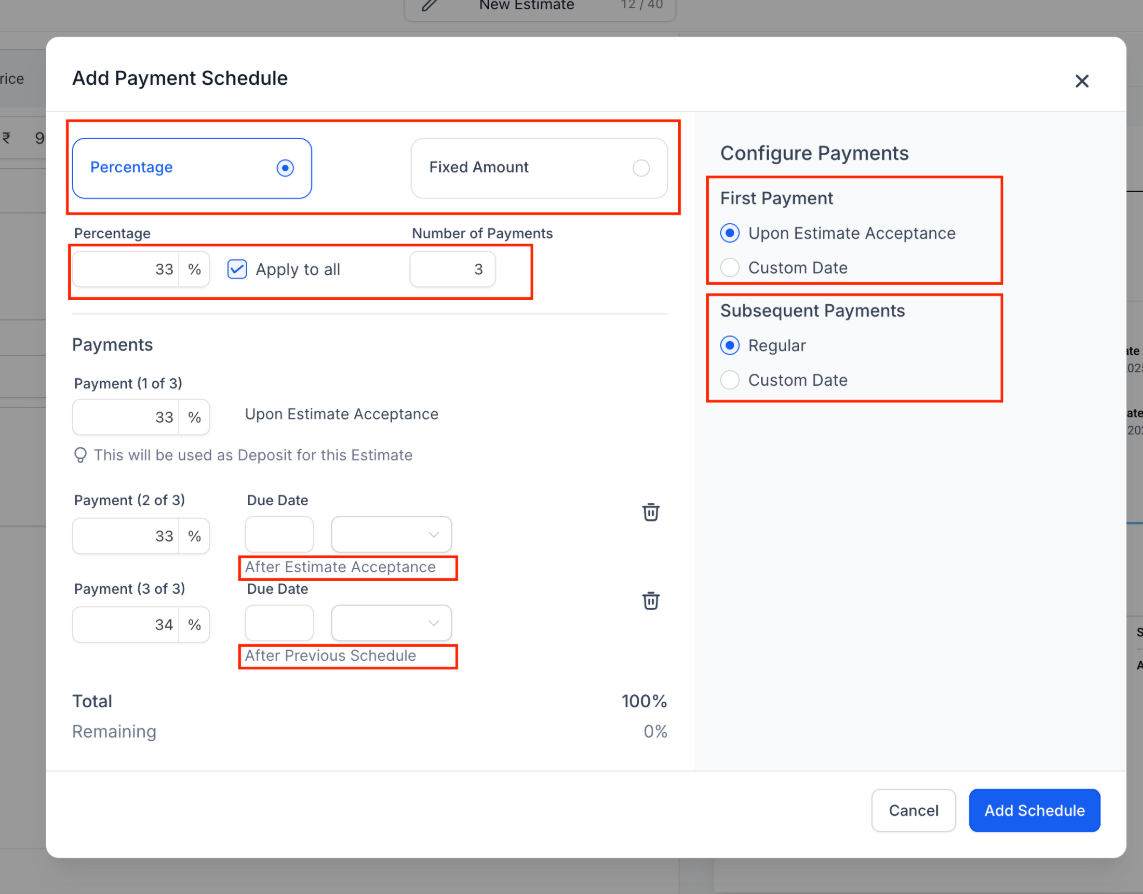
Click "Add Payment Schedule " under Amount Due, select your preferred schedule type, and configure the payment terms before adding the plan to your estimate.
-
This allows you to split the total amount into multiple payments. You can choose between percentage-based or fixed-amount schedules, configure the first payment upon estimate acceptance or on a custom date, and set subsequent payments at regular intervals or custom dates.
- Additionally, Users can attach up to 10 files , with a totalsize limit of 20MB , to estimates, invoices , and recurring invoices. Attachments offer flexibility for users to include important documents like terms, specifications, or visuals directly with estimates or invoices.
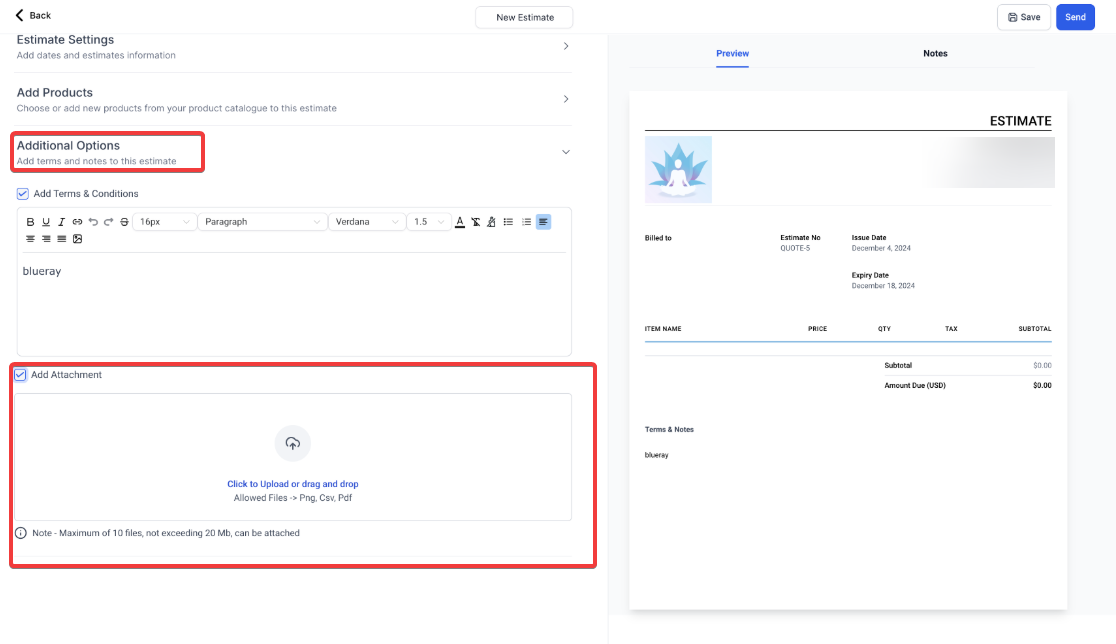
- The attachments will be included in the email sent along with the estimate.
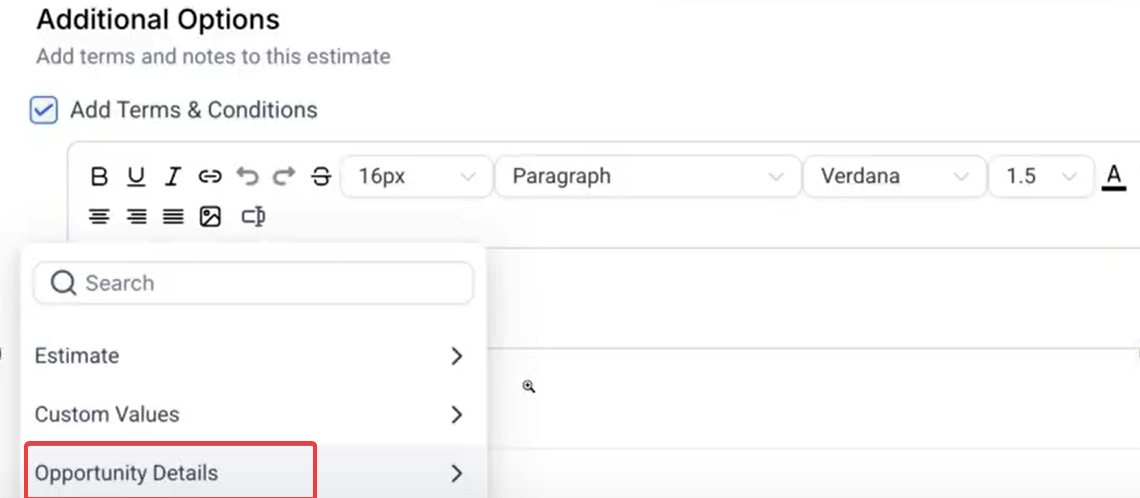
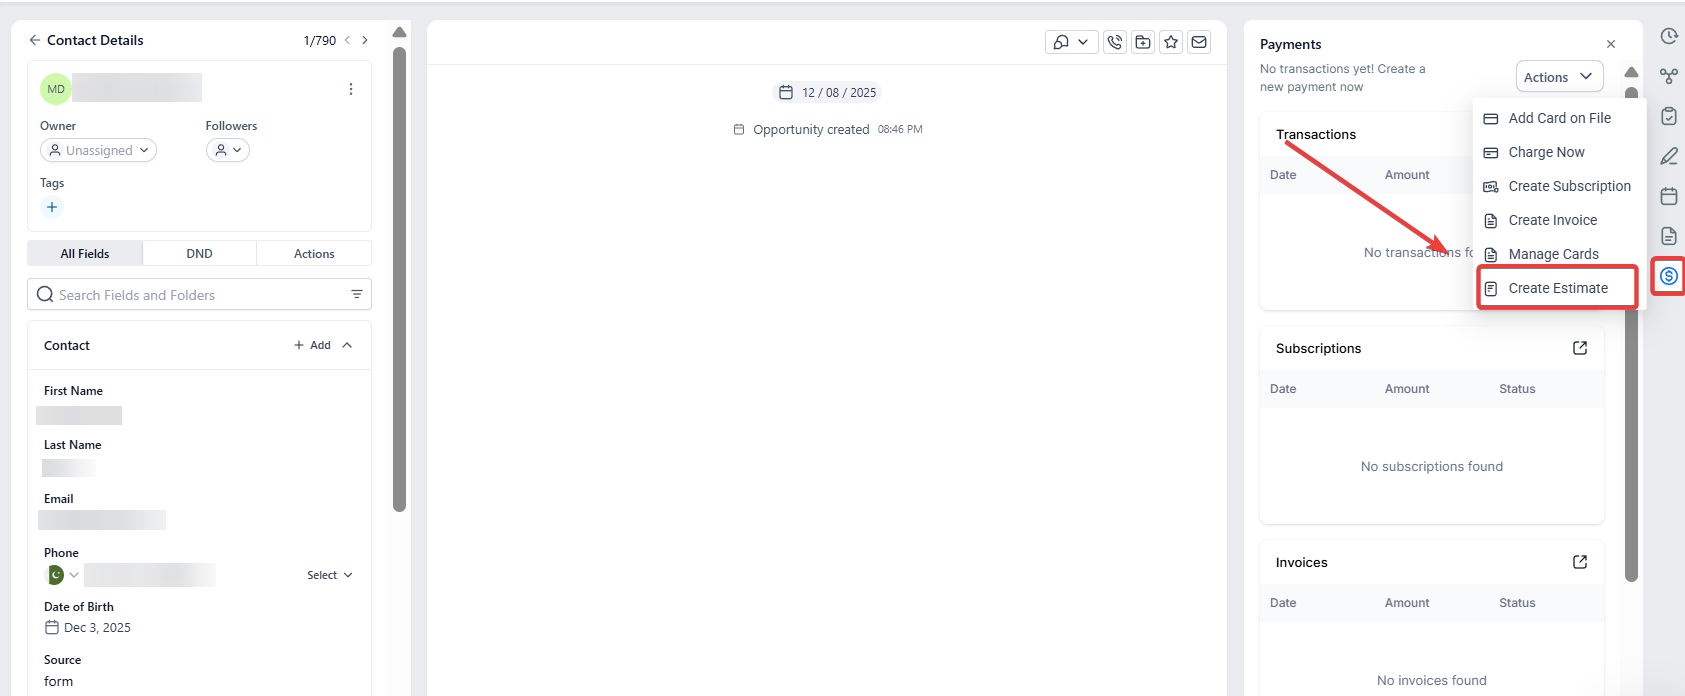
- Add Custom Values: Incorporate custom fields into your opportunities to automatically populate these details into your invoices and estimates.
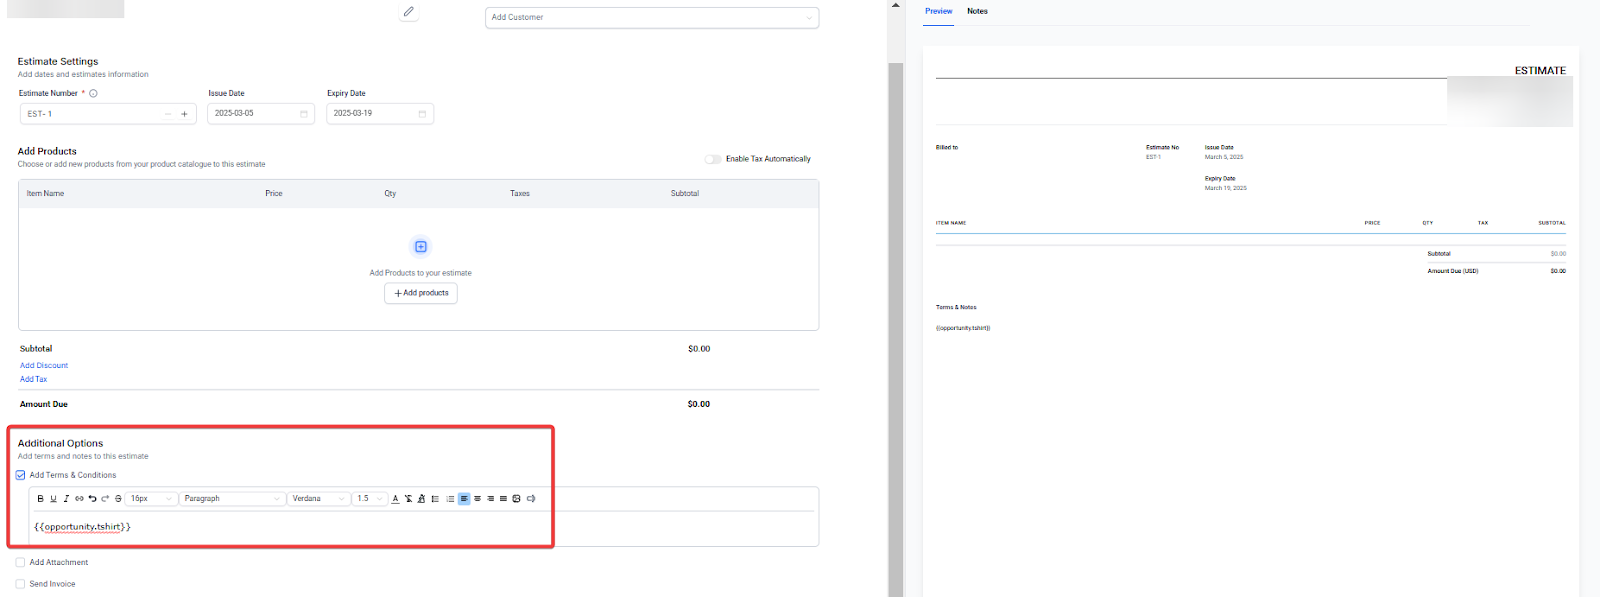
- Generate Invoices from Opportunities: Convert opportunities into invoices directly, using templates that pull in custom field data into the terms and notes.
- Note: Attachments are sent only with the initial email when the estimate or invoice is first sent, not with the ones that are subsequently scheduled.
.png)
- Auto-Invoicing Post Acceptance offers automated invoicing upon estimate acceptance, with the option to redirect recipients directly to the invoice for immediate payment.
Please Note: Direct payment redirection requires the recipient’s acknowledgment of the estimate.
- Enable “Send Invoice” and select “Direct Payment” if you want to redirect users to the invoice immediately instead of sending it via email.
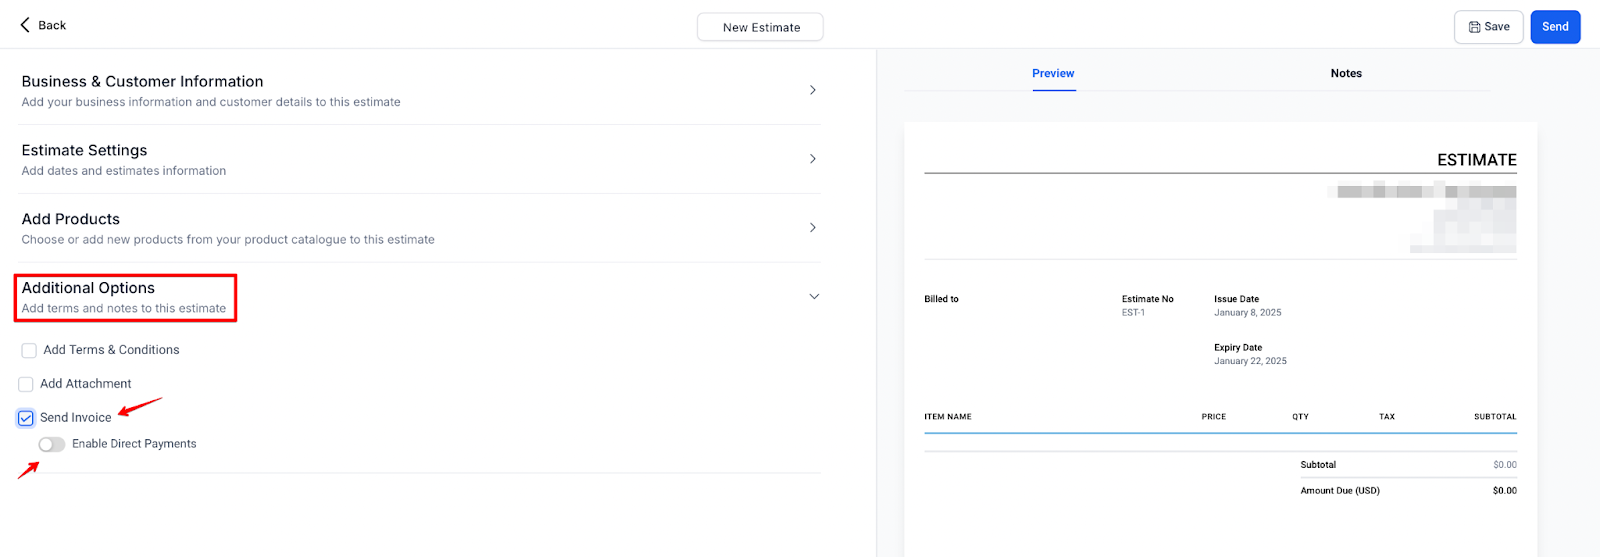
If you do not want to enable this option, proceed to the next step.
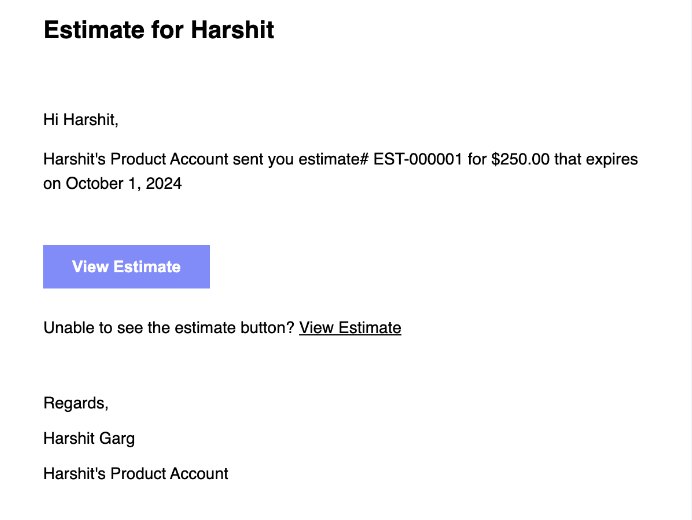
- Click ‘Send’ to share the estimate with your client via email or SMS.
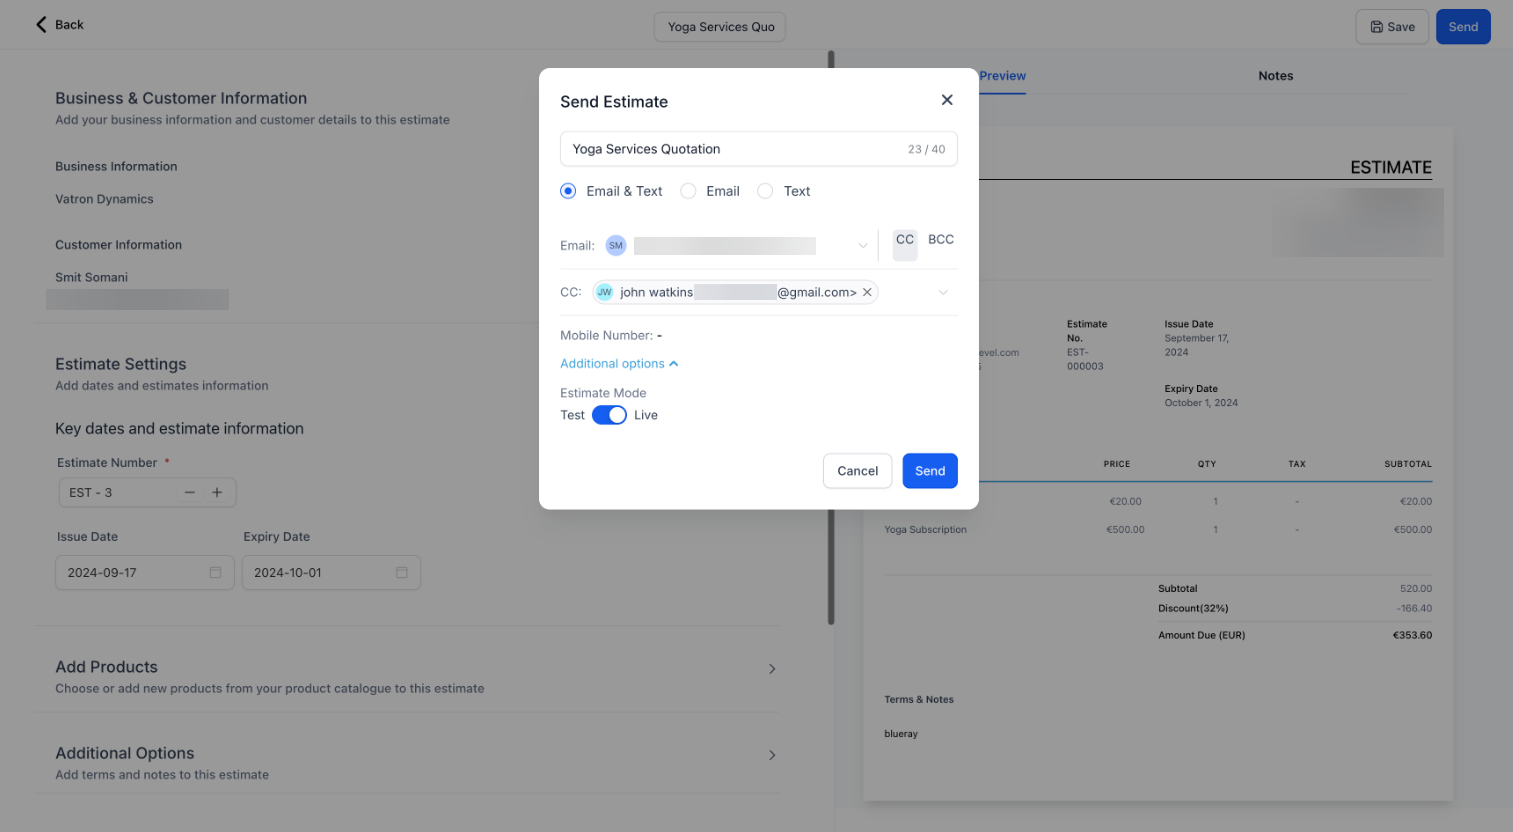 
Please note: You can Send estimates directly from the contact page with auto-filled details and track them in the Estimates Dashboard for seamless management**.**
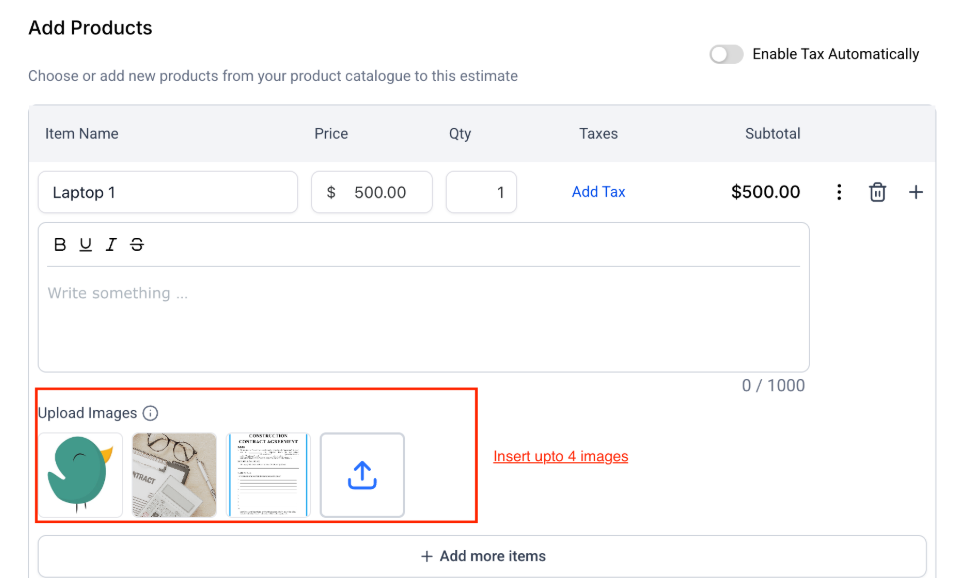
Step 3: Add photos in Estimates
This introduces the ability to attach up to four photos per line item on estimates, the visual presentation of products or services. Clients can view thumbnails under each item and easily click to open a full-screen gallery for a more detailed look. This enables the inclusion of clear visuals directly alongside pricing, helping clients make faster decisions while reducing potential misunderstandings.
¶ How to Use:
- Navigate to Payments → Invoices & Estimates → Estimates → New Estimate.
- Add your product/service line.
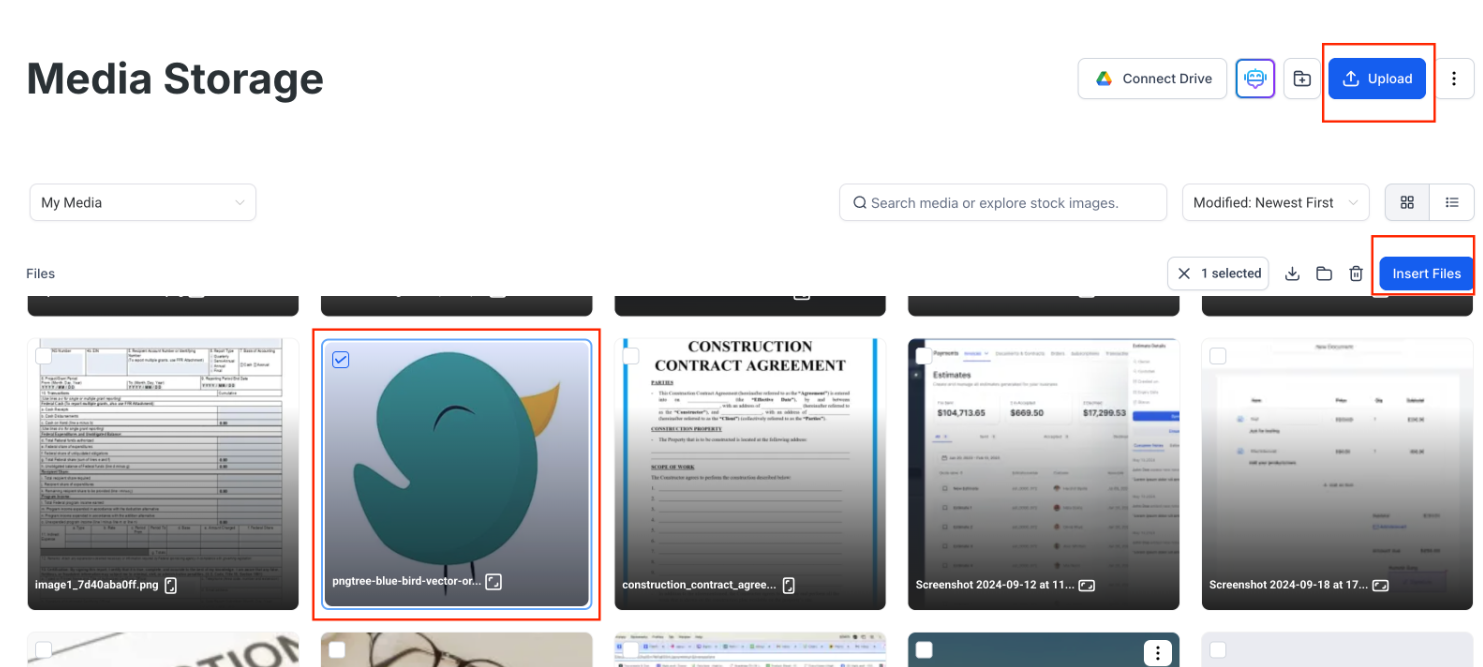
- Click Upload Images and choose from your media storage or upload directly.
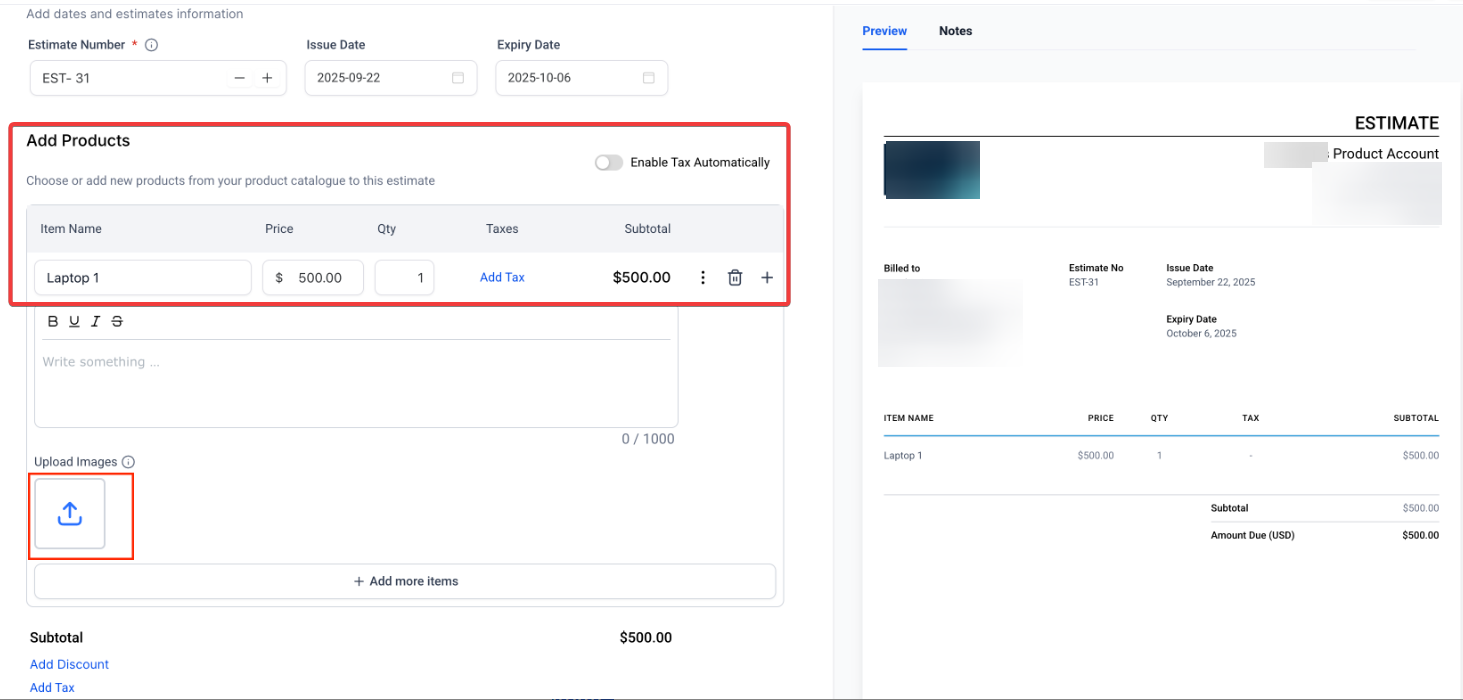
- Insert up to 4 images per item.
- Send the estimate. Clients will see the photos under each item and can open a gallery to view them in full screen.
Step 4: Client Interaction
- Once sent, clients can review the estimate and either accept or reject it.
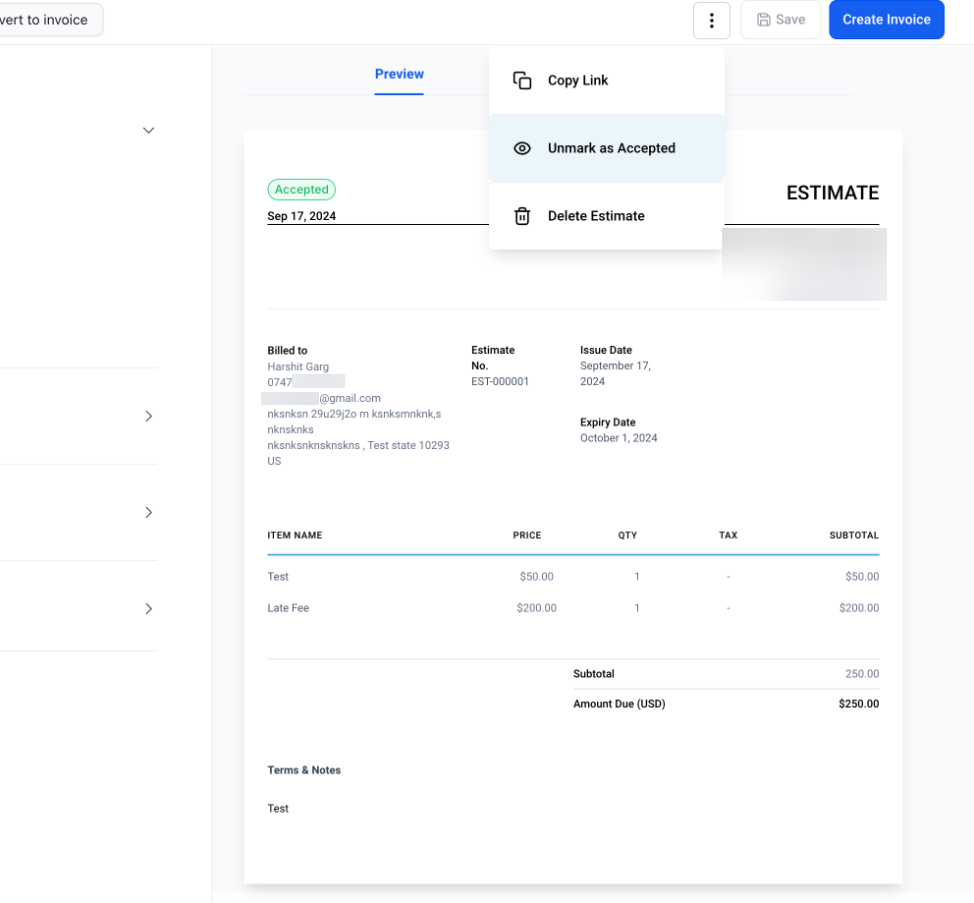
- If the client accepts, the estimate will be marked as accepted.
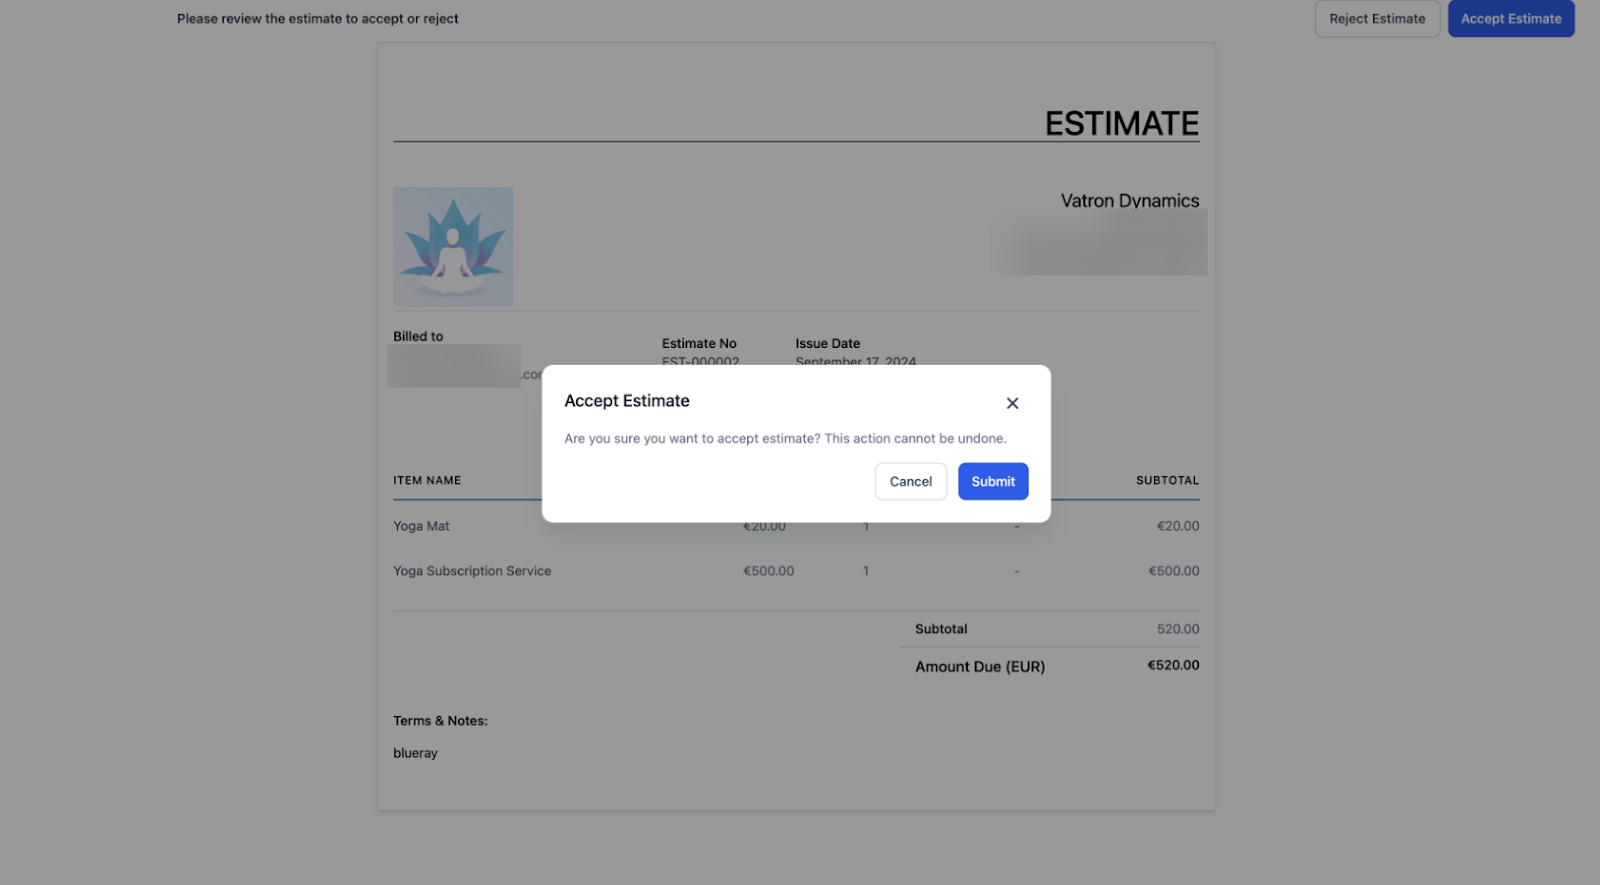
- If they reject it, they can add notes explaining their decision, and the estimate will be marked as rejected.
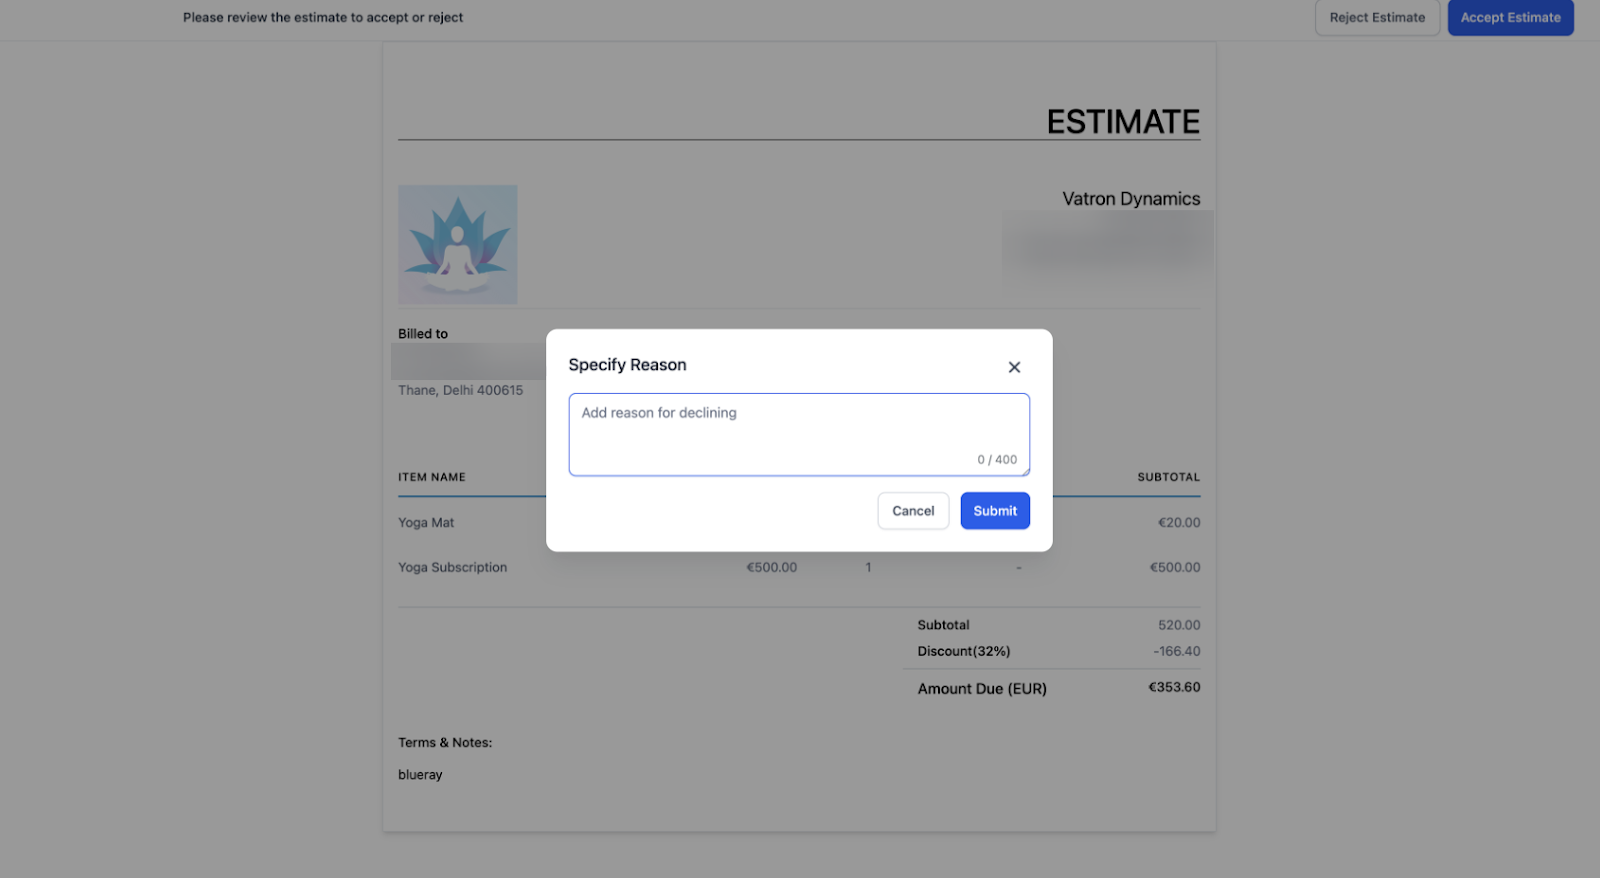
- You also have the option to manually mark an estimate as accepted or rejected if the client confirms their decision over the phone.
Step 5: Convert to Invoice
- After an estimate is accepted, click on the sent estimate and select ‘Convert to Invoice’.
- This will create an invoice based on the accepted estimate, which can then be sent to the client for payment.
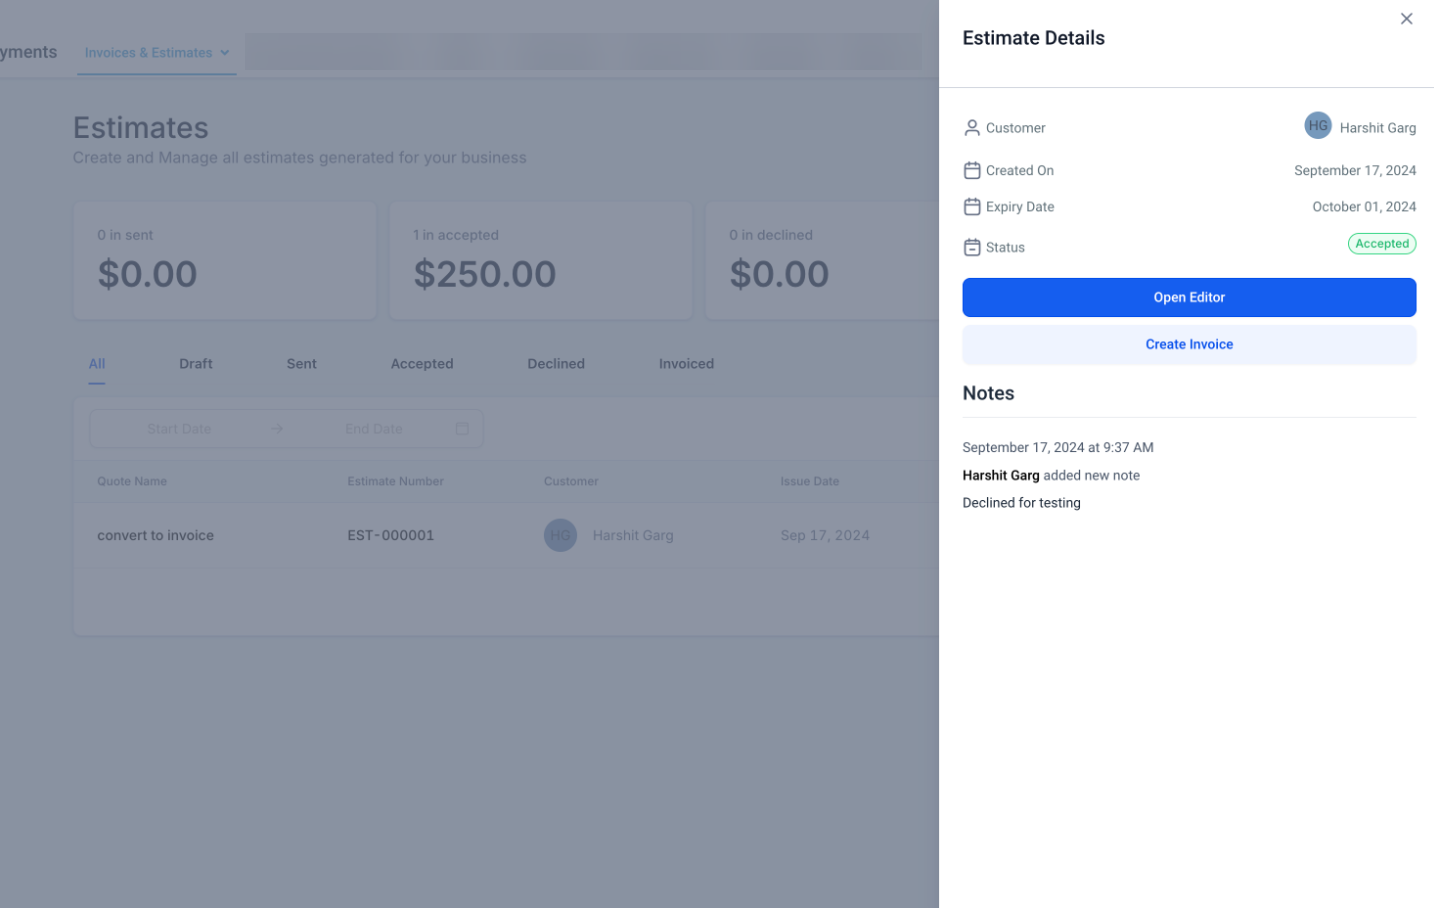
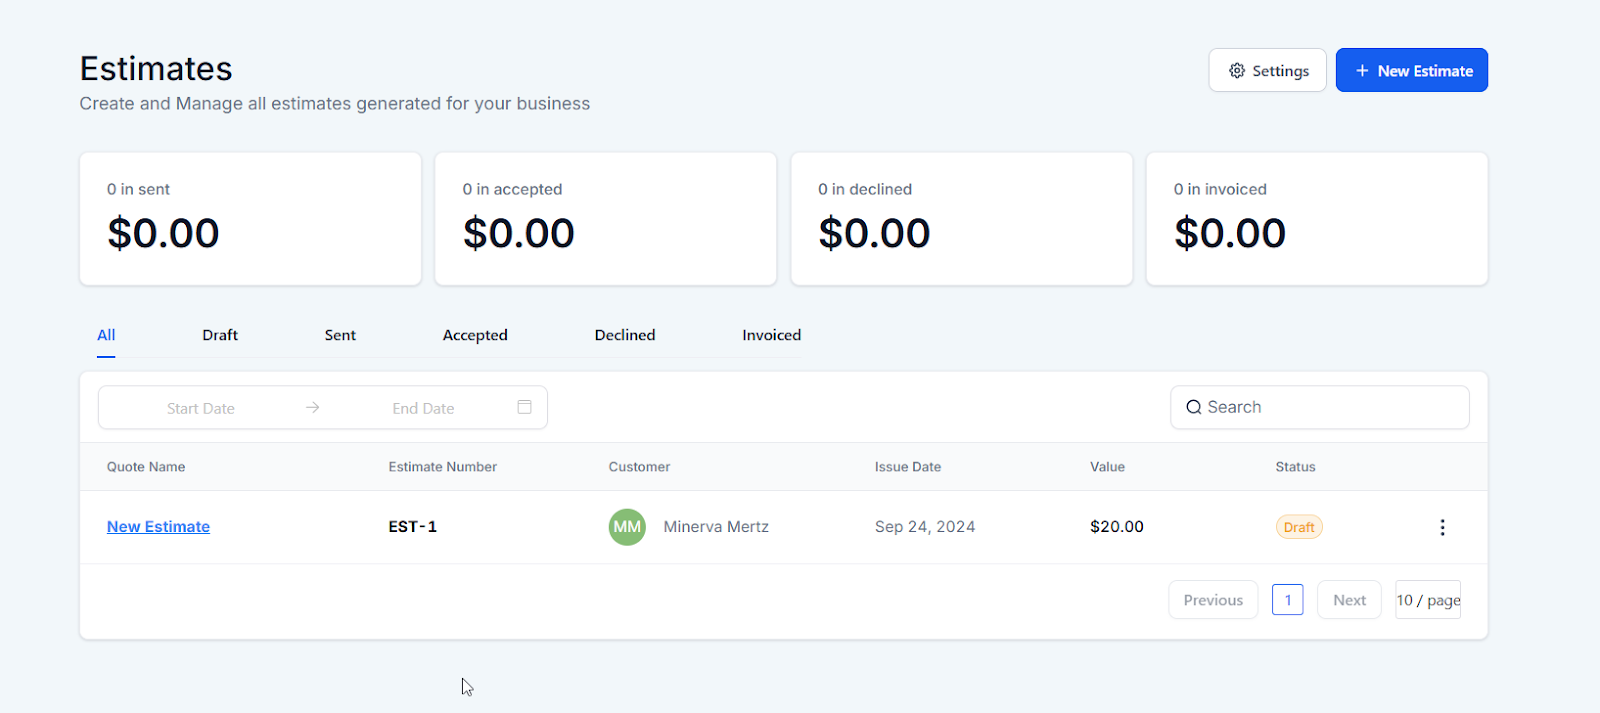
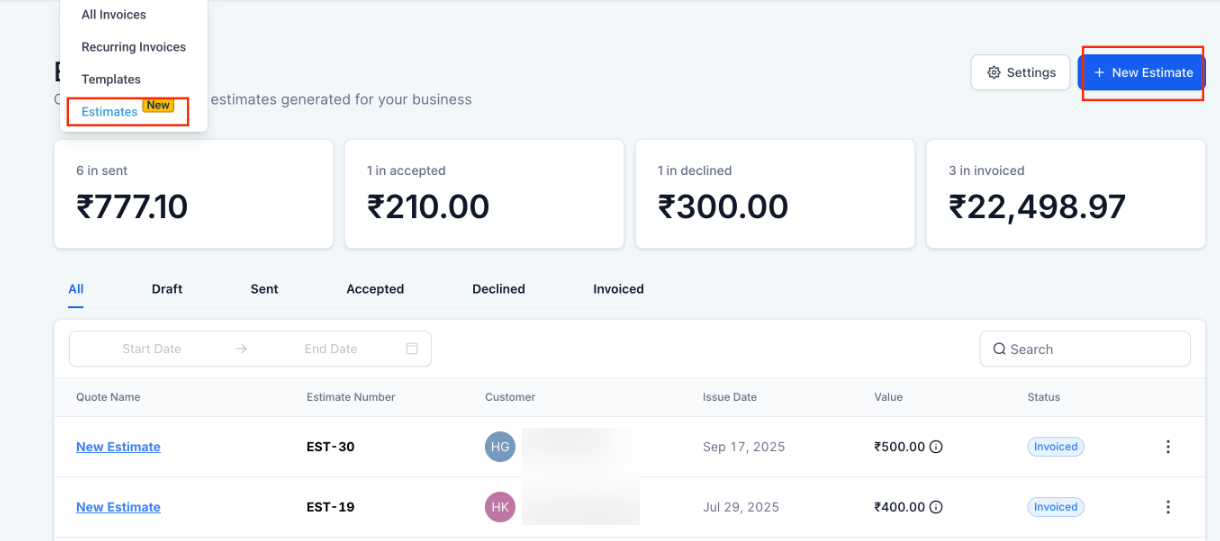
Step 6: Track and Manage Estimates
- Keep track of all estimates from the dashboard, categorized by their status: Draft, Sent, Accepted, Declined, and Invoiced.
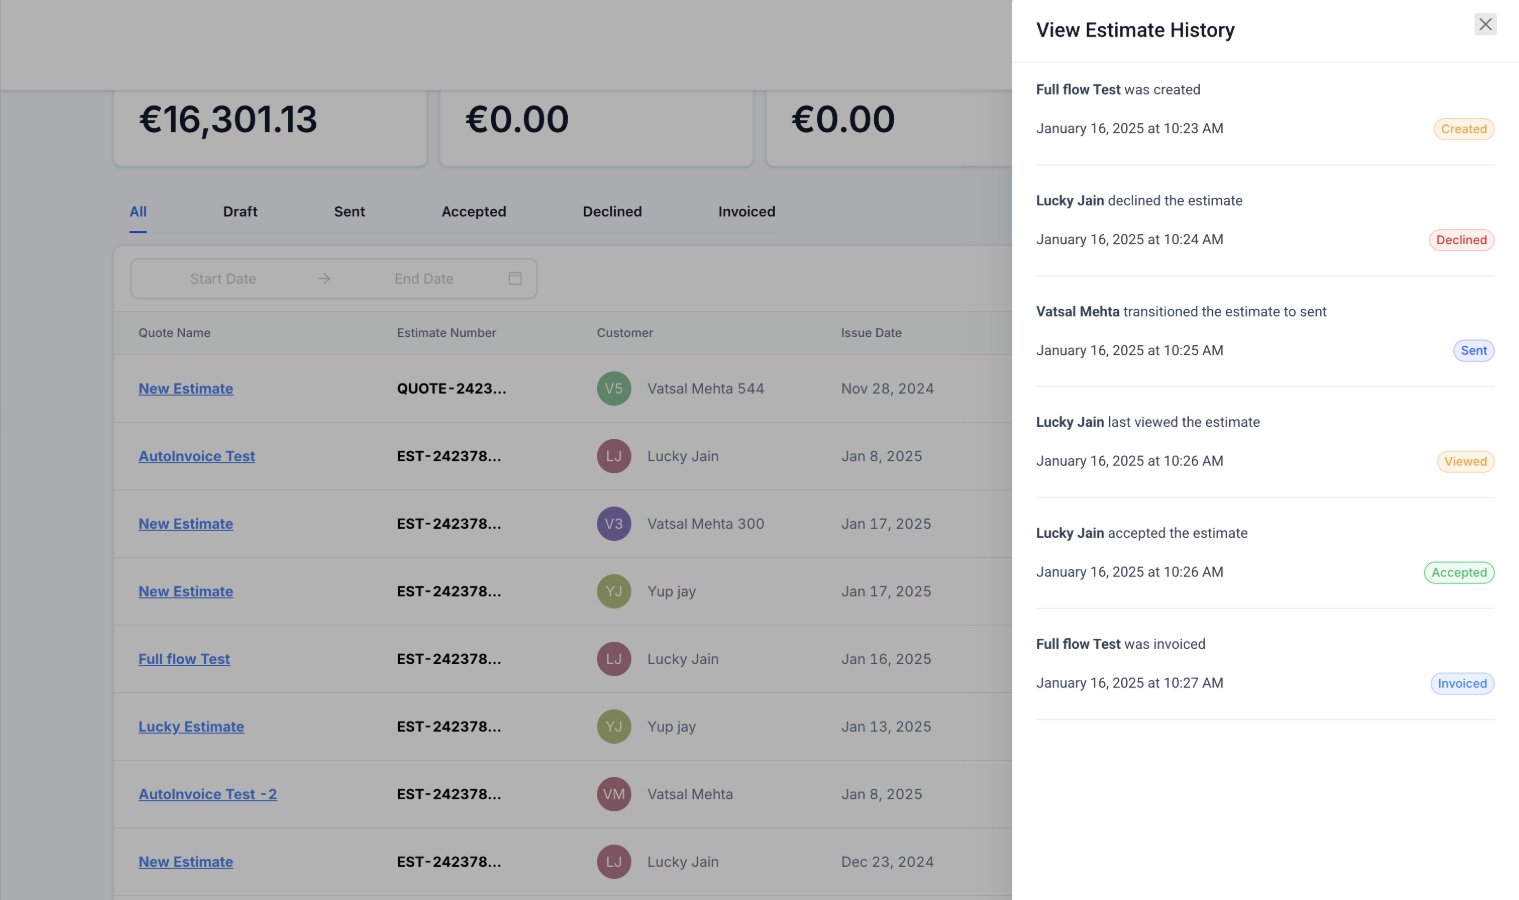
- Click on the three dots and select “View History” to see detailed logs of sent, edited, viewed, and signed estimate statuses in one place.
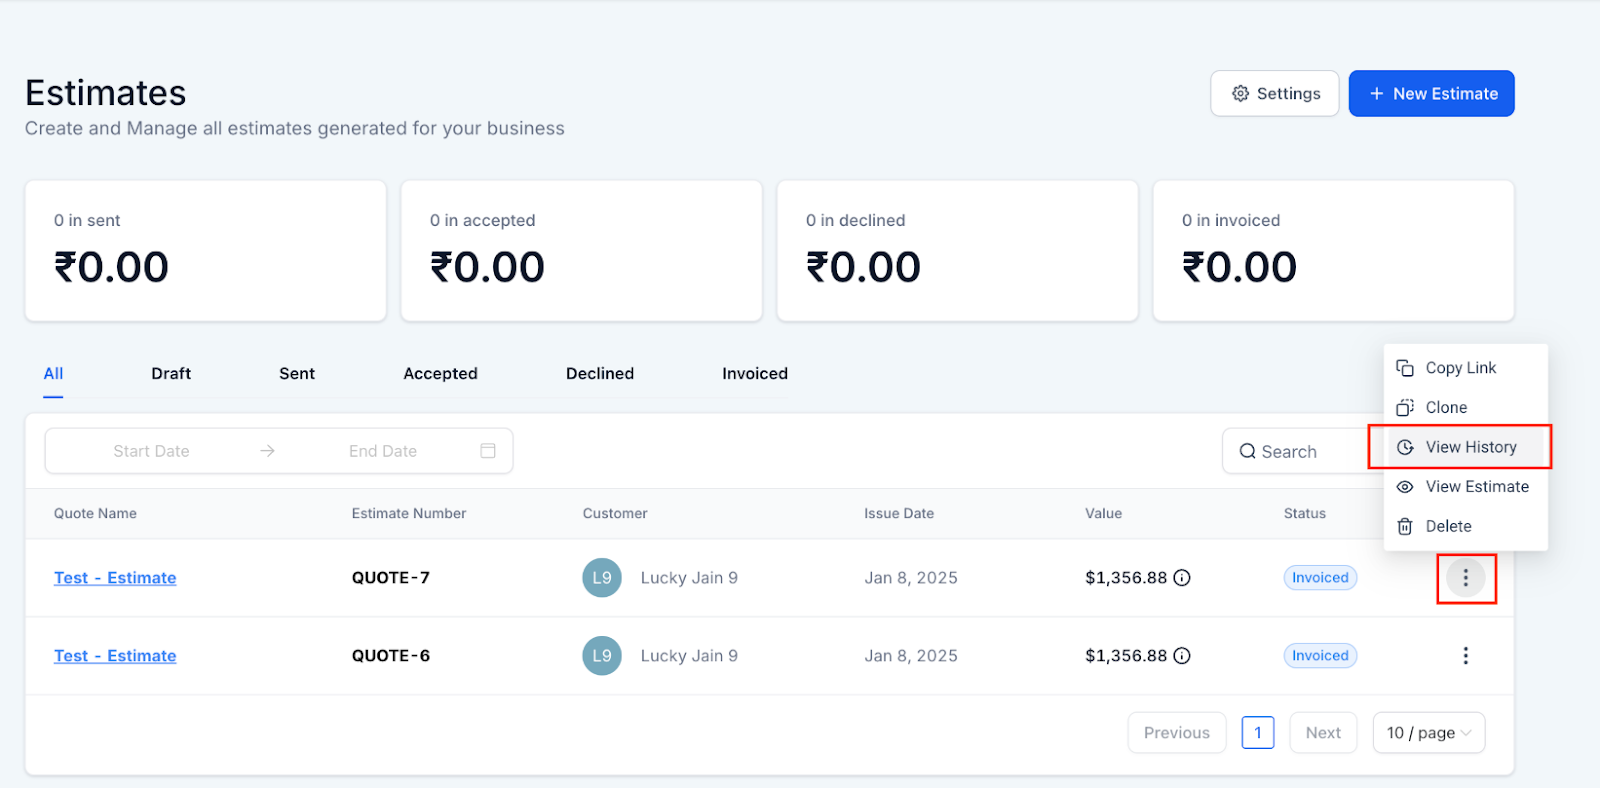 
- Monitor the value of estimates in the pipeline and review any notes added by users.
Customization
- Customize estimates by adding your company’s branding and specific terms in the settings section, ensuring each estimate reflects your business identity.
¶ Estimate Templates
Users can easily create, save, and clone templates within the Templates section of Invoices and Estimates.
How to Use
1- Navigate to Payments on the left** > Hover on Invoice & Estimates on the top > From the dropdown selectTemplates**
2- Click on the New Estimate Template button and fill in the necessary details.
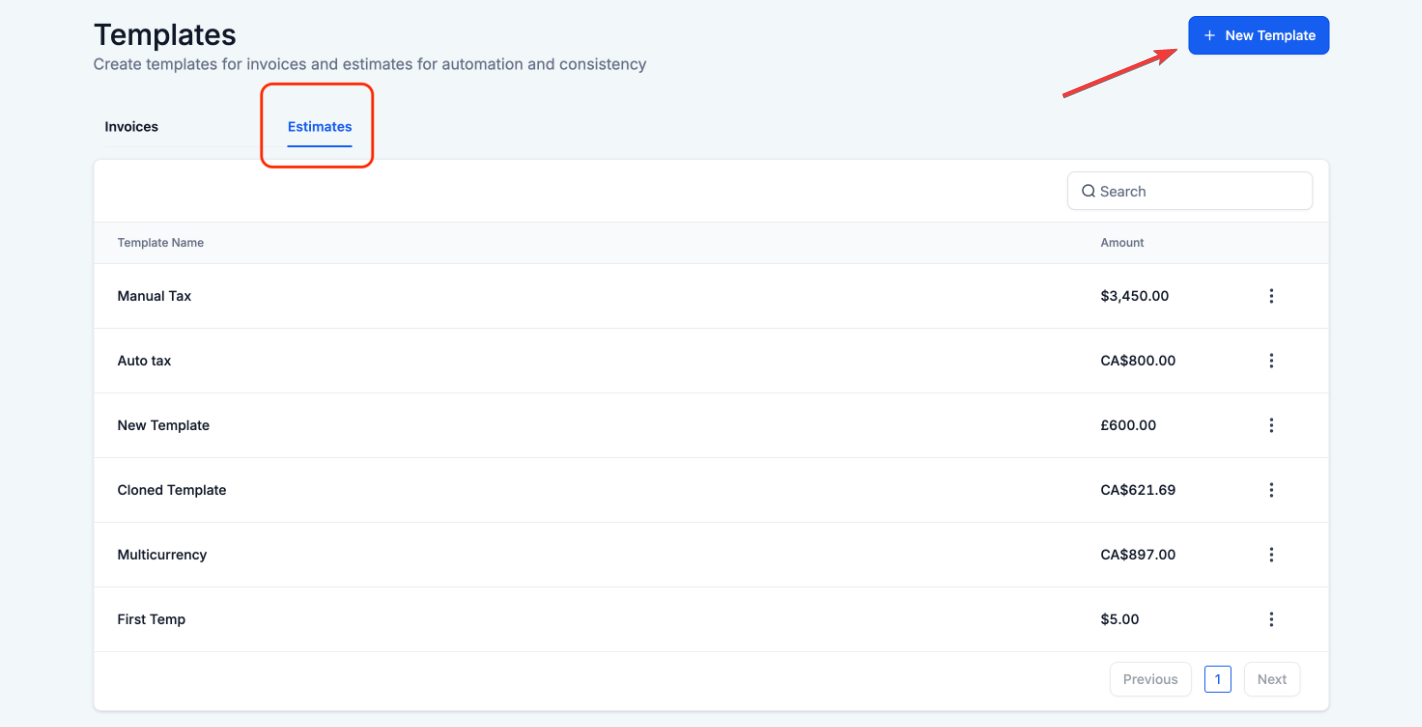 
3- Save the template for future use. To create a copy, select the template and click Clone.
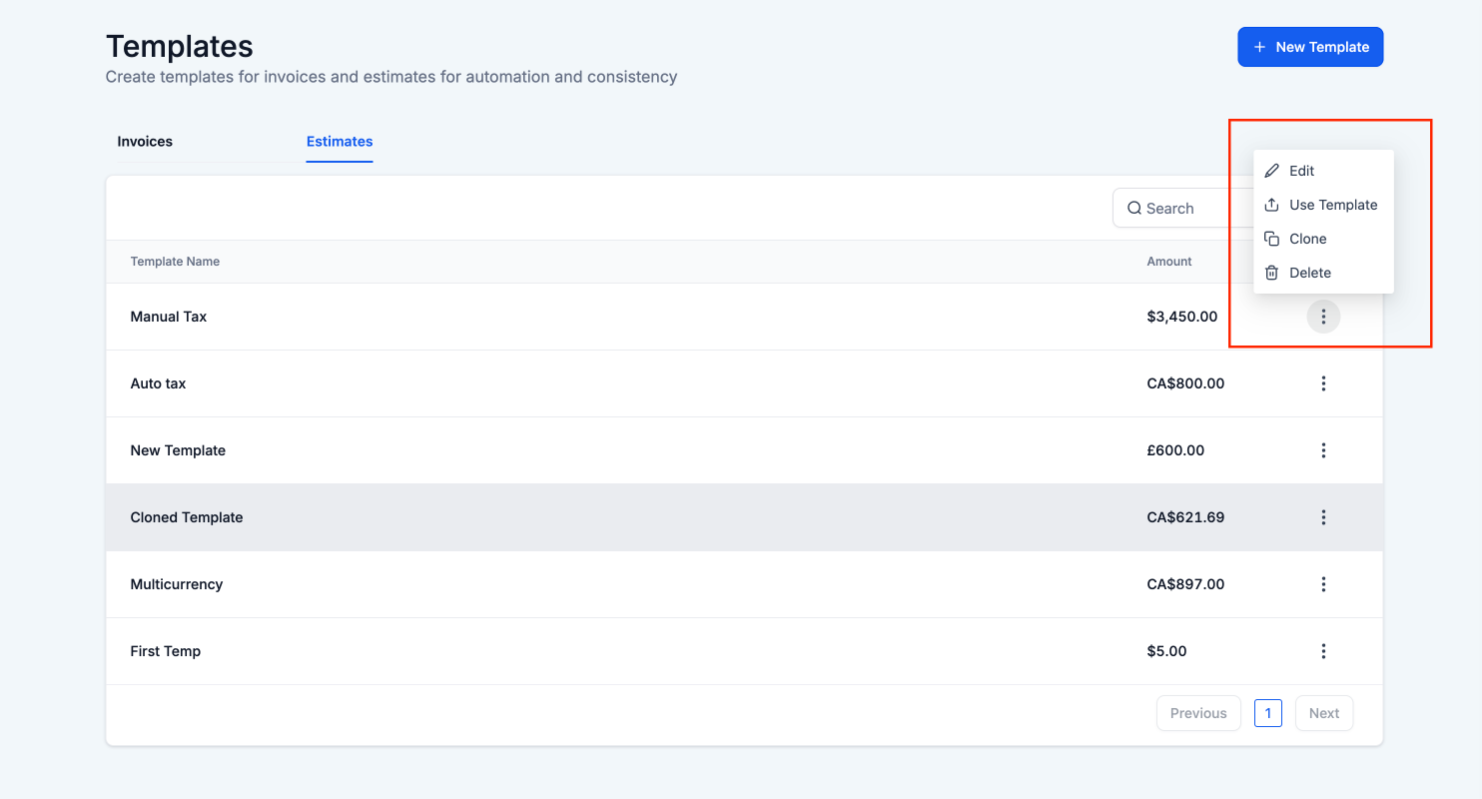
Note: Some details may need to be manually adjusted after cloning a template for specific use cases.
¶ Pro Tips
- Utilize Templates : Save time by creating templates for common estimates. This can help standardize proposals and ensure consistency across your communications.
- Follow Up on Pending Estimates : Keep an eye on estimates that are sent but not yet accepted or rejected. A quick follow-up can often prompt a response from the client.
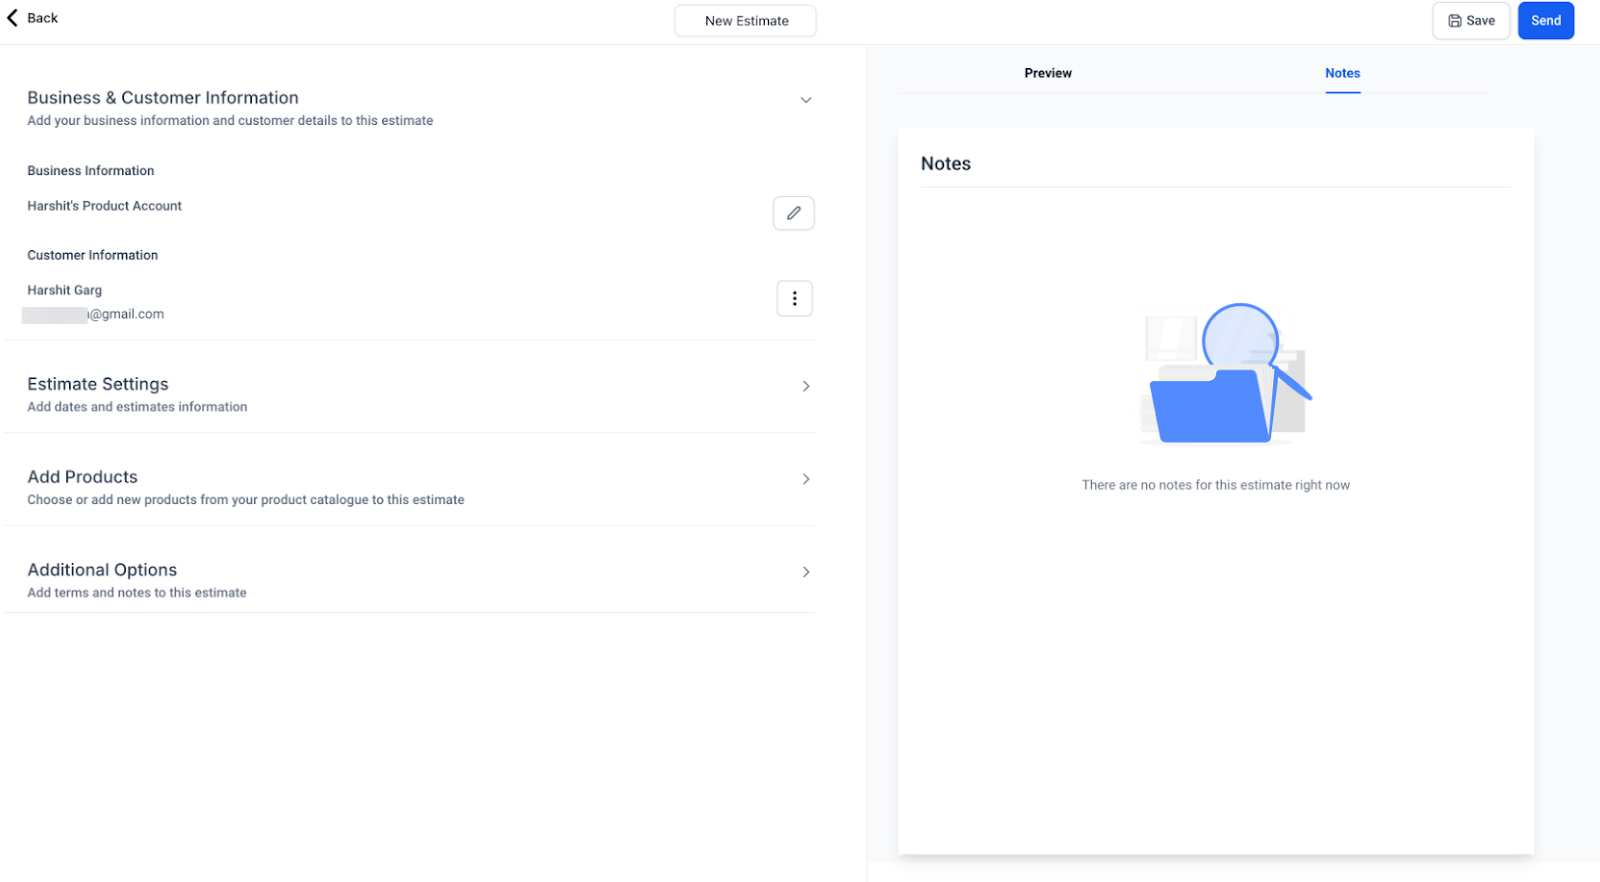
- Leverage Notes : Use the notes feature within the estimate builder to track important client feedback or specific details about the estimate. This can be especially useful for future reference or when making revisions.
¶ FAQs
Question: Can I edit an estimate after it has been sent?**
**Answer: Yes, you can edit an estimate even after it has been sent, as long as it has not been accepted. Simply navigate to the estimate, make your changes, and resend it to the client.
Question: How do I know if a client has viewed the estimate?**
**Answer: The status of the estimate will be updated once it is viewed by the client. You can track these updates directly from the dashboard.
Question: Can I set automatic reminders for pending estimates?**
**Answer: Yes, you can set reminders for estimates that have not yet been accepted or rejected, helping you stay on top of follow-ups with your clients.
Question: Is it possible to apply discounts directly within the estimate?**
**Answer: Absolutely. You can add discounts to specific items or the entire estimate, providing flexibility in your pricing strategy.
Question: Can estimates be used for recurring services or products?**
**Answer: Estimates are typically used for one-time services or products, but you can include notes or line items to specify any recurring nature. For ongoing services, you might consider using the recurring invoice feature once the estimate is accepted.
Question: Is it possible to share templates with other team members?**
**Answer: Depending on your permissions, templates may be accessible to other users who can view or clone them.
Question: Will changes to a template affect previously sent estimates?**
**Answer: No, modifying a template will not impact any estimates that have already been sent.
Question: Can I create templates for different departments?**
**Answer: Yes, templates can be customized for various departments or use cases by naming and saving them appropriately.
Question: How do I create an installment plan?**
**Answer: Click “Add Payment Schedule” under Amount Due, then select your payment schedule type (percentage or fixed amount), and configure the payment terms.
Question: Can I choose specific dates for payments?**
**Answer: Yes, you can configure both the first and subsequent payments to be made on custom dates or at regular intervals.
Question: How many files can I attach to an estimate and what is the maximum file size?**
**Answer: You can attach up to 10 files per estimate, with the total size for all attachments combined not exceeding 20MB.
Question: How do I set up custom values for my estimates?
Answer: You can configure custom values directly within the estimate editor or predefine them in the settings for consistent use.
Question: Can I use partial quantities for all types of items?**
**Answer: Partial quantities apply only to items that allow fractional input based on your system’s configuration.
Question: Can I enable auto-invoicing for all estimates?**
**Answer: Yes, you can set this up under “Additional Options” while creating a new estimate or template.
Question: What happens if I don’t enable direct payment?**
**Answer: The invoice will be sent via email to the recipient upon estimated acceptance.
Question: How do I add custom fields to an opportunity?**
**Answer: Add custom fields through the opportunity settings under the manage fields option.
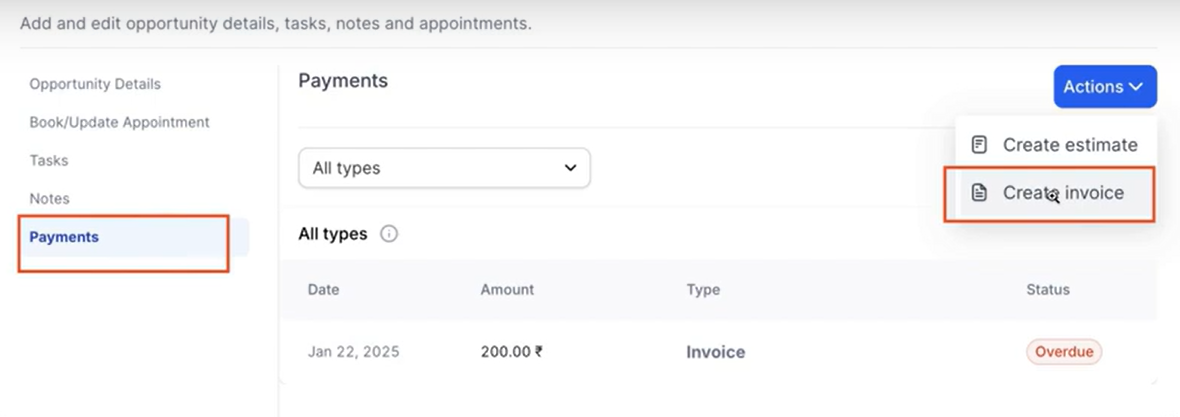
Question: Where can I create an invoice from an opportunity?
Answer: In the opportunity’s detail view, under ‘Payments’, select ‘Create Invoice’ to convert the opportunity directly into an invoice.
Question: How many photos can I include on a single estimate line item?
Answer: You can attach up to 4 photos per line item. Clients will be able to see these as thumbnails and can click on them to view the images in a full-screen gallery.
Question: Can I see exactly when a client opened the estimated email?
Answer: Yes. By clicking the three dots on an estimate and selecting “View History,” you can see a detailed log of when the estimate was sent, edited, viewed, and signed.