¶ How to Create a Document or Contract with Multiple Signatures
How to Create a Document or Contract with Multiple Signatures
Documents and Contracts are an essential part of any business, especially when they require approval from multiple people. In this guide, we’ll walk you through the process of creating a document or contract with multiple signatures. This step-by-step approach ensures all stakeholders can sign and approve documents, streamlining your sales process.
¶ Overview of the Process
This feature allows you to create documents that include product pricing, descriptions, and signature fields for multiple recipients. Once created, you can assign the appropriate people to sign and track the status of the document until it’s fully approved.
Benefits:
- Allows multiple recipients to sign a document.
- Ideal for businesses needing approvals from different team members or stakeholders.
- Streamlines document tracking and download once fully signed.
¶ Step-by-Step Guide
¶ Setting Up Your Template
1. Navigate to Documents and Contracts
- Go to the Documents and Contracts section under Payments.
- Select Templates to begin creating a new document template.

2. Create a Blank Template
- Click Create New and choose the blank template option or import from the template library.

- Title your document appropriately, such as “Proposal for Project X” or “Estimate for Services.”

¶ Adding Products and Pricing
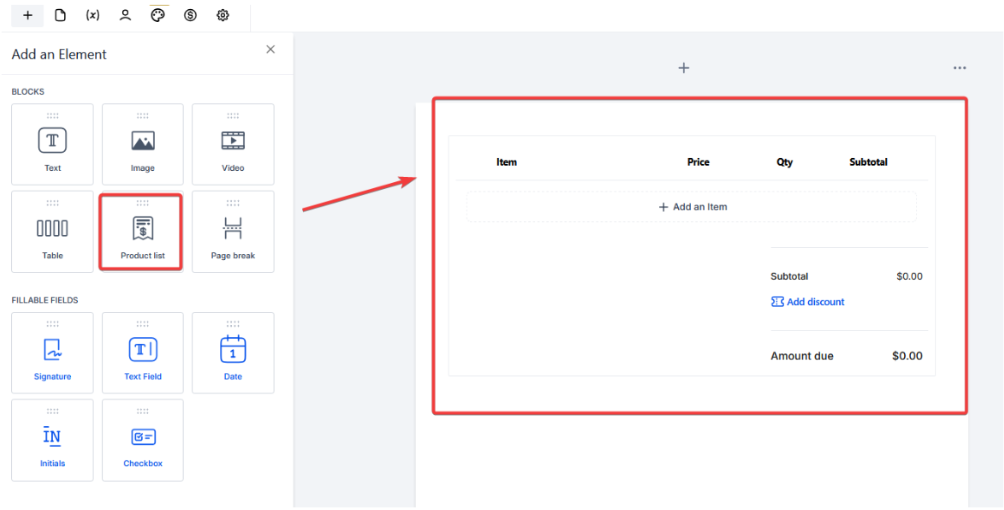
1. Add Product List Element
- On the left side, locate the Product List element. Drag and drop it into your template.
- This will create a table where you can add items, prices, quantities, and the total amount due.
2. Customize the Product Details
- Select existing products from your inventory or create new items as needed.
- You can rename products, add descriptions, and ensure all relevant details are included in the estimate.

¶ Adding Signature Fields
1. Add Signature Fields for Multiple Recipients
- From the left-hand menu, drag and drop the Signature element into your template.
- Add as many signature fields as required for your document (e.g., two signatures for two different people).
- These signature fields will be assigned to your recipients in the next step.

¶ Assigning Recipients
1. Save and Assign Recipients
- Once your template is complete, click the Recipients tab.
- In the Recipients tab, assign the signature fields to the appropriate contacts. You can select recipients from your existing contact list.

2. Add Additional Signers
- For documents needing multiple signatures, ensure each signature field is linked to the correct person. Assign the second (or more) recipient to the respective signature fields.


3. Assign to Sender
- When creating a template, you have the option to choose “Sender” instead of selecting your name, i.e., the creator of the template.

- When the template is used, the signature fields automatically get assigned to the team member sending the document.
Note: In workflows, the “Sender” field remains tied to the business user who last edited the document. This is because workflows are usually triggered by contacts, and may not map to a specific sender.
¶ Sending the Document
1. Send via Email or Link
- You can either send the document via email or generate individual links for each recipient.
- These links are specific to each recipient, allowing them to sign only their designated fields.

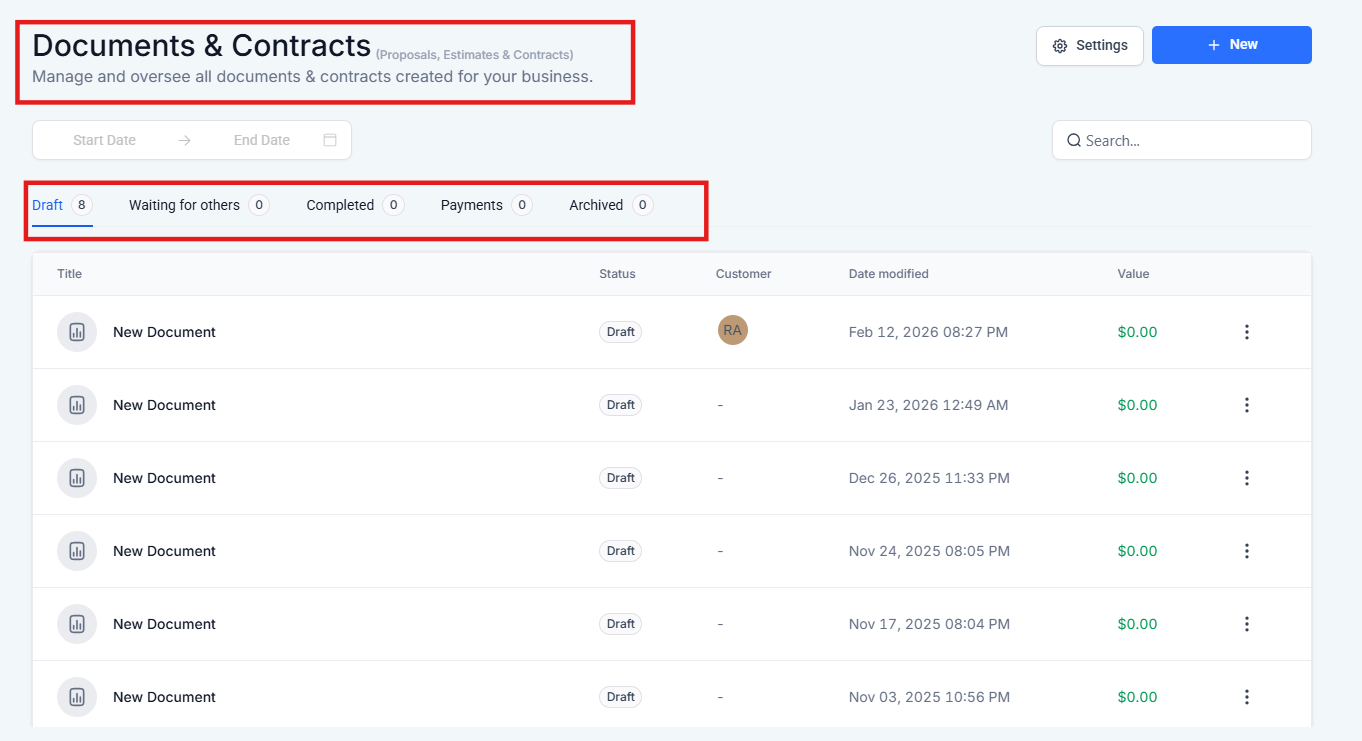
2. Tracking Document Progress
- After sending, track the document’s status under Documents and Contracts.
- You’ll see whether it’s been viewed and signed, and its current status in the sales process.
¶ FAQs
Question: Can I assign multiple people to sign the same document?**
**Answer: Yes, you can add as many signature fields as needed and assign them to different recipients in the next step.
Question: How do I know if my document has been signed?**
**Answer: You can track the status of the document in the Documents and Contracts dashboard, where you’ll see if it’s been viewed or signed.
Question: Can each recipient sign separately?**
**Answer: Yes, each recipient will receive their own unique link or email, allowing them to sign their designated section only.
Question: Can I download the document once all signatures are collected?**
**Answer: Yes, after all parties have signed, you can download a completed PDF version of the signed document.
Question: Can I edit the document after it has been sent?**
**Answer: No, once a document is sent for signatures, it cannot be edited. If changes are required, you’ll need to create a new version of the document.
Question: How do signature fields get assigned when using a template?**
**Answer: When creating a template, you can select “Sender” instead of assigning your own name as the signer. This ensures that when the template is used, the signature fields automatically assign to the team member sending the document.
Question: Can the document be integrated into a workflow?**
**Answer: Yes, but note that the “Sender” field in workflows will remain tied to the last editor, not the person triggering the workflow.
**Question:**How do I add pricing and items to my document or contract?
Answer: You can use the Product List element from the left-side menu to drag and drop a table into your template. This allows you to add items, prices, and quantities directly into the document.
Question: How do I add a price table to my contract so the client knows what they are paying for?
Answer: You can use the Product List element from the left-side menu. Simply drag and drop it into your template to create a table where you can add specific items, descriptions, quantities, and total costs.
Note: In workflows, the “Sender” field remains linked to the last business user who edited the document, as workflows are typically triggered by contacts rather than a specific sender.