¶ Managing Comments In Your Membership Section
Managing Comments In Your Membership Section
When creating or teaching a course it’s important to get real-time feedback from your students/participants. This allows you to know how effective your course is. Providing feedback to your students/participants is also critical for their performance and learning.
By adding comments to your membership section, you can create and foster an engaged learning environment. Follow along to learn how to manage your membership comments.
¶ Part 1: Understanding Each Feature
Starting with an understanding of each feature - enabled, hidden, and locked, you will be able to determine what is best for LeadMagicX.
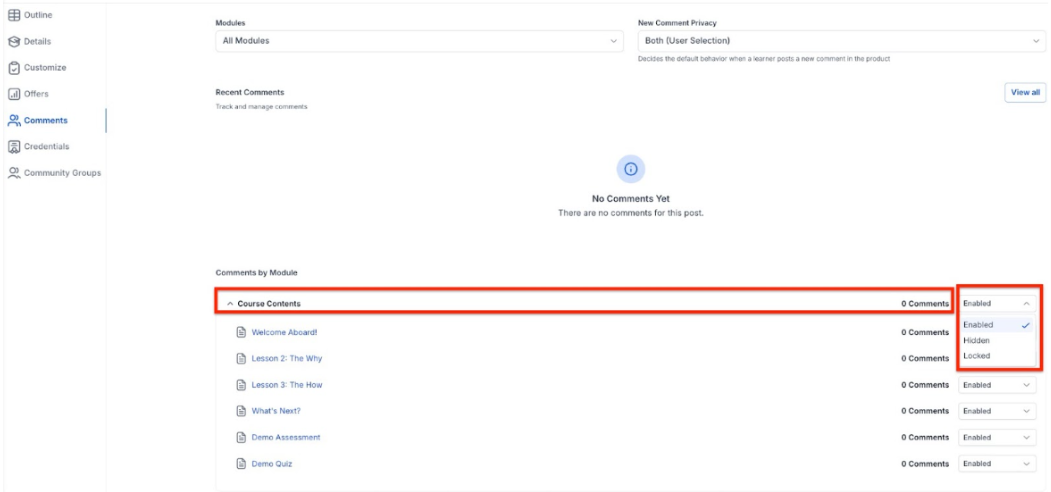
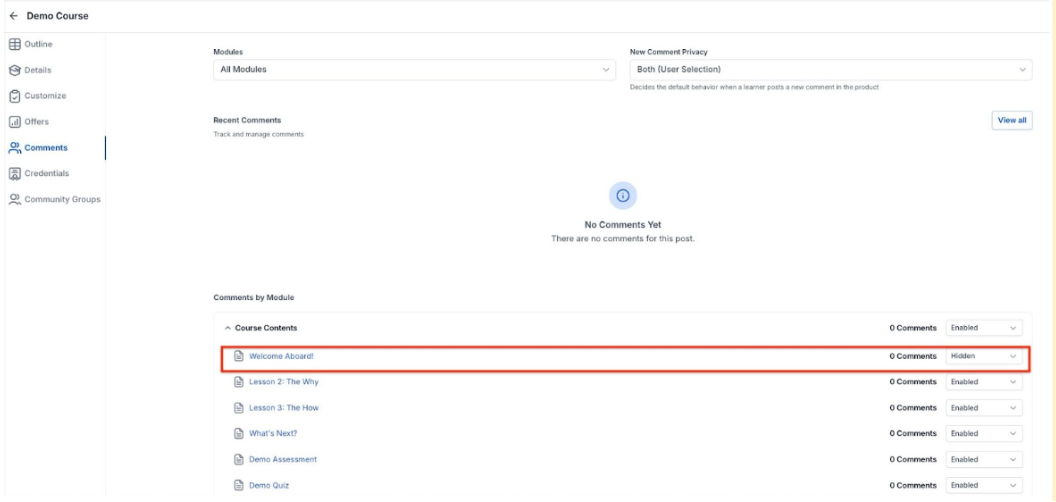
- Enabled: will be visible on the page and will show existing comments in the thread. This will give your students the ability to add new comments.
- Hidden: will not be visible on the page and will not show existing comments in the thread.
- Locked: this feature will remove the ability for your students to add new comments, however, the existing comments will still be visible, which is where this varies from “hidden”.
¶ Part 2: Enabling, Hiding, and Locking Membership Comments
Enable comments foralllessons within a category.
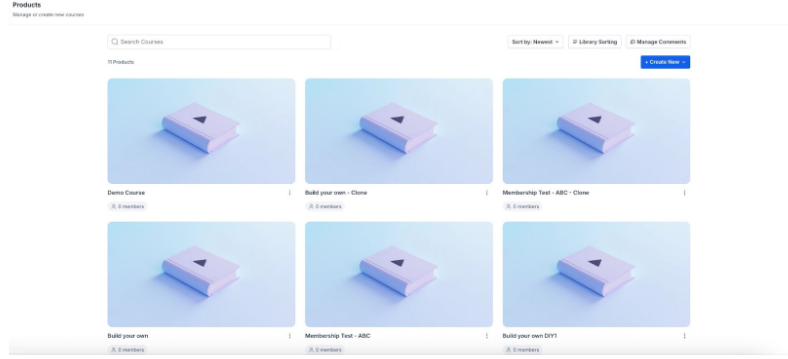
- Navigate to Memberships > Courses > From the dropdown select the Products tab.
- Choose an existing Product or create a new one
- Click on the comments section
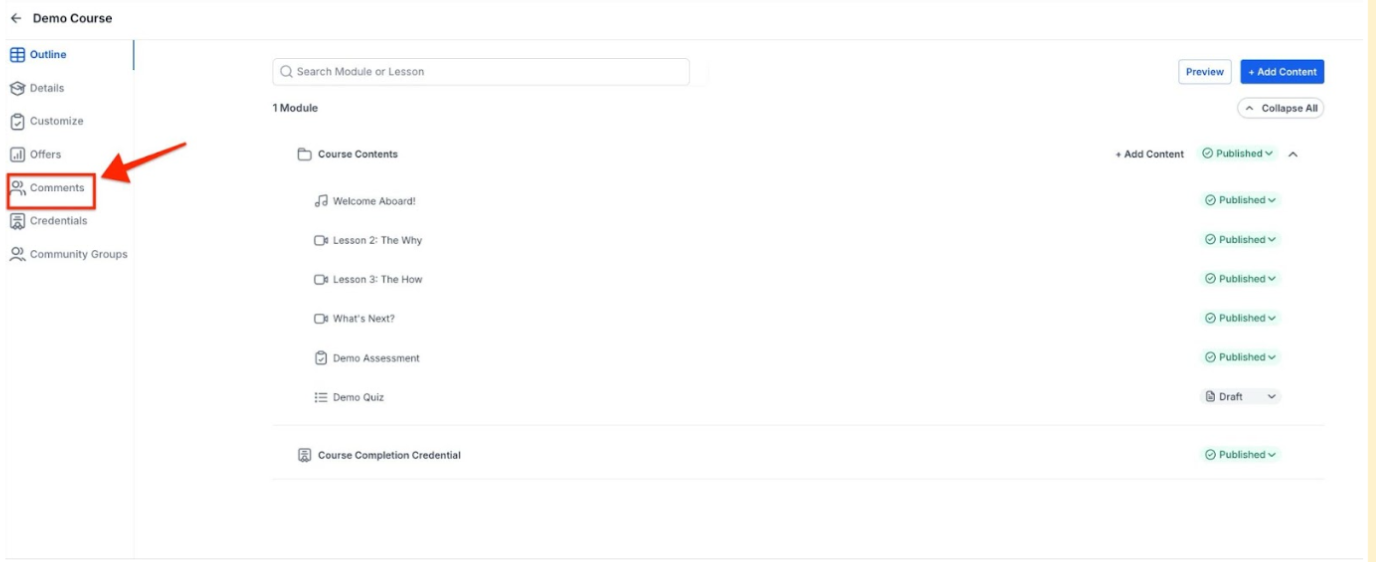
- Select the category you would like to enable, hide, or lock comments for
Enabling comments forselectedlessons within a category
- Select which lessons you would like to enable, hide, and lock comments within a category.
¶ Part 3: Managing Your Comments
Step 1: Access the comments manager for your Products
- Navigate to the Products tab
- Click “Manage Comments ”
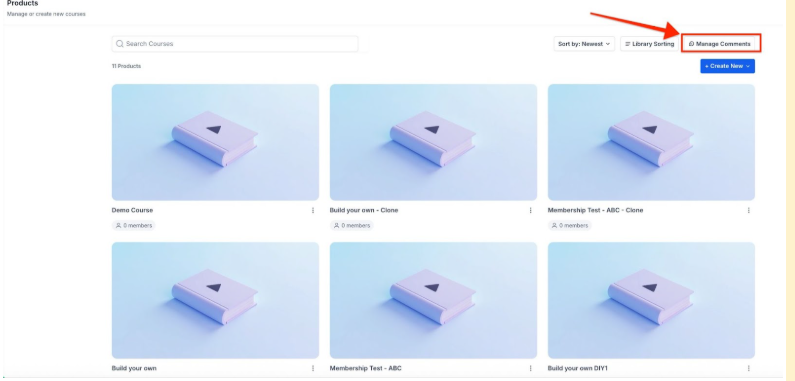
- Here you can access your comments manager
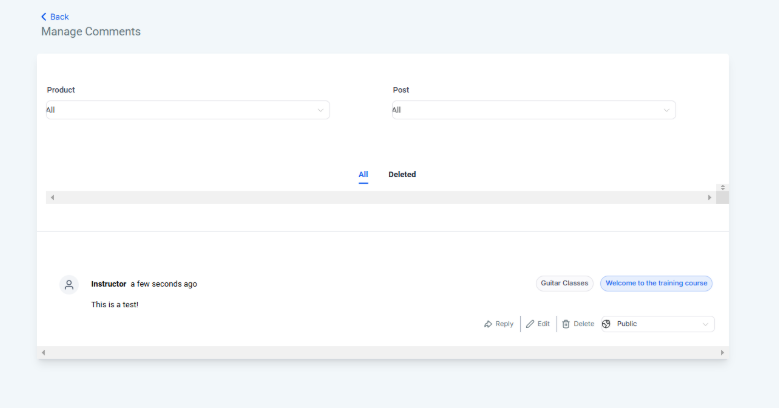
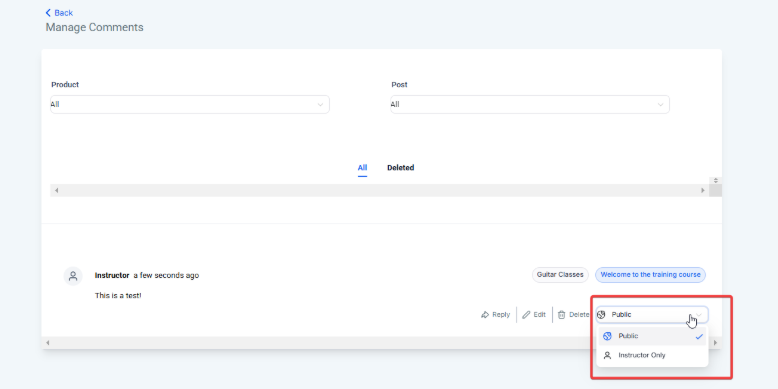
Step 2: Change Comment visibility
- On a specific comment within "Manage Comments " select “Instructor Only” or “Public” from the drop-down to change the visibility setting.
- Public: The comment will be visible to the course creator and all students in the course
- Instructor Only: The comment will only be visible to the course creator and the student who posted the comment.
Step 3: Delete and Restore comments
- To delete a comment, navigate to Products > Manage Comments > select the comment you wish to delete > click Delete.

- To restore a comment you had deleted, navigate to Products > Manage Comments > click into the “Deleted” tab where you can view all deleted comments. Select the comment you wish to restore > click Restore.

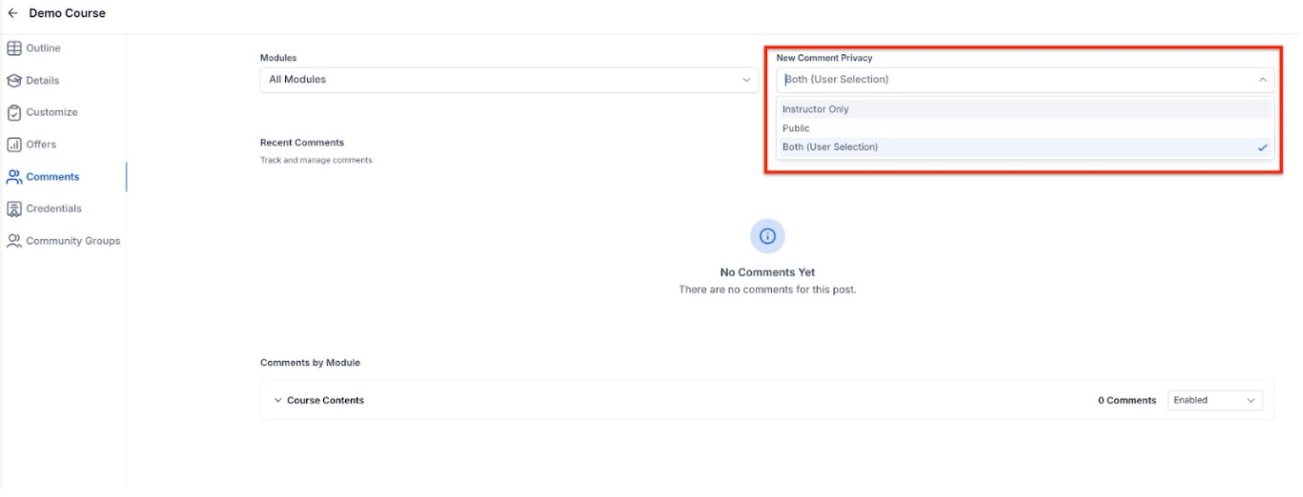
Step 4: Changing the visibility of comments in your product
- Navigate to the Course Product.
- Select “Comments ”
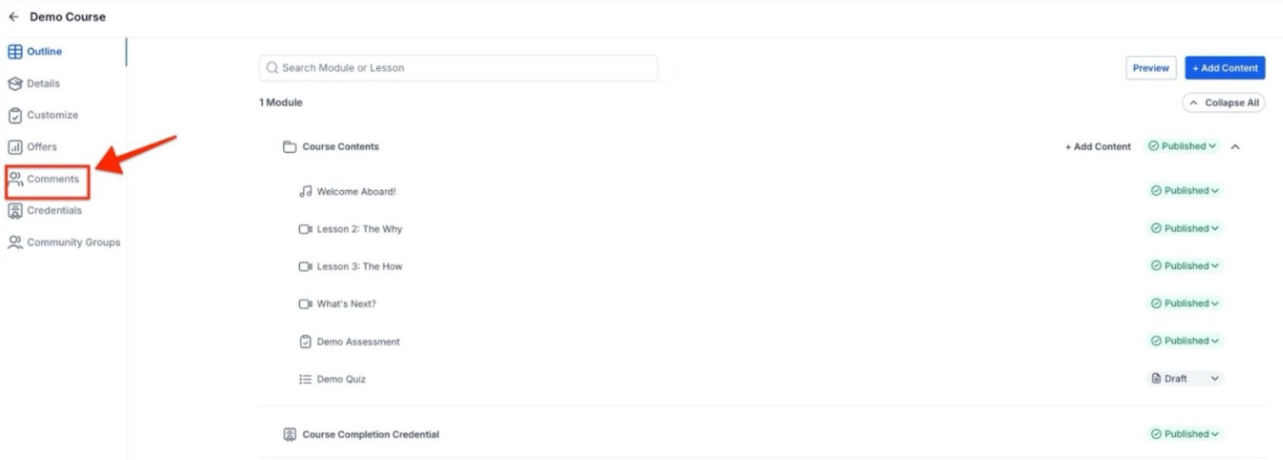
- Change New Comment Privacy to Instructor Only, Public, or both.
- Instructor only: Only the instructor can see comments
- Public: Everyone can read the comments
- Both: The poster and instructor can read the comment
Images in Comments
Members/Participants can add images and GIFs directly into lecture comments for clearer communication and richer discussions.
Special Requirement: Supported formats include standard image types and GIFs, with a size limit to maintain platform performance.
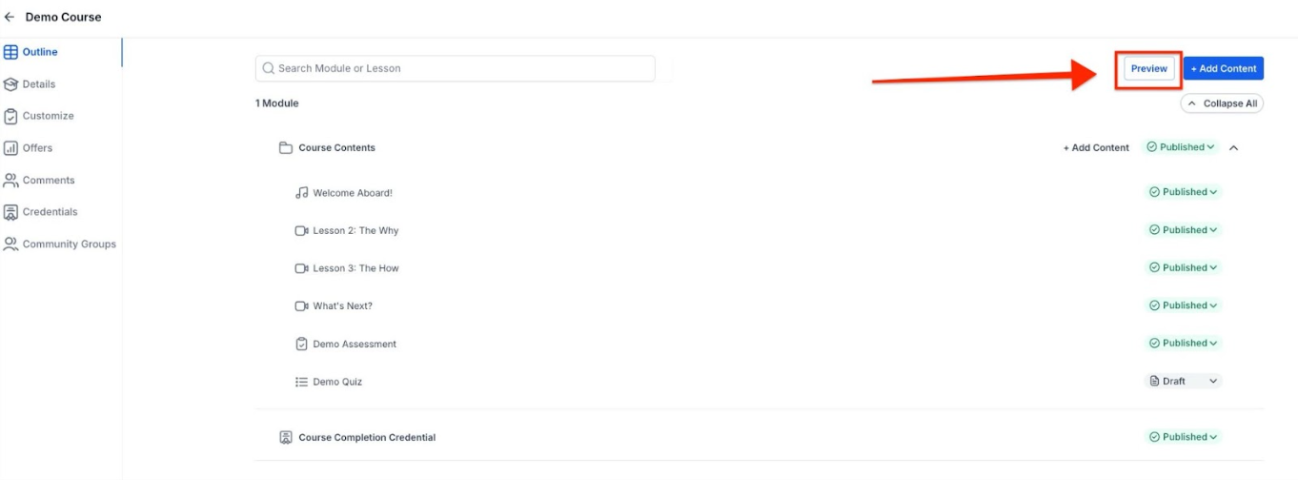
To verify that you can click “Preview,” navigate back to your product.

FAQs
Question: Why is it important to use membership comments in my course?**
**Answer: Membership comments provide real-time feedback from students, helping you gauge the effectiveness of your course. They also offer a way to engage with students and provide critical feedback to enhance their learning experience.
Question: What are the different comment visibility options and what do they mean?**
**Answer: The visibility options are:
- Enabled: Comments are visible on the page, allowing students to see and add new comments.
- Hidden: Comments are not visible on the page and students cannot see or add new comments.
- Locked: Existing comments are visible, but students cannot add new comments.
Question: How do I enable, hide, or lock comments for all lessons within a category?**
**Answer: Go to the Products tab.
Choose an existing product or create a new one.
Click on the Comments section.
Select the category where you want to enable, hide, or lock comments.
Question: How can I enable, hide, or lock comments for specific lessons within a category?**
**Answer: Navigate to the Products tab.
Choose an existing product or create a new one.
Click on the Comments section.
Select the specific lessons where you want to enable, hide, or lock comments.
Question: How do I access the comments manager?**
**Answer: Go to the Products tab.
Click on Products.
Click Manage Comments to access the comments manager.
Question: How can I change the visibility of a comment?**
**Answer: In the Comments Manager , find the specific comment.
Use the drop-down menu to select either User Only or Public :
- Public: Visible to the course creator and all students.
- User Only: Visible only to the course creator and the student who posted the comment.
Question: How do I delete or restore comments?**
**Answer: To delete a comment: Navigate to Products > Manage Comments.
Select the comment you want to delete.
Click Delete.
Question: What permissions do I need to manage or delete comments?**
**Answer: Only instructors or admins with course access can change visibility, delete, or restore comments in the manager.
Question: Can students include media in their comments?**
**Answer: Yes, members and participants can add images and GIFs directly into lecture comments. This is intended to facilitate clearer communication and richer discussions. Please note that supported formats include standard image types and GIFs, and there is a size limit to ensure optimal platform performance.
Question: What is the difference between “Hidden” and “Locked” comments?
Answer: While both options prevent students from adding new comments, the difference lies in visibility. “Hidden” completely removes the comment thread from the page, whereas “Locked” keeps all existing comments visible to students while disabling any new entries.
Question: Will I get a notification when a student leaves a new comment?
Answer: Yes. You can set up internal notifications under Settings > My Staff or create a custom Workflow using the “Membership New Comment” trigger. This ensures you can respond to student questions quickly without manually checking the manager every day.