¶ How To Create and Install a Live Chat Widget
Adding a Live Chat widget to your website is a powerful way to connect with visitors in real-time, enhancing customer service and engagement. This guide will walk you through the steps of setting up the Live Chat widget, customizing its appearance, and integrating additional features like business hours and conversational AI for a seamless user experience.
¶ Why Use the Live Chat Widget?
The Live Chat widget provides a simple way to:
- Engage Visitors : Connect with customers directly on your website.
- Boost Responsiveness : Offer real-time support, improving customer satisfaction.
- Personalize Experiences : Customize the widget’s look and behavior to align with your brand and service hours.
- File Sharing: Share files (images and PDFs) directly inside Live Chat, with support for up to 5 files per message (max 20MB each) on both desktop and mobile. The feature includes built-in checks for file size, type, and duplicates. Additionally, bots can be enabled to respond to images sent by users.
¶ 1. Setting Up the Live Chat Widget
1- Access the Chat Widget Setup :
- Navigate to Sites > Chat Widget within your account.
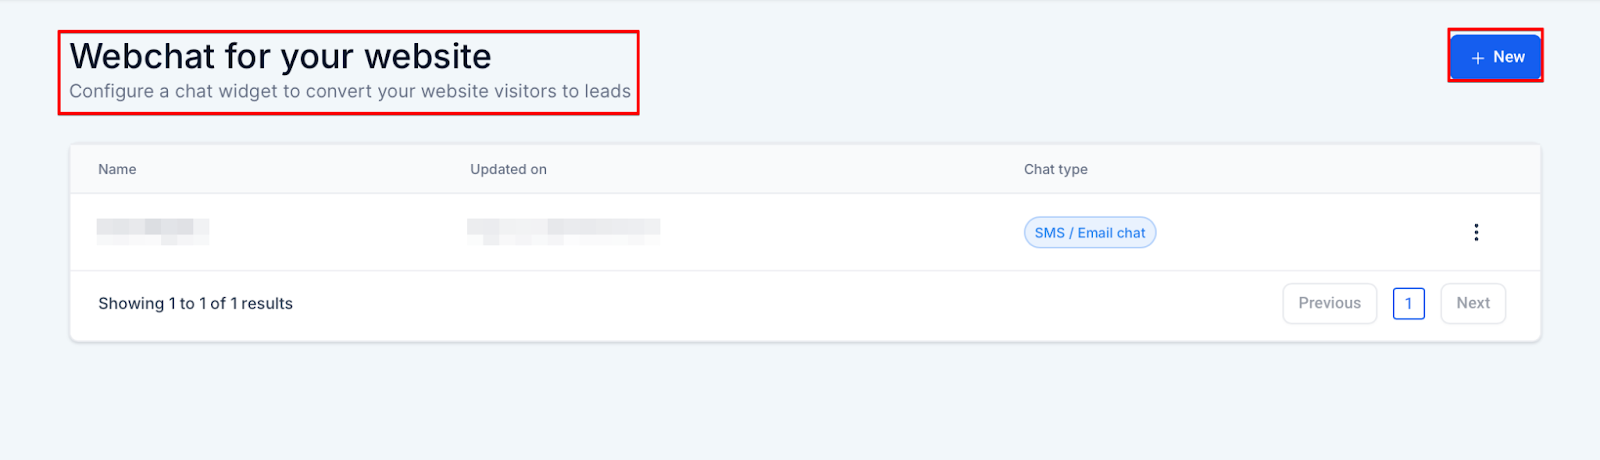
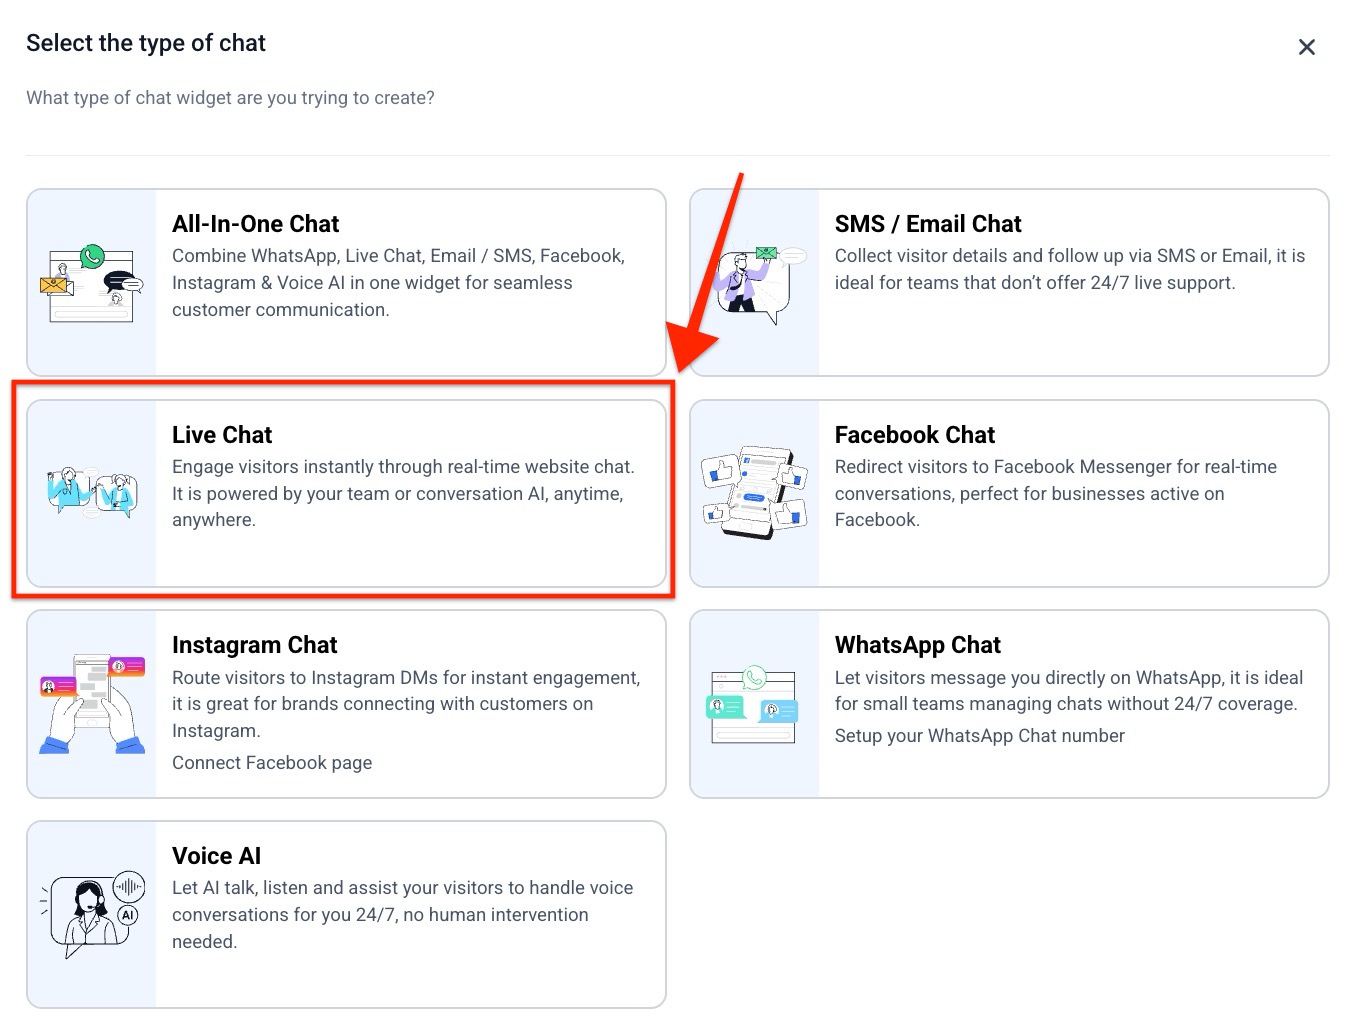
2- Select Chat Type :
- In the Chat Type section, select Live Chat to enable real-time messaging.
3- Save and Preview :
- Once Live Chat is selected, save your settings to activate the widget. A preview will show you how it will appear on your website.
¶ 2. Customizing Widget Appearance
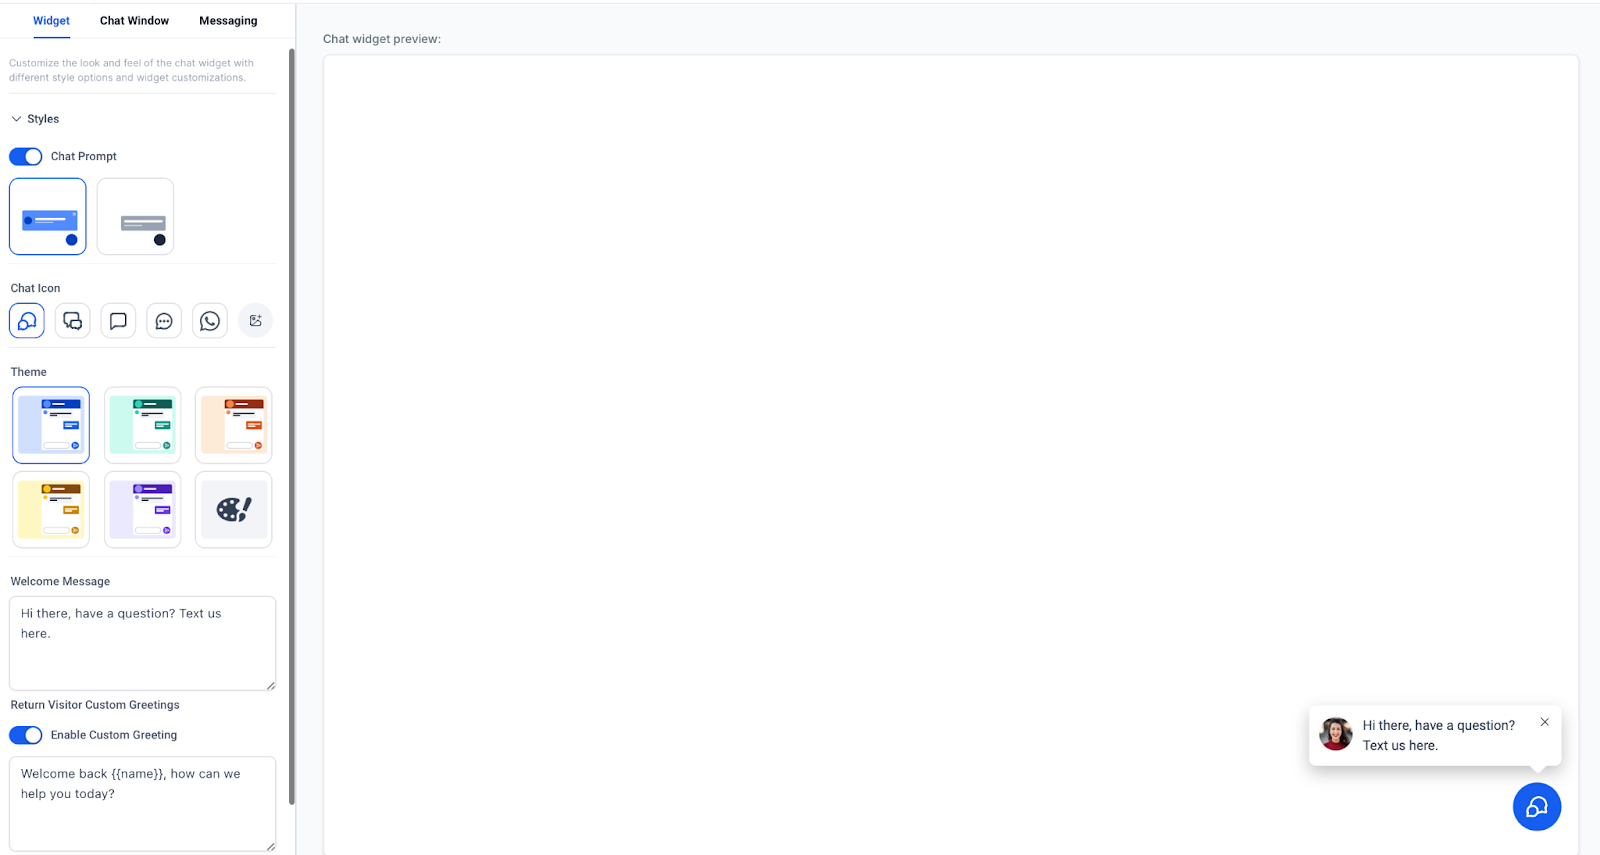
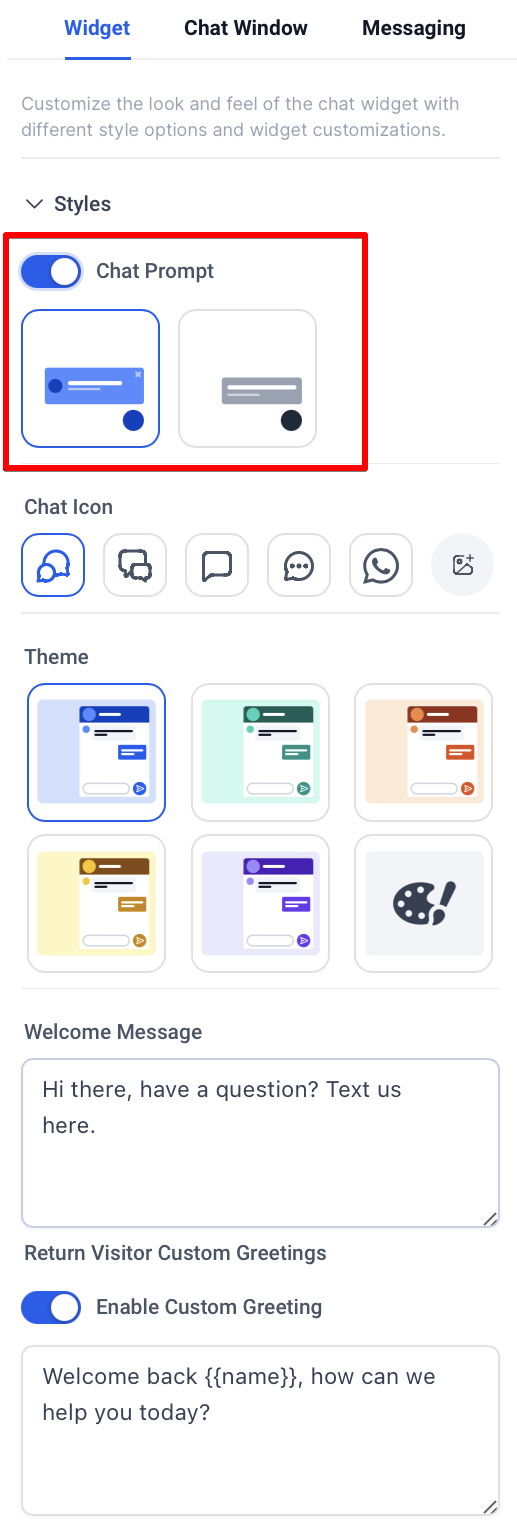
1- Enable Chat Bubble :
- Use the Enable Chat Bubble option to display a chat bubble icon on your site. If disabled, only the circular chat icon will remain.
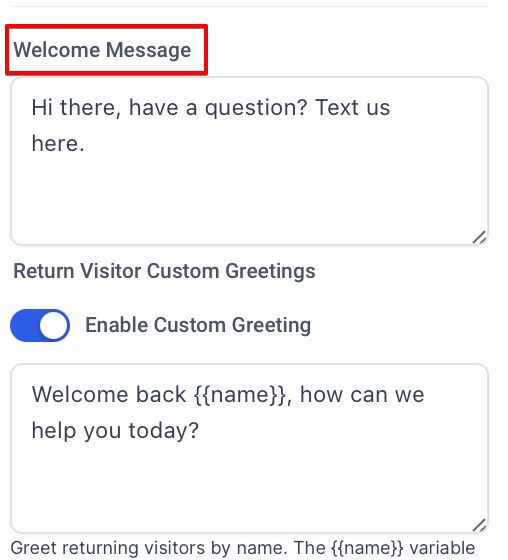
2- Set Intro Message :
- Customize the Intro Message that visitors see before initiating a chat.
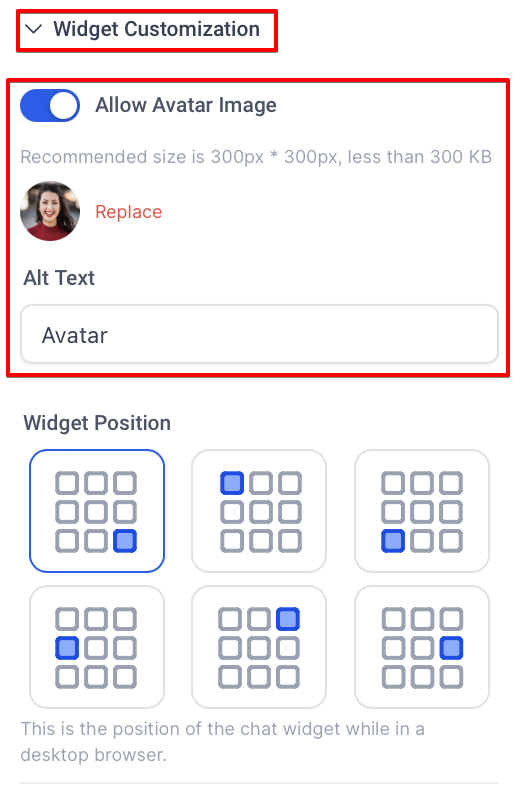
3- Upload an Avatar :
- Add a personal touch with an avatar for team members, or select from pre-set images.
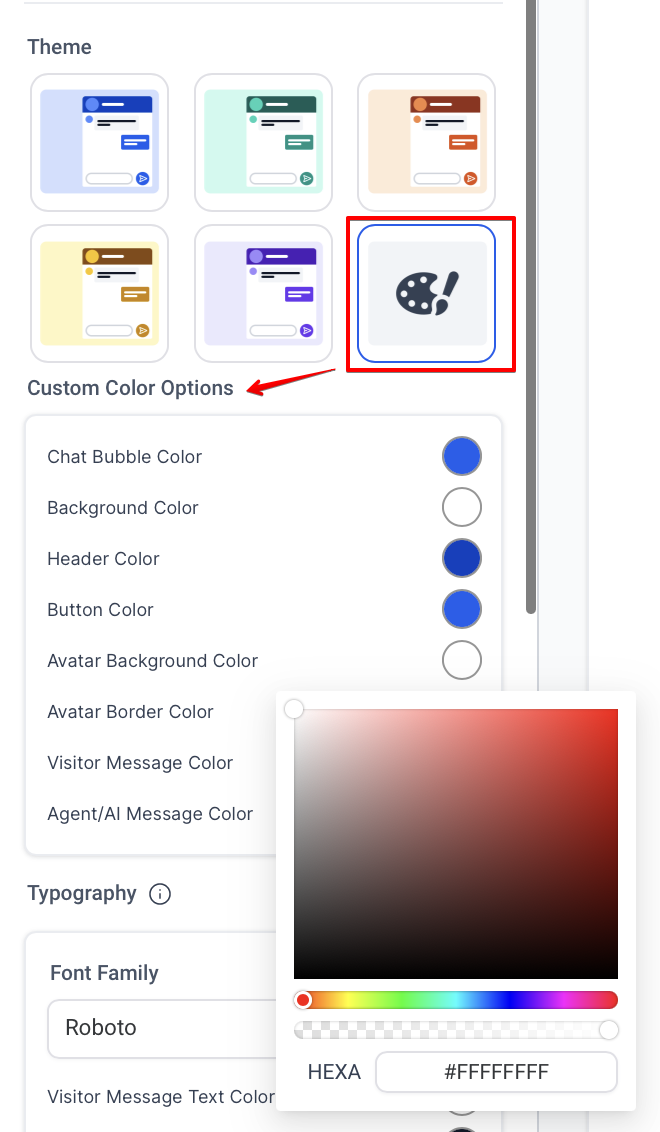
4- Adjust Colors and Fonts :
- In the Widget Window settings, you can change widget colors, font styles, and branding. These options ensure the widget reflects your brand identity.
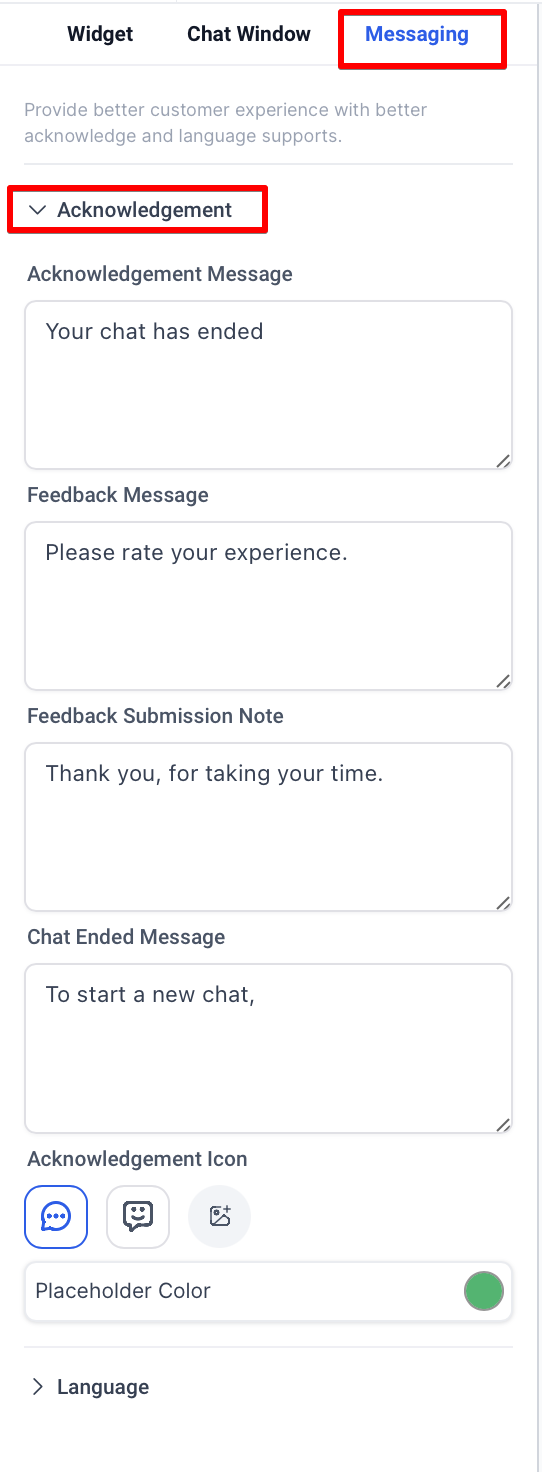
5- Configure Acknowledgement Messages :
- Enter messages for Greeting, Chat Ended, and Feedback to personalize the interaction.
¶ 3. Setting Business Office Hours
1- Enable Business Hours :
- Go to Sites > Chat Widget, select the Chat Window tab, and activate Business Office Hours.
2- Define Office Hours :
- Specify time ranges for each day (Sunday to Saturday) to control chat availability.
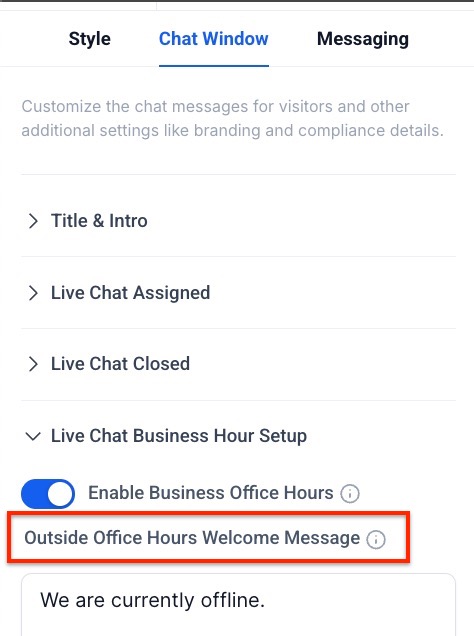
3- Customize Messages :
- Set a Welcome Message for outside business hours, such as “We are currently offline.”
4- Automate Contact Form :
- When a visitor messages outside of office hours, a contact form will automatically display, allowing them to leave their details for follow-up.
5- Additional Options
1- Notification Sound
- In Chat Window, go to Additional Options to toggle Notification Sound , which alerts visitors for more messages.
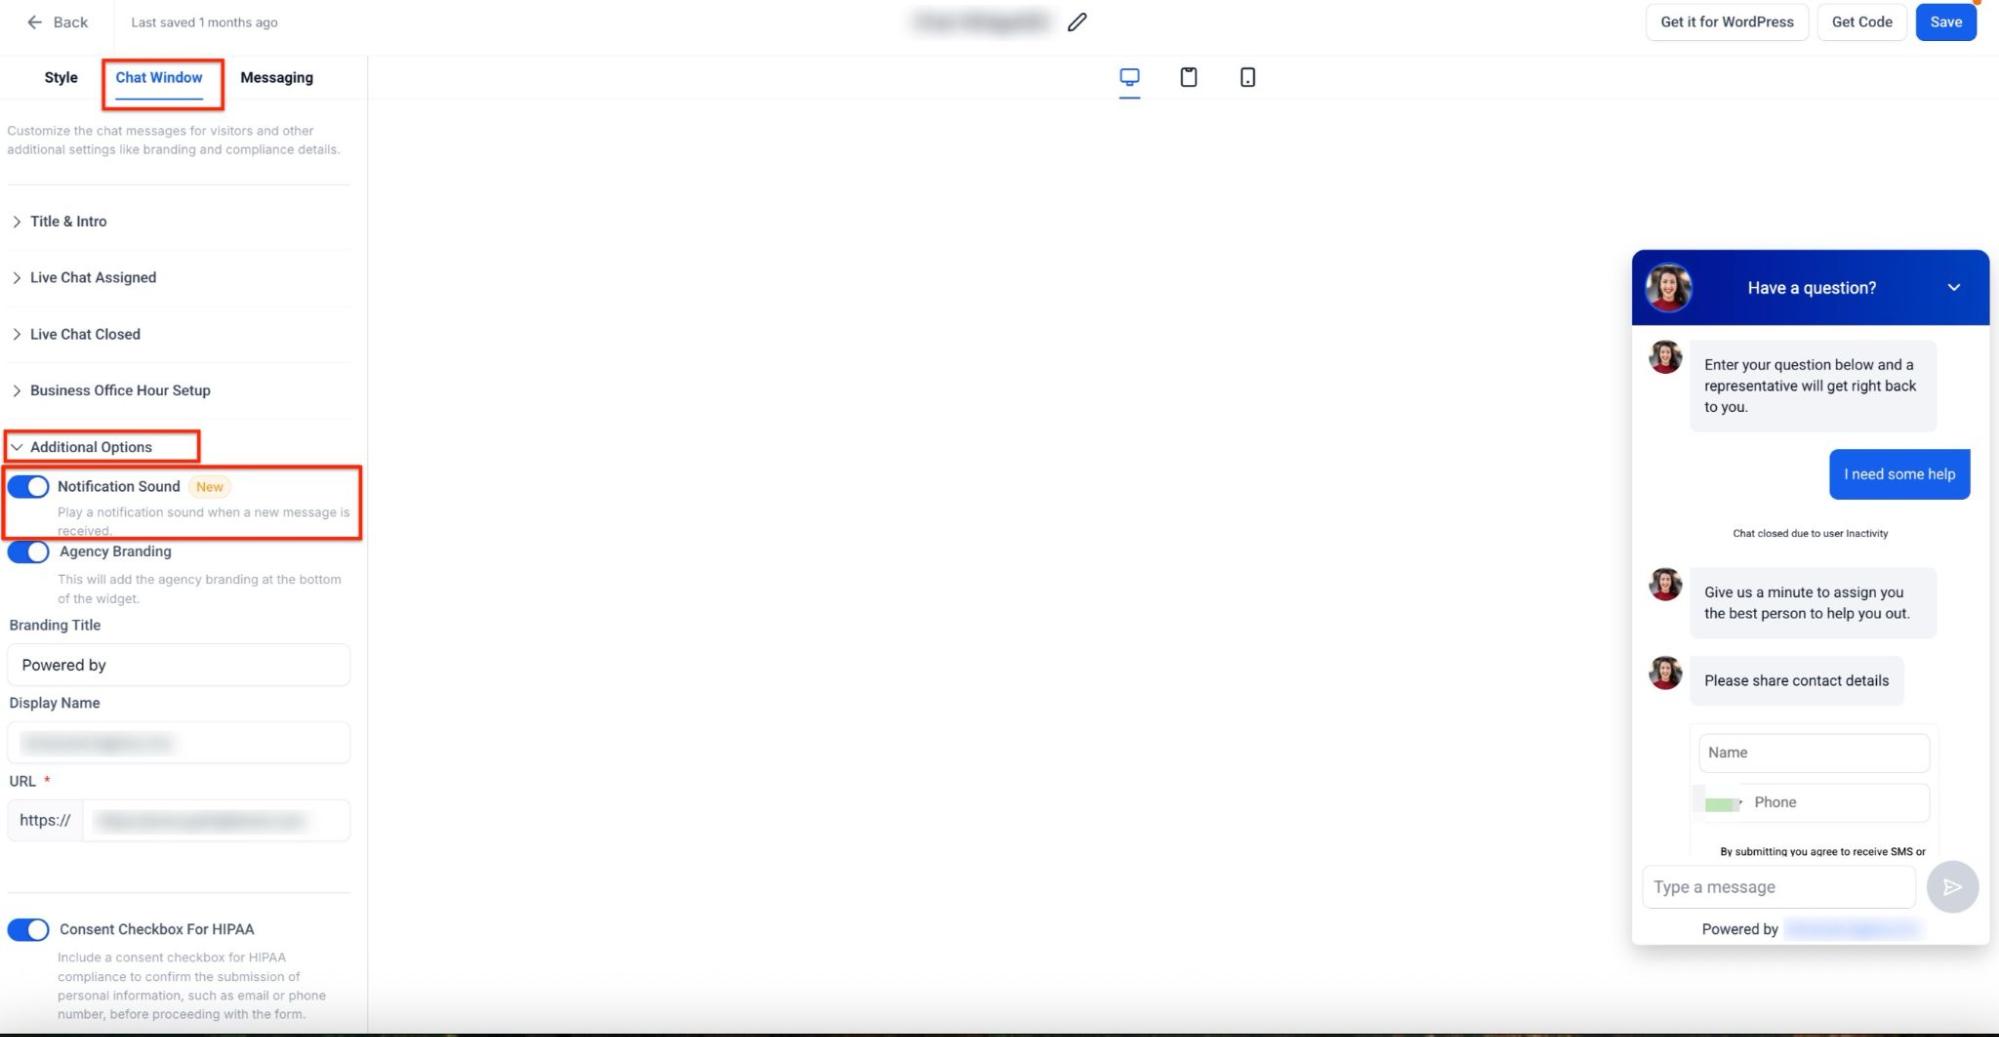
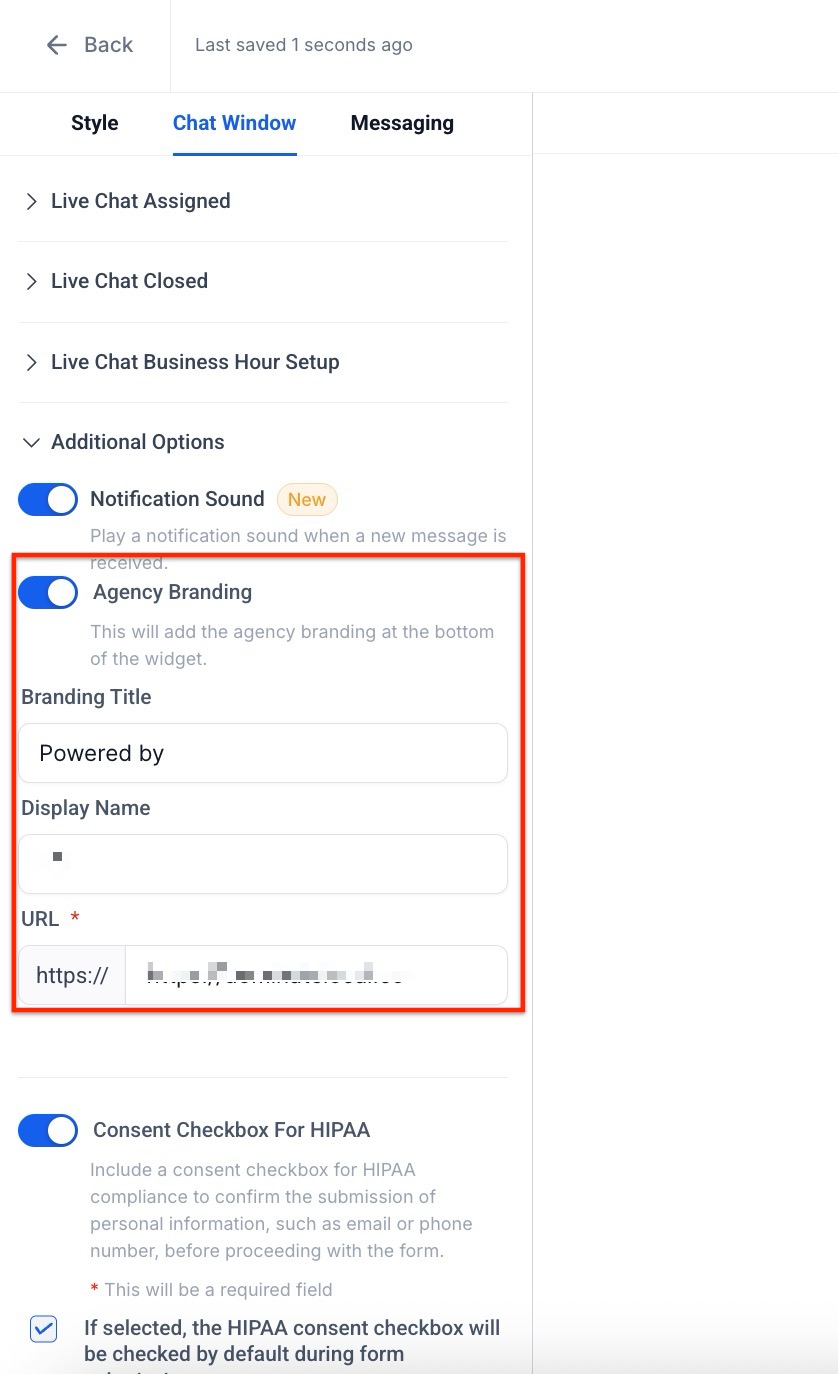
2- Agency Branding
- In Additional Options, you also have the option to add your Agency Branding. This will show your branding including the Title, Display Name and Image that you will add.
¶ 4. Integrating Conversational AI
1- Access Conversational AI Settings :
- Head to Settings > Conversational AI to enable automated responses for Live Chat.
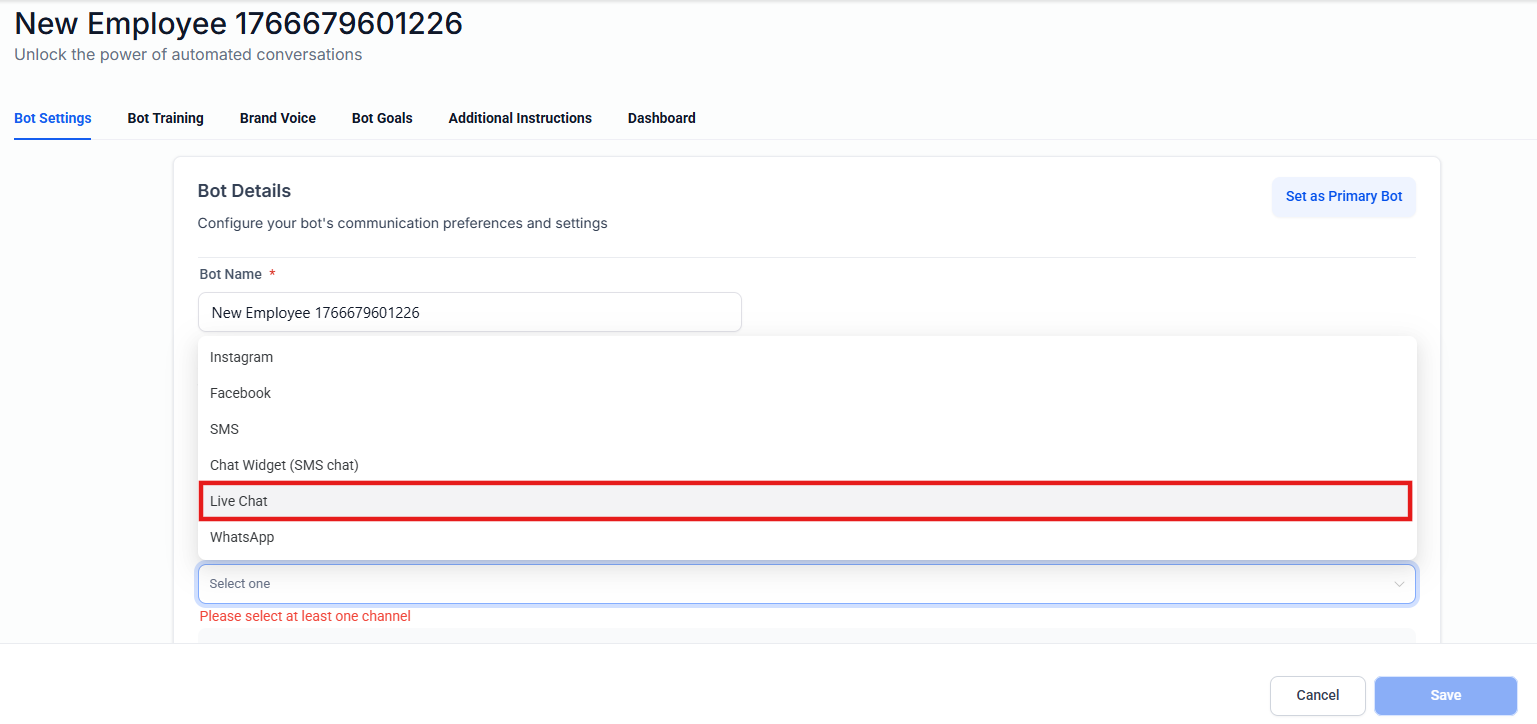
2- Configure AI Responses :
- Choose between Live Chat or SMS Widget and define response behaviors.
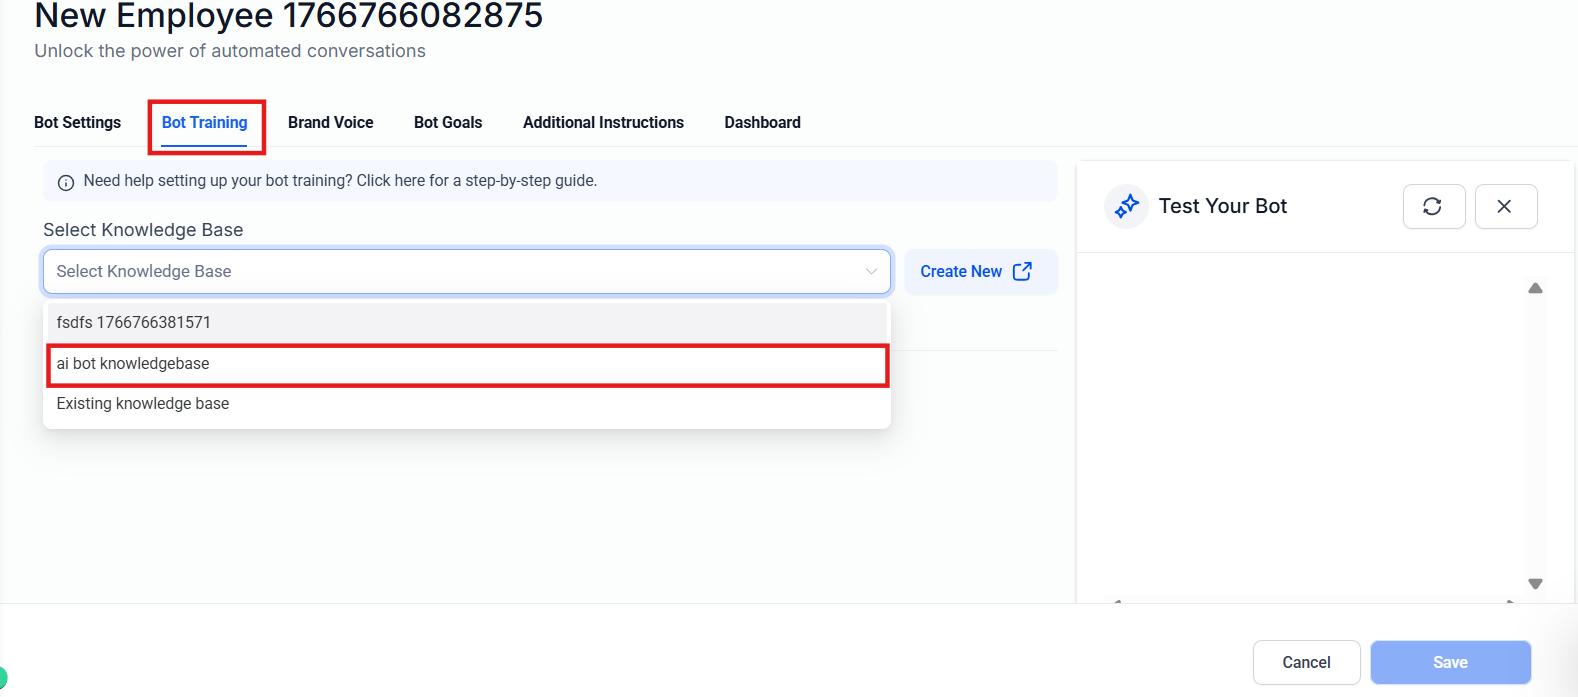
3- Train the Bot :
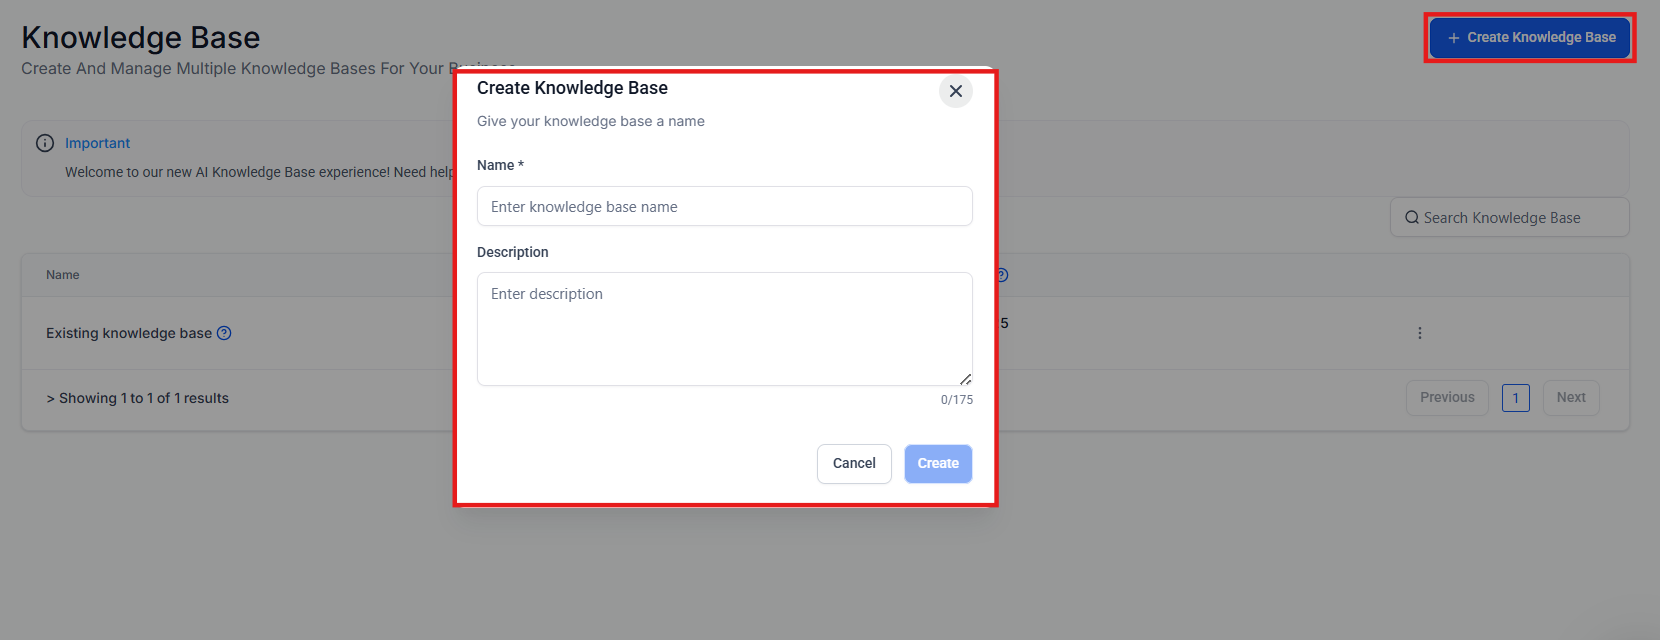
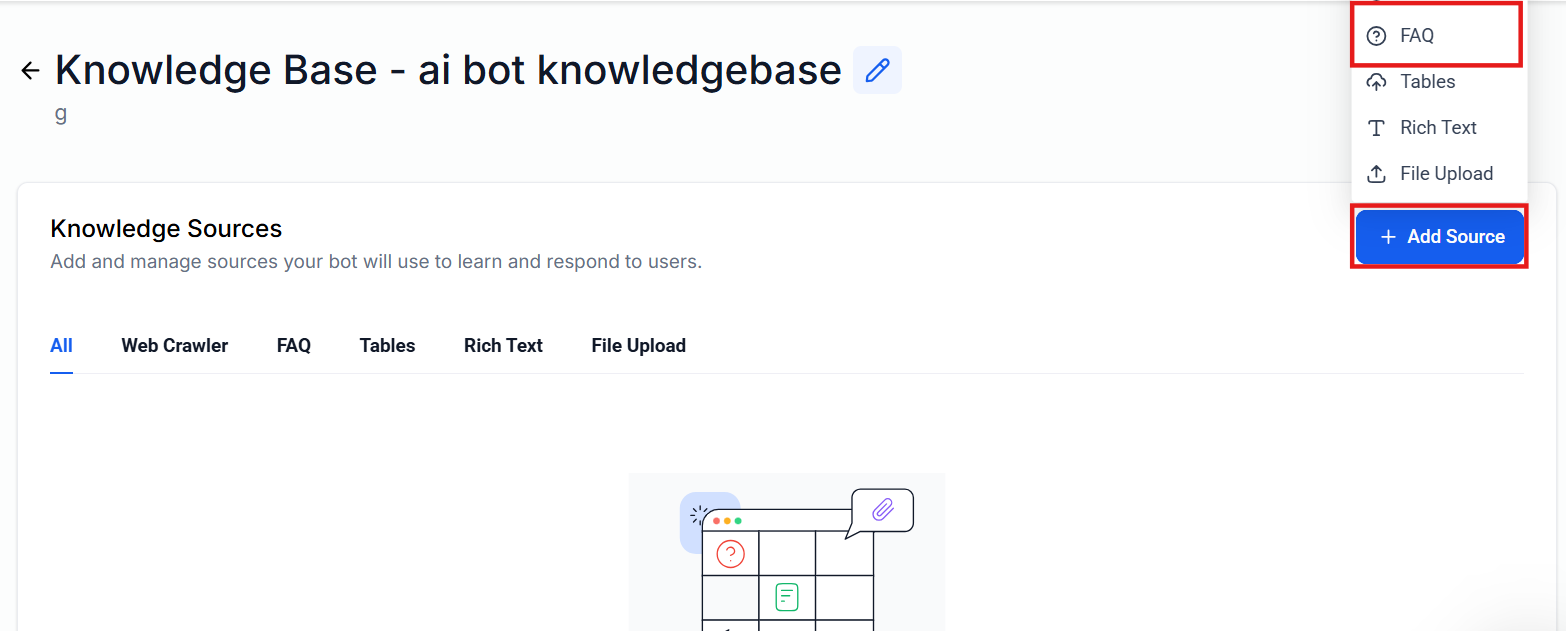
- You can add Q&A entries to your knowledge base and integrate that knowledge base into your bot through bot training , or enable the bot to learn directly from your website by providing its URL.
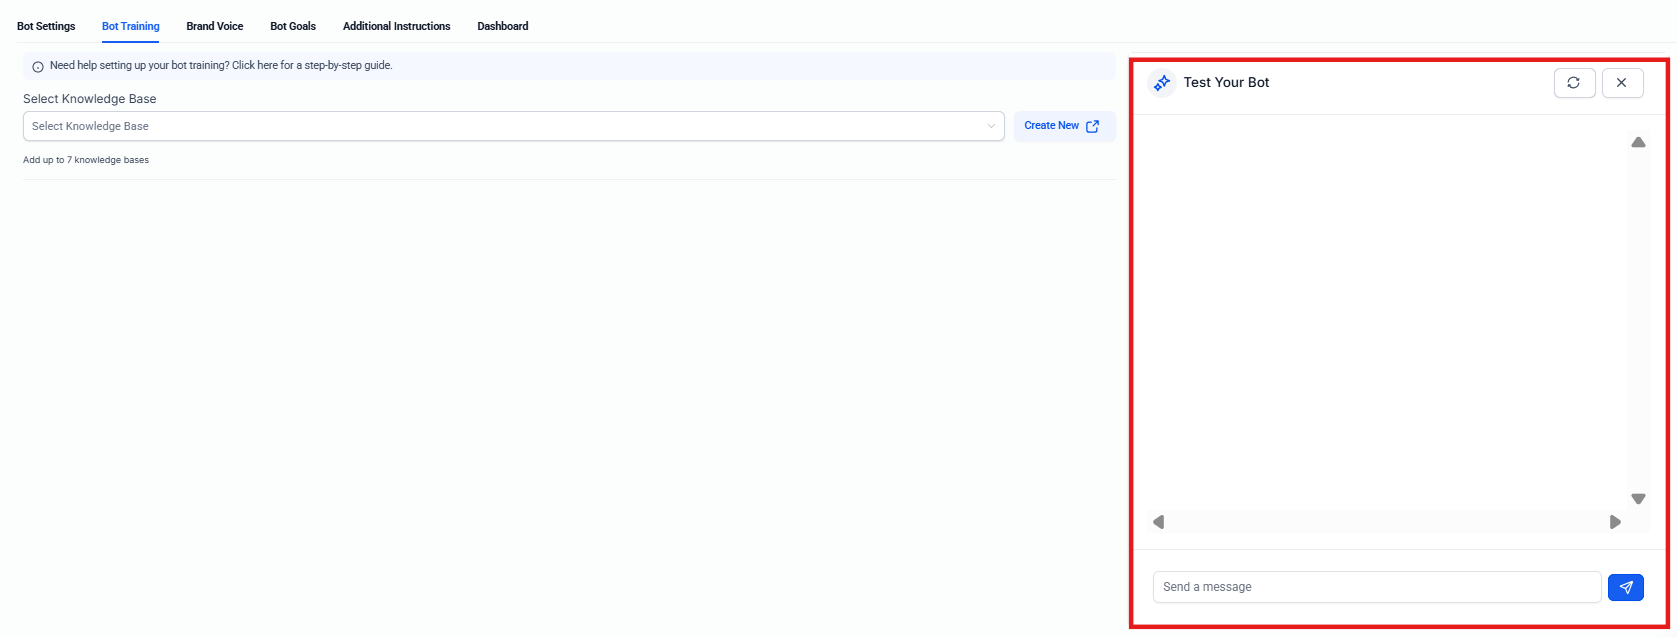
4- Testing the Bot :
- Visit the Bot Trial tab to test and refine responses before going live.
5. Feature Location in Conversations
The Live Chat widget integrates within the Conversations module, providing:
- Request Contact Details : Prompt visitors for contact information during chat for personalized follow-up.
- End Live Chat : Close the conversation when an issue is resolved, ensuring efficient chat handling.
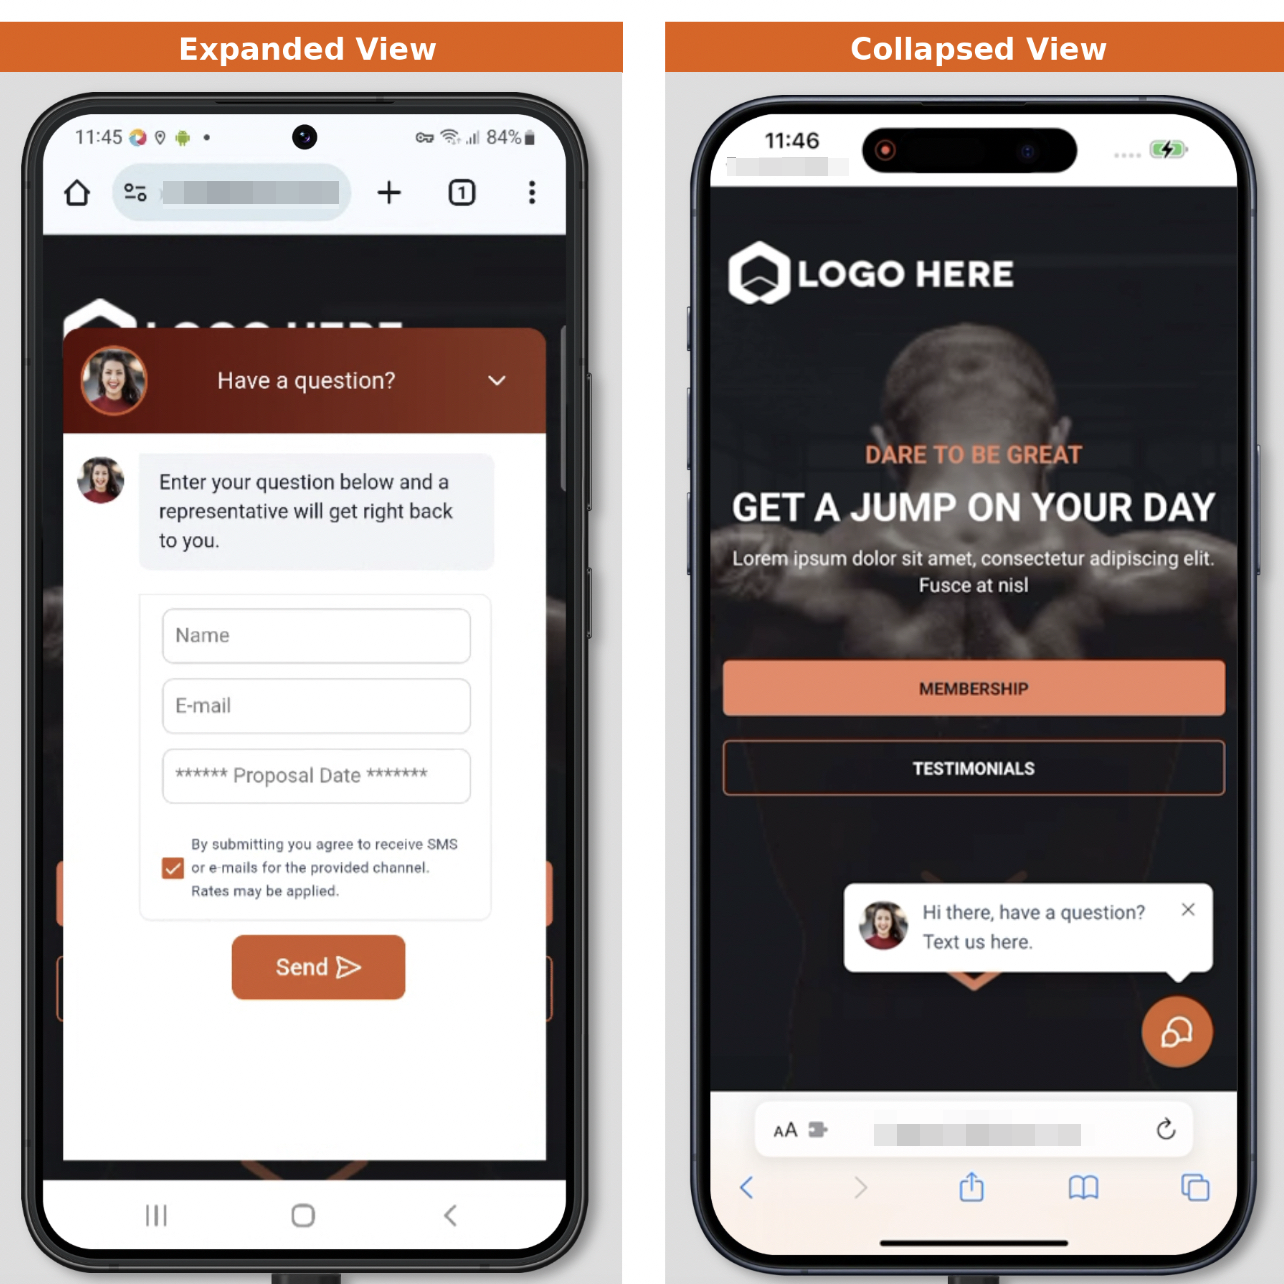
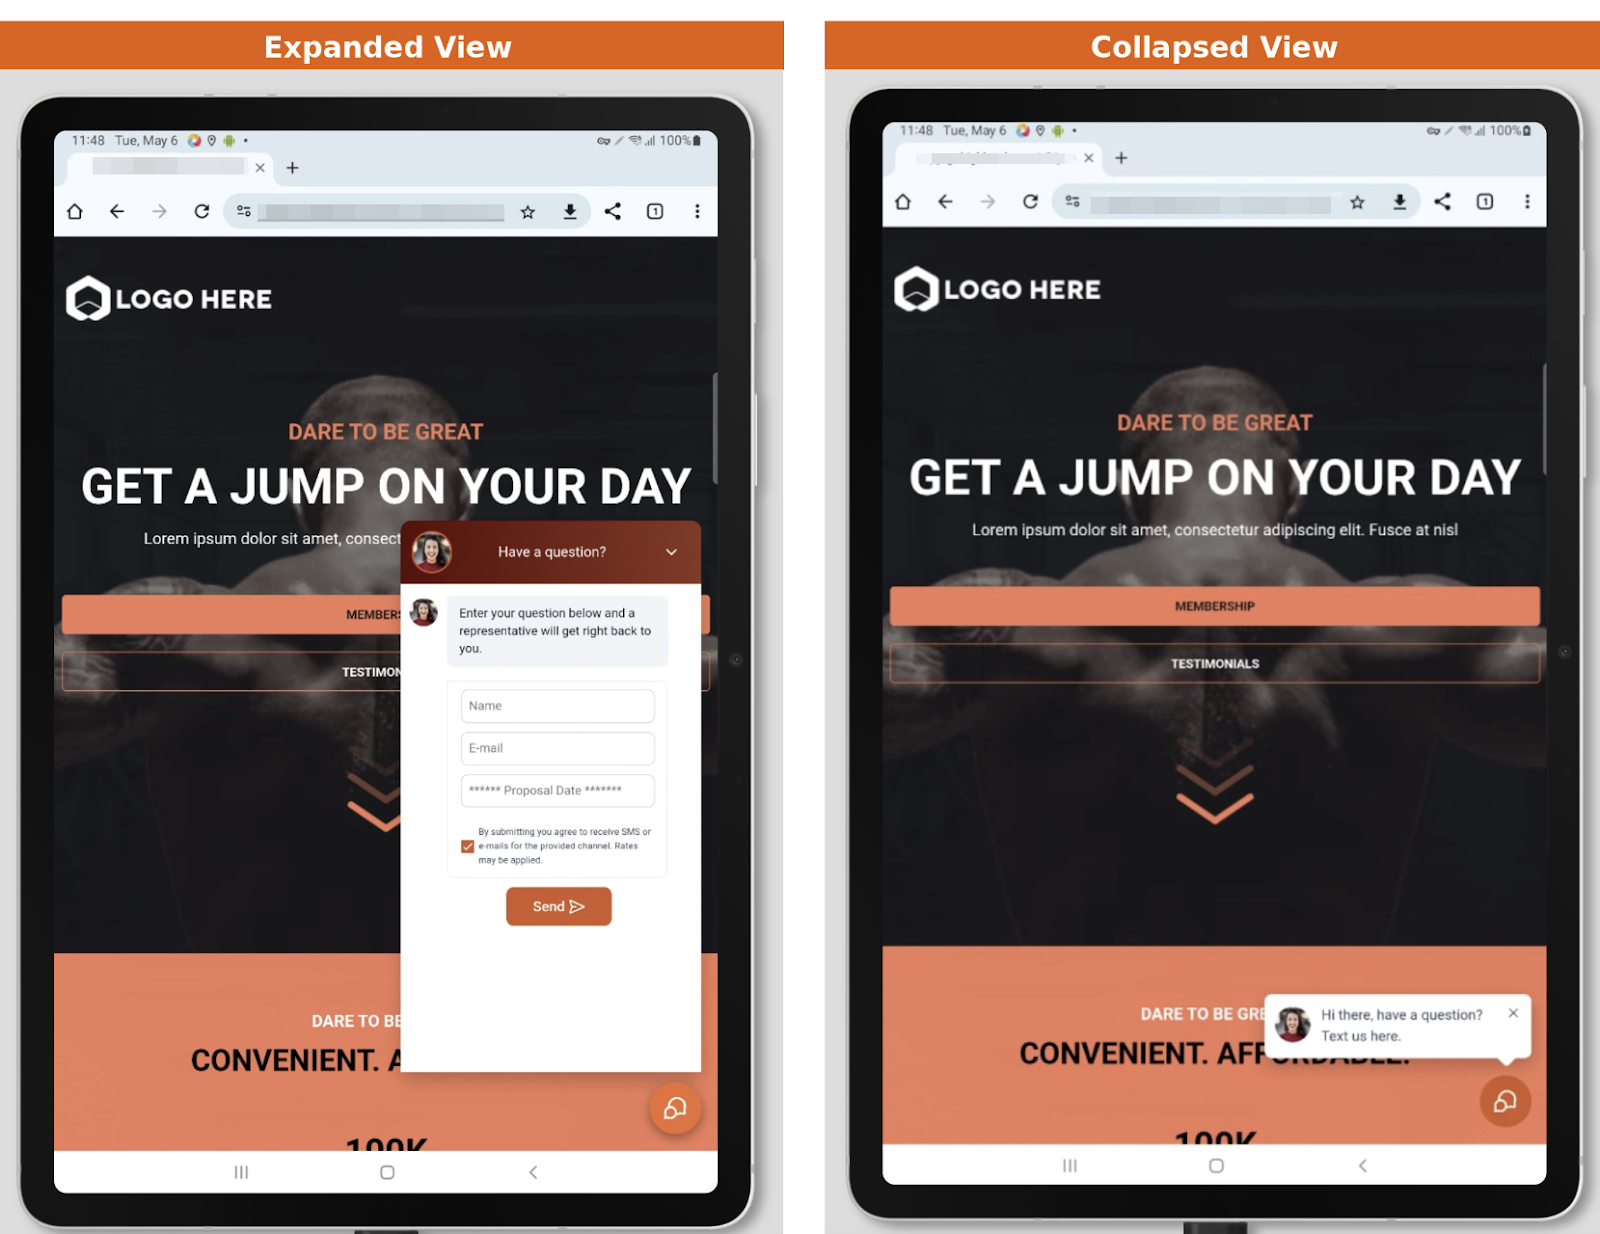
6. Chat Widget is Optimized for Different Screen Sizes
The Chat Widget is fully responsive, ensuring it adapts smoothly to smaller mobile devices and tablets. This allows the widget to support screen widths as low as 250px, making the layout and input fields automatically adjust for a seamless user experience across all devices, from mobile phones to tablets.
¶ FAQs
Question: Can I set different availability hours for each day of the week?**
**Answer: Yes, you can customize hours for each day, and copy settings across multiple days if needed.
Question: What options are available if my team is offline?**
**Answer: You can set a welcome message and configure a contact form for visitors to leave their details when messaging outside of business hours.
Question: Is it possible to add AI responses to the chat?**
**Answer: Yes, use the Conversational AI feature to enable automated responses, which can be trained and customized for common questions.
Question: How do I install the widget on an external site like WordPress?**
**Answer: Copy the widget code from the builder and paste it into your website’s footer or body. On WordPress, you can also use a plugin to insert the code.
Question: Can I personalize the chat experience for returning visitors?**
**Answer: Yes, enable the Return Visitors option to display tailored messages for users who have previously chatted on your site.
Question: How do I share files in the Live Chat widget, and what types of files can I send?**
**Answer: To share files in the Live Chat widget, simply click the paperclip icon or drag and drop files from your computer or mobile device. You can send up to 5 files per message, with each file being under 20MB. Supported file types include images (.jpg, .jpeg, .png, .heic) and PDFs (.pdf). Images will show a preview in the chat, while PDFs and HEIC files will display a file name with a download option.

Question: Can bots respond to images sent by visitors?**
**Answer: Yes, when enabled, bots can be configured to respond to images sent by users within the Live Chat.
Question: What is the difference between the “Chat Bubble” and the standard chat icon?
Answer: The chat icon is the small circular button visitors click to open a chat. If you enable the Chat Bubble , an additional introductory message box will appear next to the icon to catch the visitor’s eye before they even click.