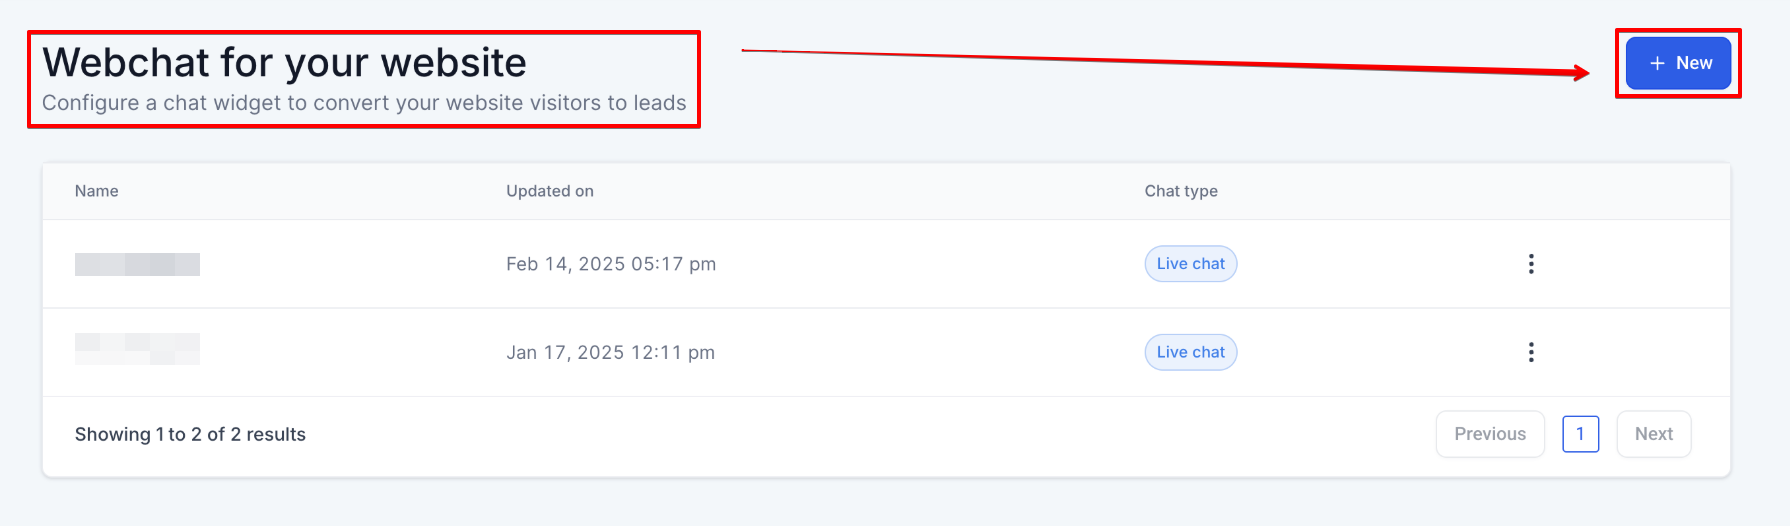
¶ All In One Chat Widget Setup
All In One Chat Widget
The All-in-One Chat widget provides a seamless communication experience by allowing you to manage Live Chat, Email, and WhatsApp conversations all from one interface. This guide will walk you through setting up and troubleshooting the All-in-One Chat widget for an optimized customer support experience.
¶ What is the All-in-One Chat Widget?
The All-in-One Chat widget allows businesses to integrate multiple communication channels (Live Chat, Email, and WhatsApp) into a single widget. This allows visitors to choose their preferred communication method seamlessly without the need to manage multiple widgets.
¶ Key Benefits of the All-in-One Chat Widget
- Manage Multiple Channels : Handle Live Chat, Email, and WhatsApp conversations from one widget.
- Consistent Branding : A unified color scheme ensures a consistent experience for your visitors.
- Personalized User Experience : Customize the initial welcome message to engage users better.
- Easy Setup : Choose the channels you want and set up in a few simple steps.
¶ Prerequisites for Setting Up the Chat Widget
¶ 1. Account Access
Ensure you have the appropriate permissions to create or edit chat widgets in your account.
¶ 2. Active WhatsApp Number (Optional)
If you plan to use WhatsApp as a communication channel, ensure you have an active WhatsApp number configured in your account.
¶ Step-by-Step Setup of the All-in-One Chat Widget
Log In to Your Account**
**Start by logging into your account.
Navigate to the Chat Widget Section**
In the left-hand navigation menu, go toSites → Chat Widget**.
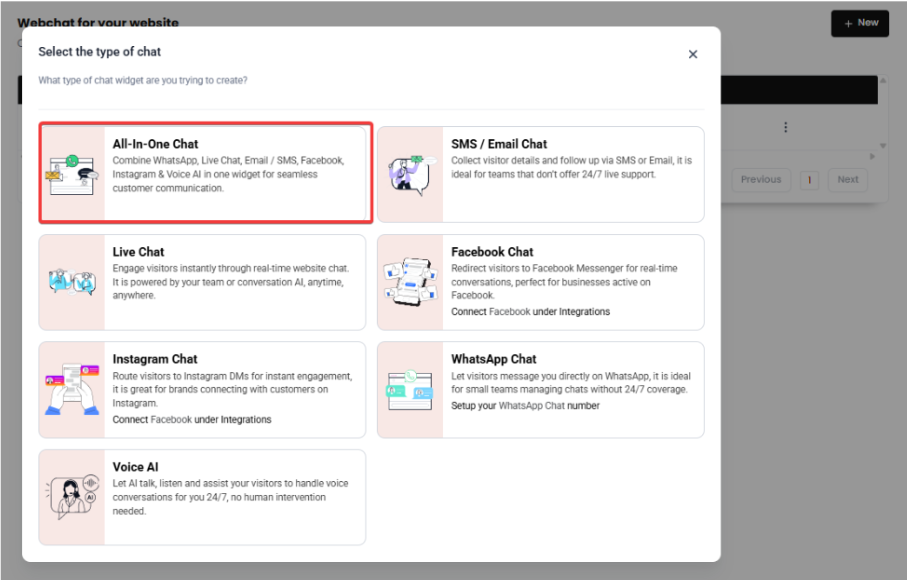
Create a New Chat Widget**
Click on “Create New Widget” and selectAll-in-One Chat** from the list of chat types.
- Note : If you do not see “All-in-One Chat,” ensure your account is updated. Refresh the page or log out and back in if necessary.
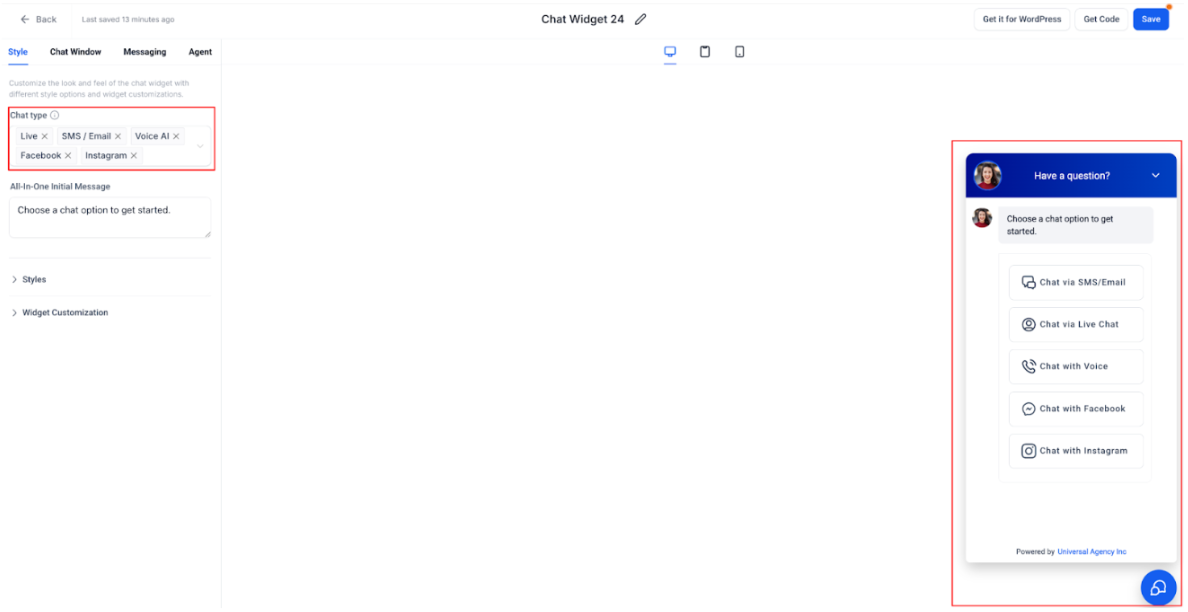
Select Communication Channels
**
**Choose the communication channels you want to enable. If you have an active WhatsApp number, it will appear as an option.
- Live Chat: Enable this option if Live Chat is part of your communication strategy.
- SMS/Email: Activate SMS or Email if these channels are part of your customer communication setup. Ensure your email settings are configured correctly.
- Voice AI: If enabled, verify that your voice assistant or IVR system is properly configured.
- Facebook: Enable this option if you want to integrate Facebook Messenger for real-time conversations.
- Instagram: Activate Instagram DM to allow visitors to connect via Instagram.
- WhatsApp: If WhatsApp is enabled, ensure your WhatsApp number is verified to allow smooth communication.
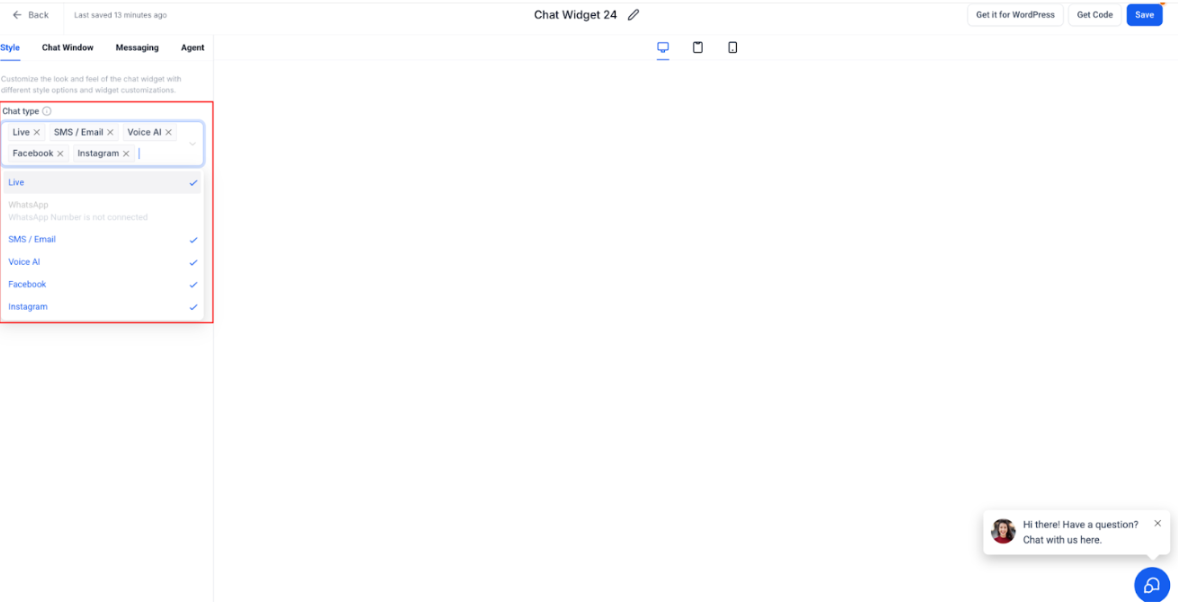
Once selected, the preview updates instantly to reflect the chosen channels, and only the selected options will be visible in the All-in-One Chat Widget for website visitors.
Notes:
1-The Facebook/Instagram options will only appear if the respective pages/accounts are connected.
2-Voice AI will be available only if it has been configured in the sub-account.
3-WhatsApp can be selected only if the WhatsApp number is connected to the sub-account.
Customize Widget Settings
- General Settings : Name your widget (e.g., “Main Website Widget”) and configure the widget color to match your branding.
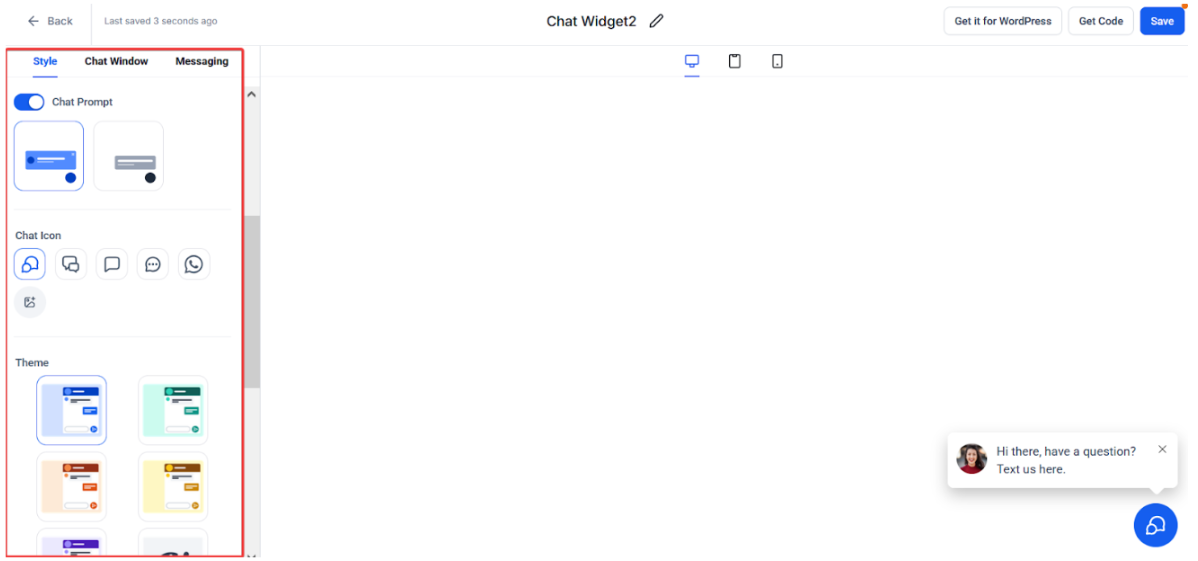
- Channel Settings :
- For Live Chat , set a display name, greeting message, and offline behavior.
- For Email Chat , customize the message and form fields.
- For WhatsApp , confirm your number and set a default greeting message.
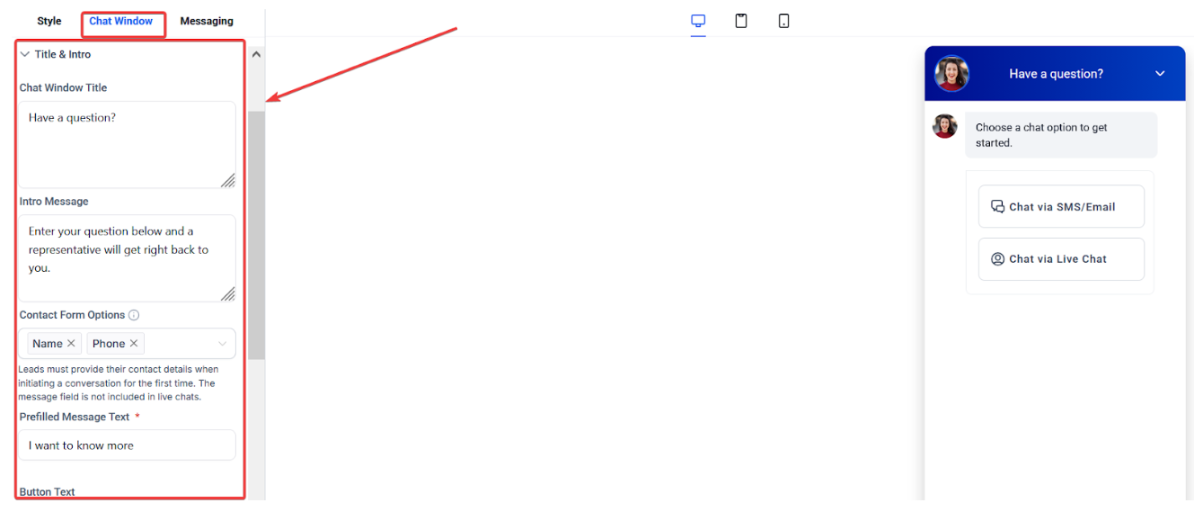
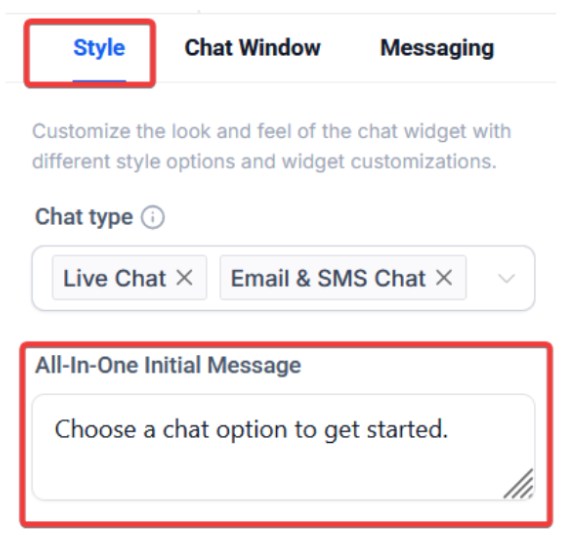
Set Initial Message**
**Customize the message that appears when visitors first open the widget (e.g., “Hello! How can we assist you today?”).
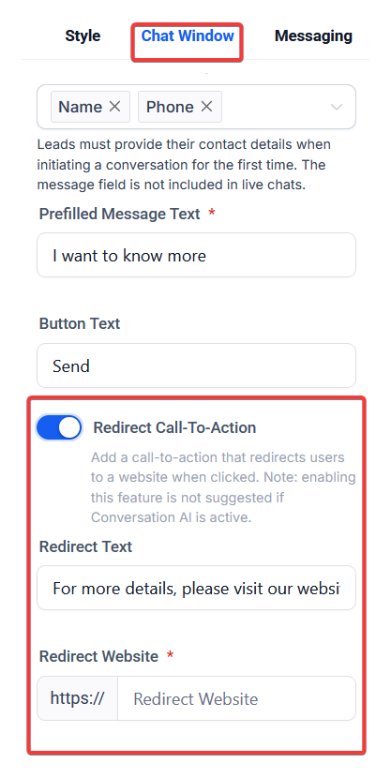
Redirect Call-to-Action
Add a custom message and link that appears after the contact form. Not recommended for use with Conversation AI.
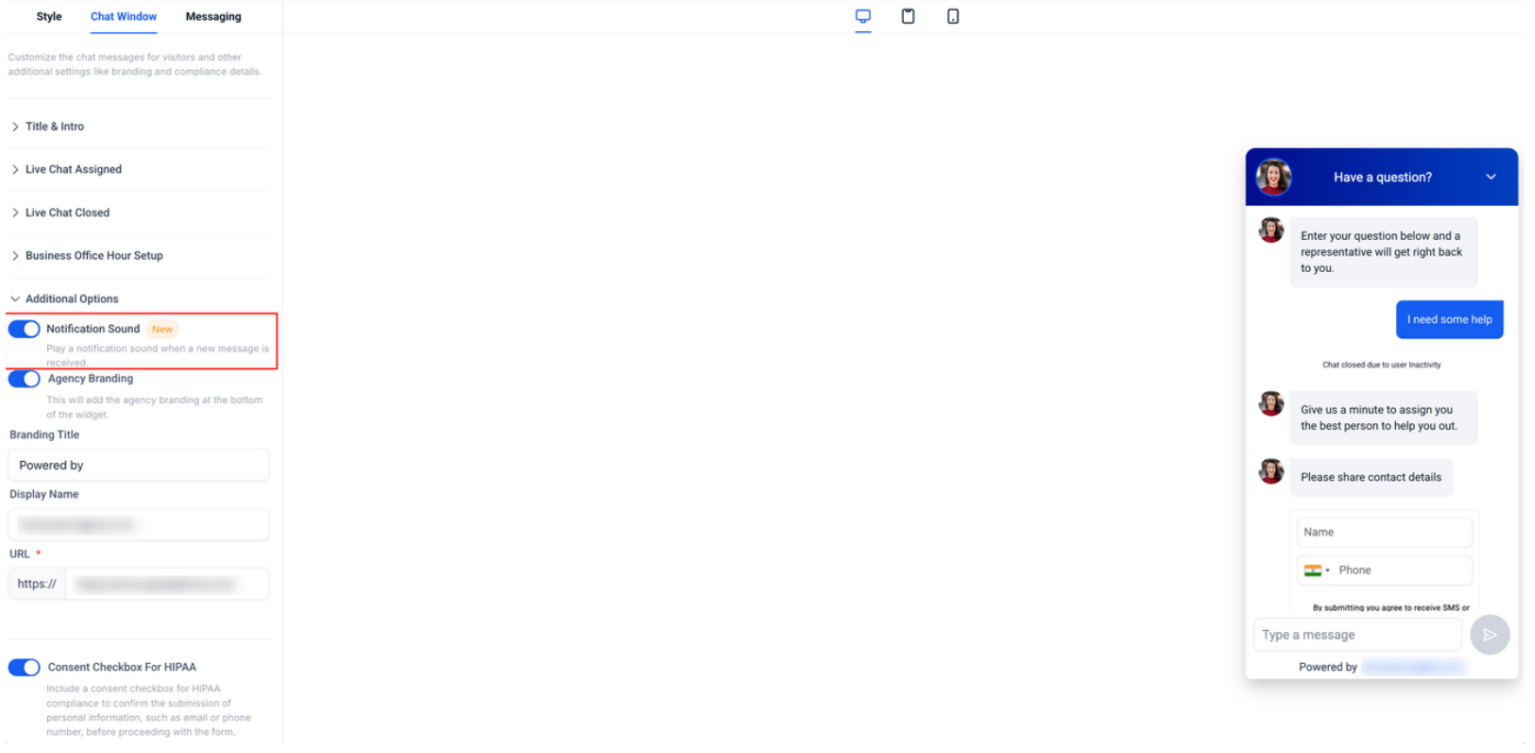
Chat Widget – Notification Sound Option
The Notification Sound in the Chat Widget allows LeadMagicX users to manage how visitors are alerted to new messages. By offering a sound toggle option, it ensures a customizable communication experience that balances engagement and user comfort.
Save and Preview**
ClickSave** to store your settings. Preview the widget to ensure everything functions correctly across all channels.
¶ Using the All-in-One Chat Widget
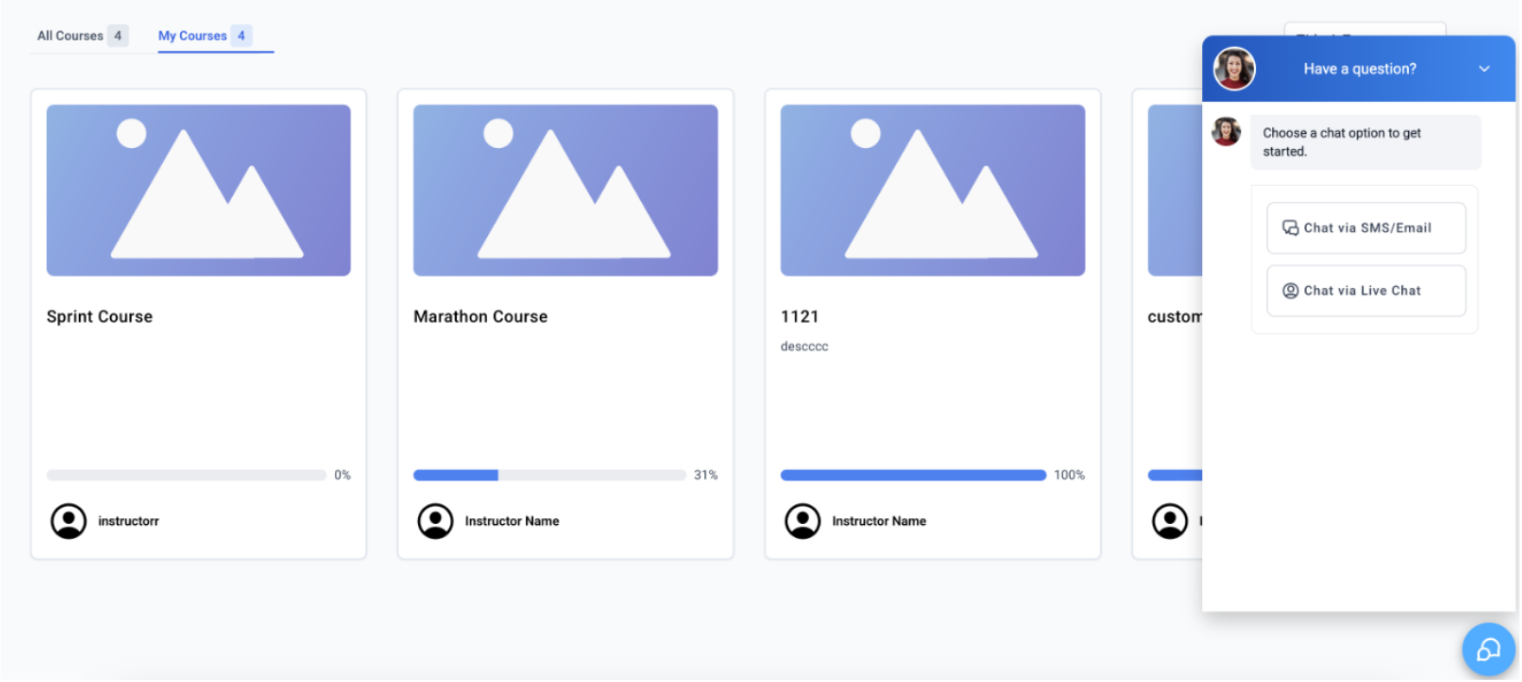
- Switching Between Channels : Visitors can easily switch between Live Chat, Email, or WhatsApp using the Back button in the chat header.
- Active Conversations : Conversations remain active until manually closed by the user or automatically after a set period of inactivity.
- Contact Form Fields : Standard fields like “Message” will be available for Email and WhatsApp chat to collect user information.
This allows you to integrate a Chat Widget into the Client Portal, including specific modules like Communities, Courses, and Affiliates, enabling real-time communication within the portal. By adding the Chat Widget to selected child apps, users can easily access support and interact without leaving the app. This setup improves user engagement and streamlines support workflows.
How to Use:
- Navigate to Client Portal → Settings → Chat Widgets.
- Choose your widget from the dropdown.
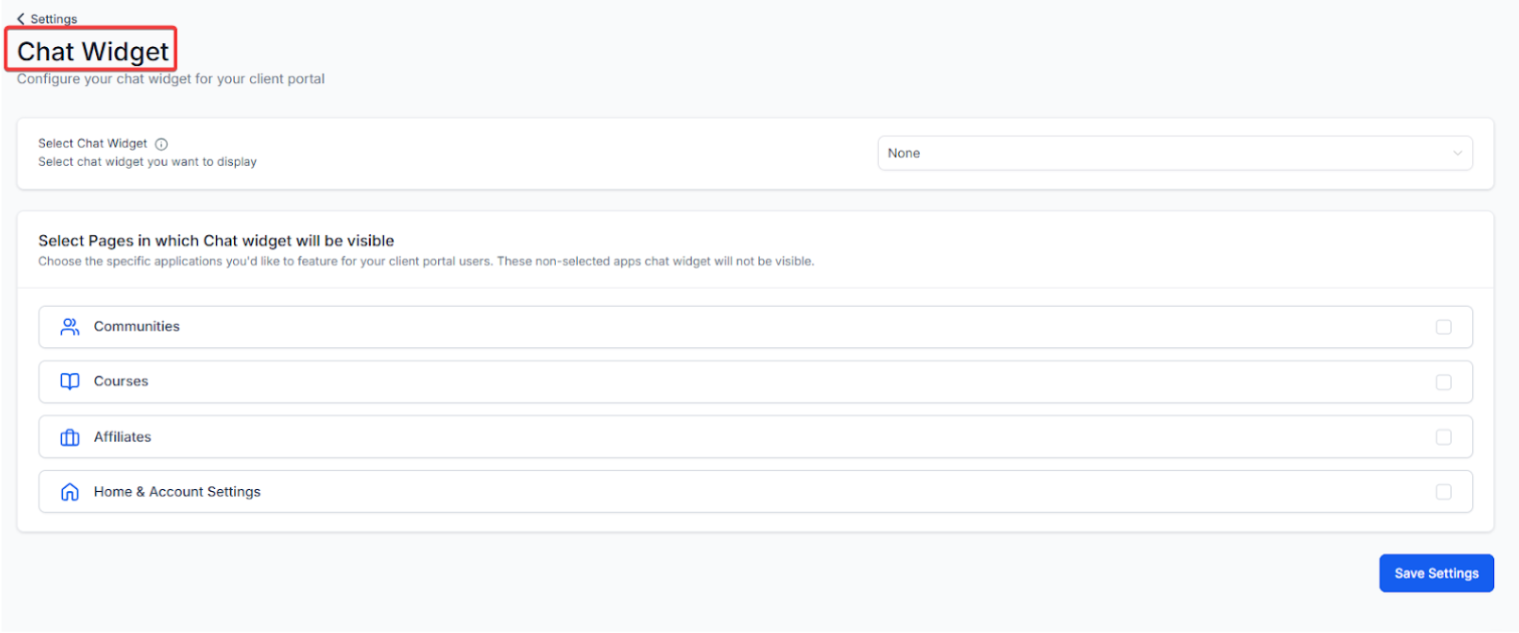
- Select the child apps where you want the widget to appear.
- Click “Save Settings.”
Note : Only one chat widget can be added to the Client Portal at a time. You can choose where it appears, but multiple widgets are not supported.
¶ FAQ’s
Question: What if I don’t have a WhatsApp number?**
**Answer: If you don’t have a WhatsApp number, you can still use the widget with just Live and Email Chat. WhatsApp will be hidden until a valid number is added.
Question: Can I customize the color for each channel?**
**Answer: The All-in-One Chat widget uses one unified color scheme to maintain consistency across all channels.
Question: Do I need separate permissions to set this up?**
**Answer: If you have access to Sites → Chat Widget , you should be able to create and edit widgets. If you don’t see this option, please contact your admin.
Question: How do I end a Live Chat session?**
**Answer: You can end a session from the Conversations panel or it will automatically close after the timeout period
Question: How does the “Voice AI” channel work inside a text-based widget?
Answer: When a user selects the Voice AI option, the widget can initiate a web-call or provide a “Click-to-Call” button that connects them to your AI Voice Assistant. This allows the user to have a spoken conversation to resolve complex issues while staying within the browser.