¶ Masking Sender Emails - From Name and Address
Masking Sender Emails - From Name and Address
There are several ways that you can specify the “From” information for emails within LeadMagicX. Both the email address and the sender name can be customized. There are many reasons you may want to do this. Perhaps your SMTP settings have a general company email like [email protected], but you want a campaign or workflow to send emails from [email protected], or from a specific user’s email address like [email protected]. Follow these steps below to learn how the determines which email address to use by default, and how you can customize your options:
¶ How To Determine Which Configured Sender Email Your Leads Will be Receiving Emails From
- Using the grid below, you can see how to determine what to use as the sender email address:
| Cases | Unassigned Contact | Assigned Contact |
|---|---|---|
| Manual Emails | Logged in user email | 1st priority |
| Location Email | N/A | N/A |
| Assigned User Email | N/A | N/A |
| Automated Emails | Campaign/workflow settings | 1st priority |
| Assigned User Email | N/A | 2nd priority |
| Location Email | 2nd priority | 3rd priority |
| Review Request Emails | We will always use the Logged in user email as the sender’s email |
Appointment request emails
(calendar settings->3. Confirmation)| We will use [email protected] depending on the subdomain you set up for the location, or the SMTP-integrated email.
¶ Checking if Contacts Are Assigned or Unassigned in LeadMagicX
- Contacts/Smart Lists:
- Navigate to Contacts > Smart List
- Search for the contact using the Quick Search feature.
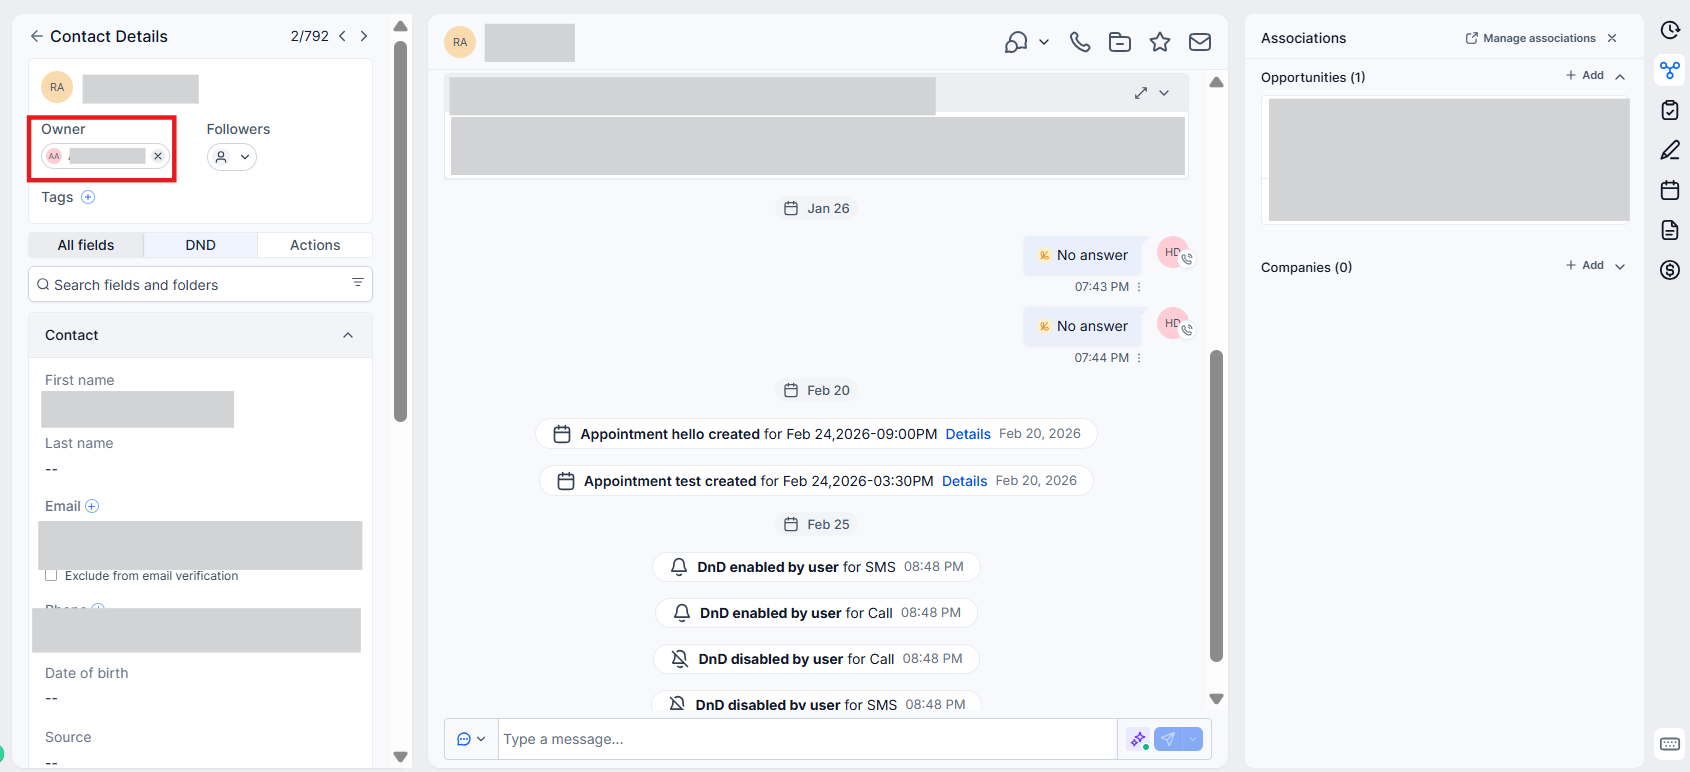
- Within the Contact record, you’ll see “Owner” to see if the Contact is unassigned or the assigned user’s name if they are assigned to someone.
- Conversations
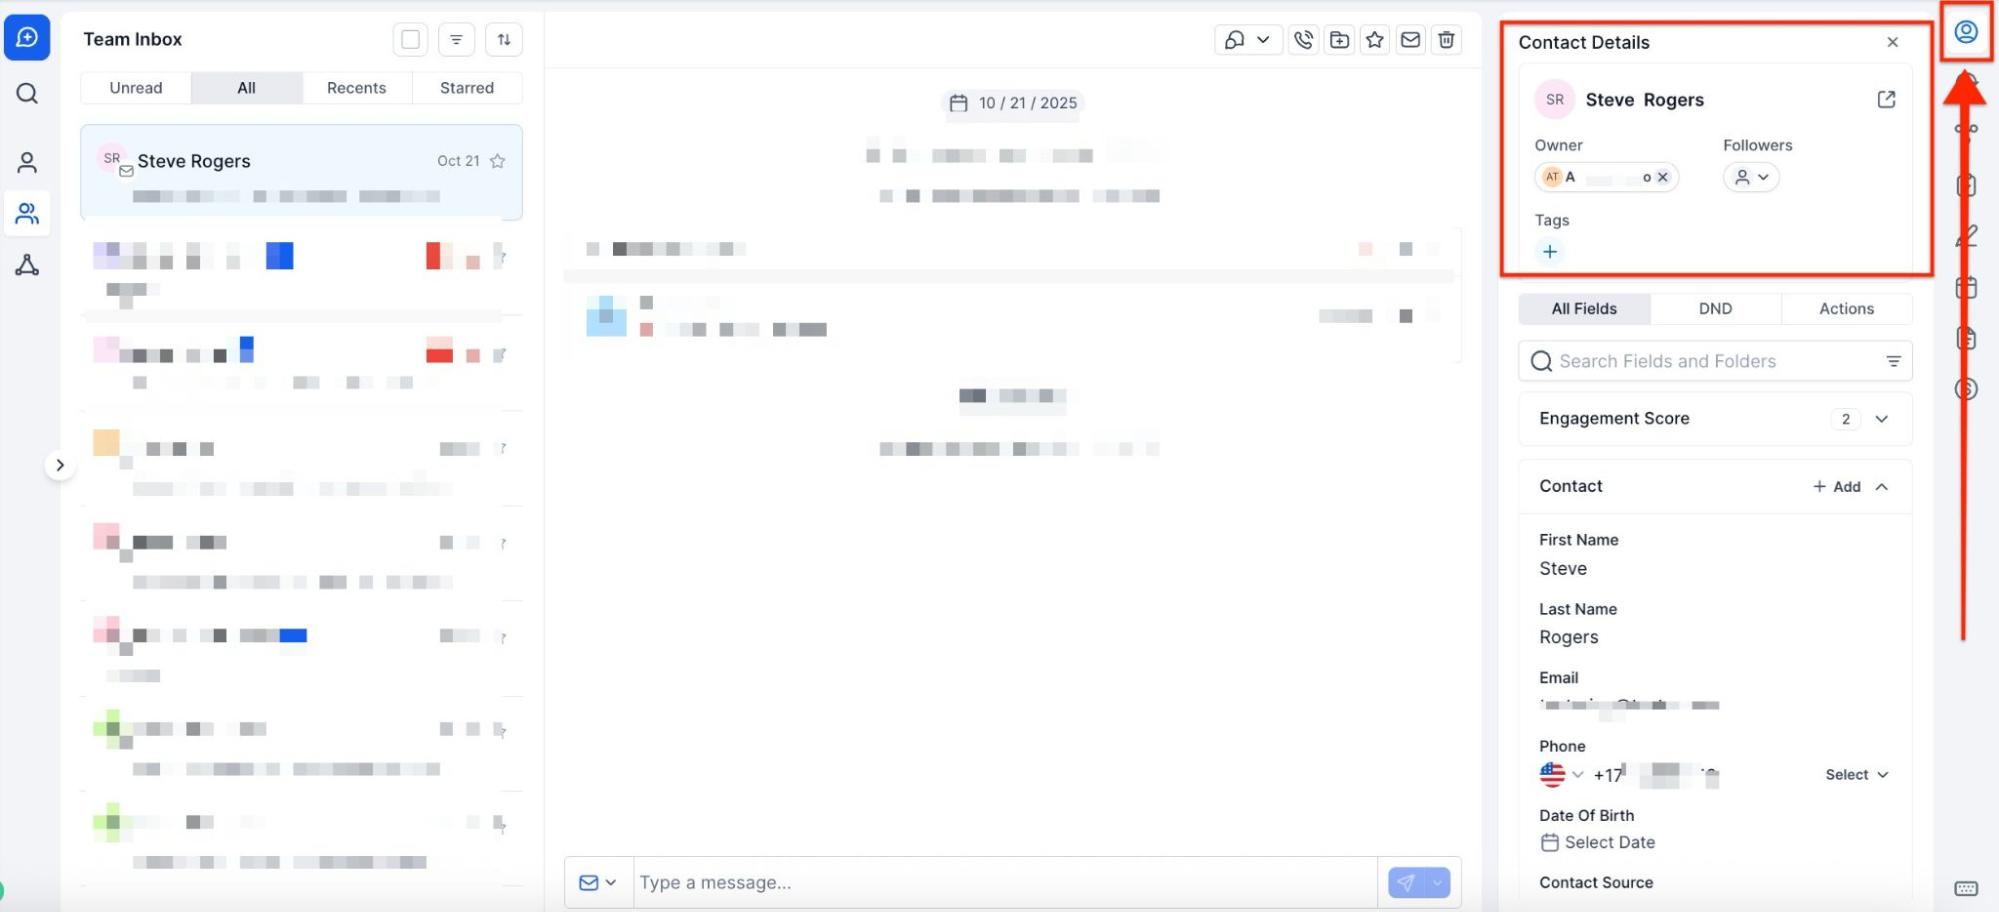
- Search your Conversations > Click on the icon on the right to view the Contact Details
- Click the Contact’s icon and you’ll be redirected to their full Contact Record, where you can see the assigned user (or lack of).
¶ Places you can configure the sender’s email:** **
¶ Manual emails
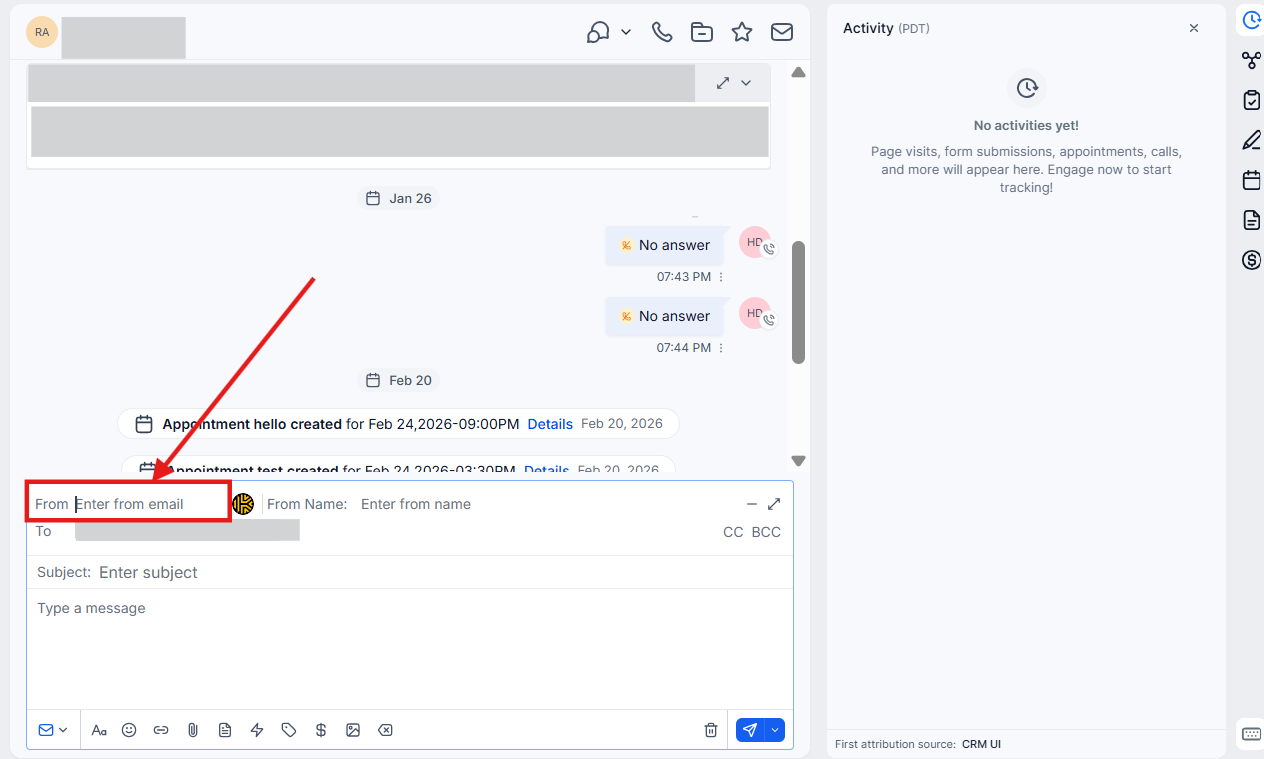
¶ Conversation tab
The From email will be the user-logged-in email by default:
¶ Places you can configure the sender’s email:
¶ Automated email
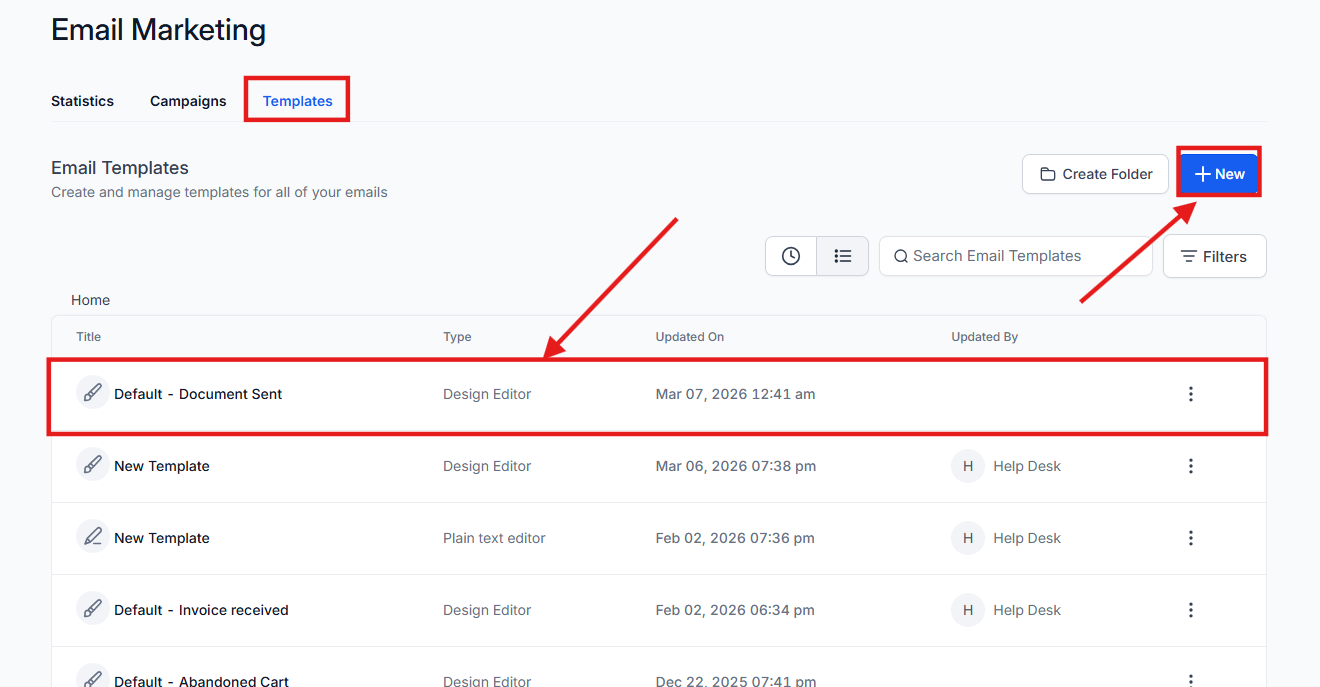
¶ Email template
Navigate toMarketing > Emails > Templates and select (+ New), then Select the design editor and create a blank template, or edit an existing template by clicking on its name.
Once you created the email template, click Settings from the three dots menu (top right corner) and configure the From name/address here.


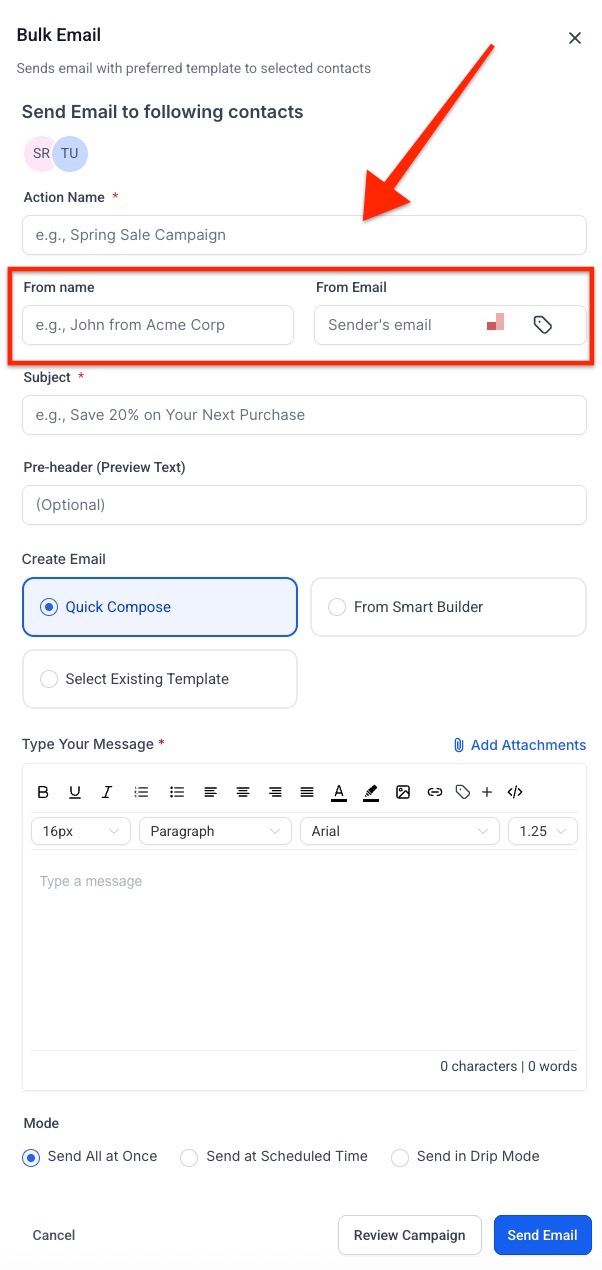
¶ Bulk action - Send Email
Click Contacts >Smart Lists > Select Contacts > Click Send Email

Click “Confirm and Proceed”

Add theFrom Name and From Email
¶ Workflow settings
Click Automation > Workflows > Create Workflow or edit an existing flow.
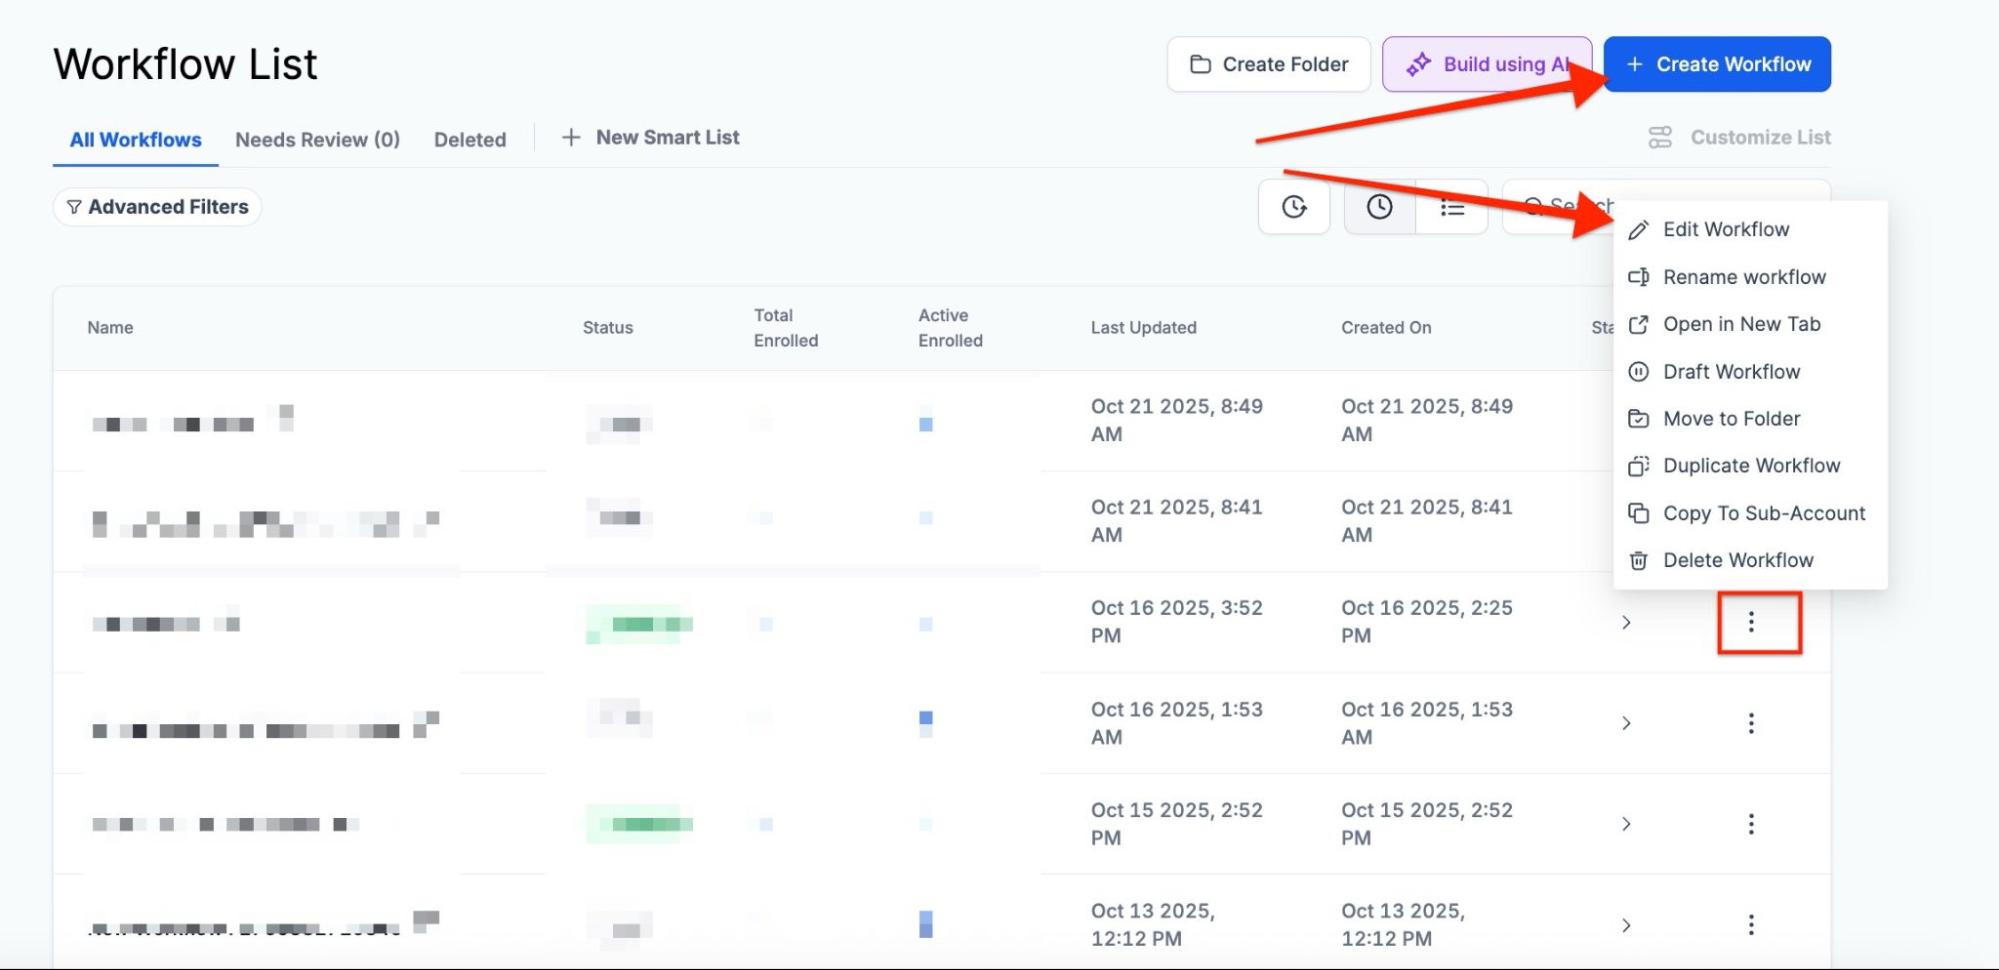
If creating a new flow, Select continue in the tile to Start from scratch.
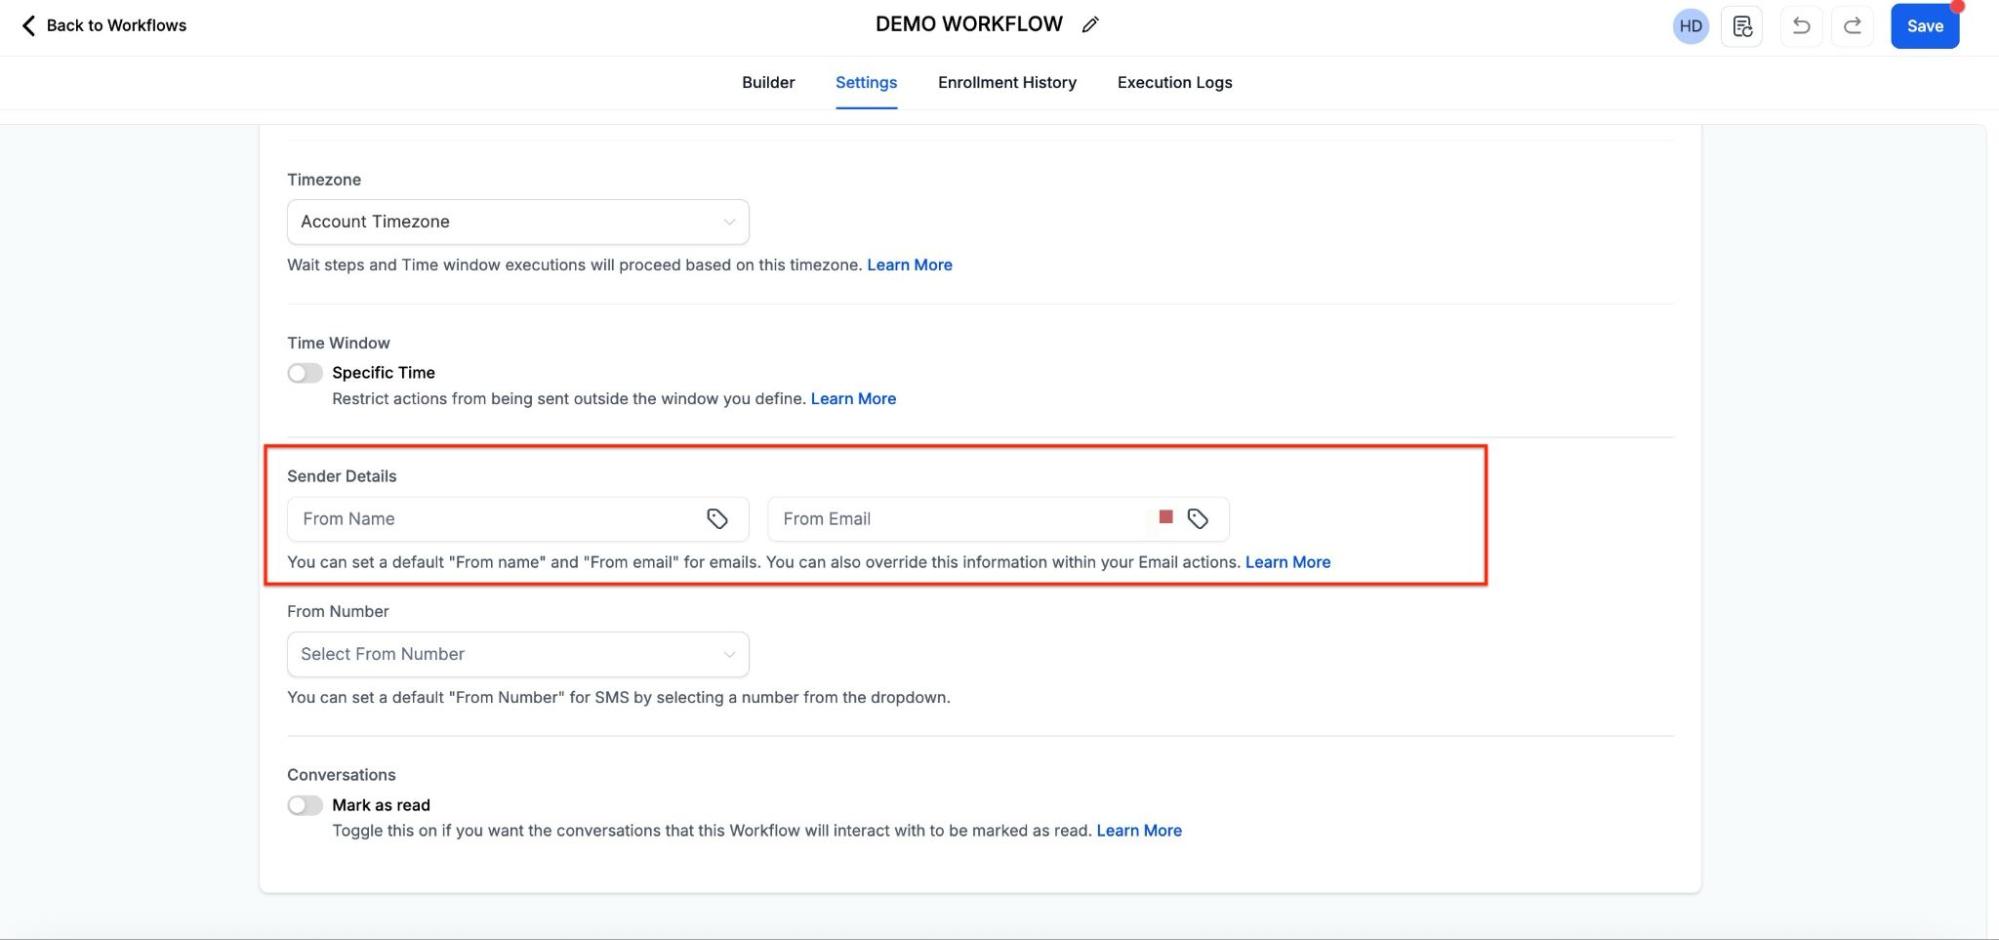
Click Settings and configure the sender details area and save the workflow.
¶ Workflow Send Email Action
Click on the + button > Select the "Send Email " option.
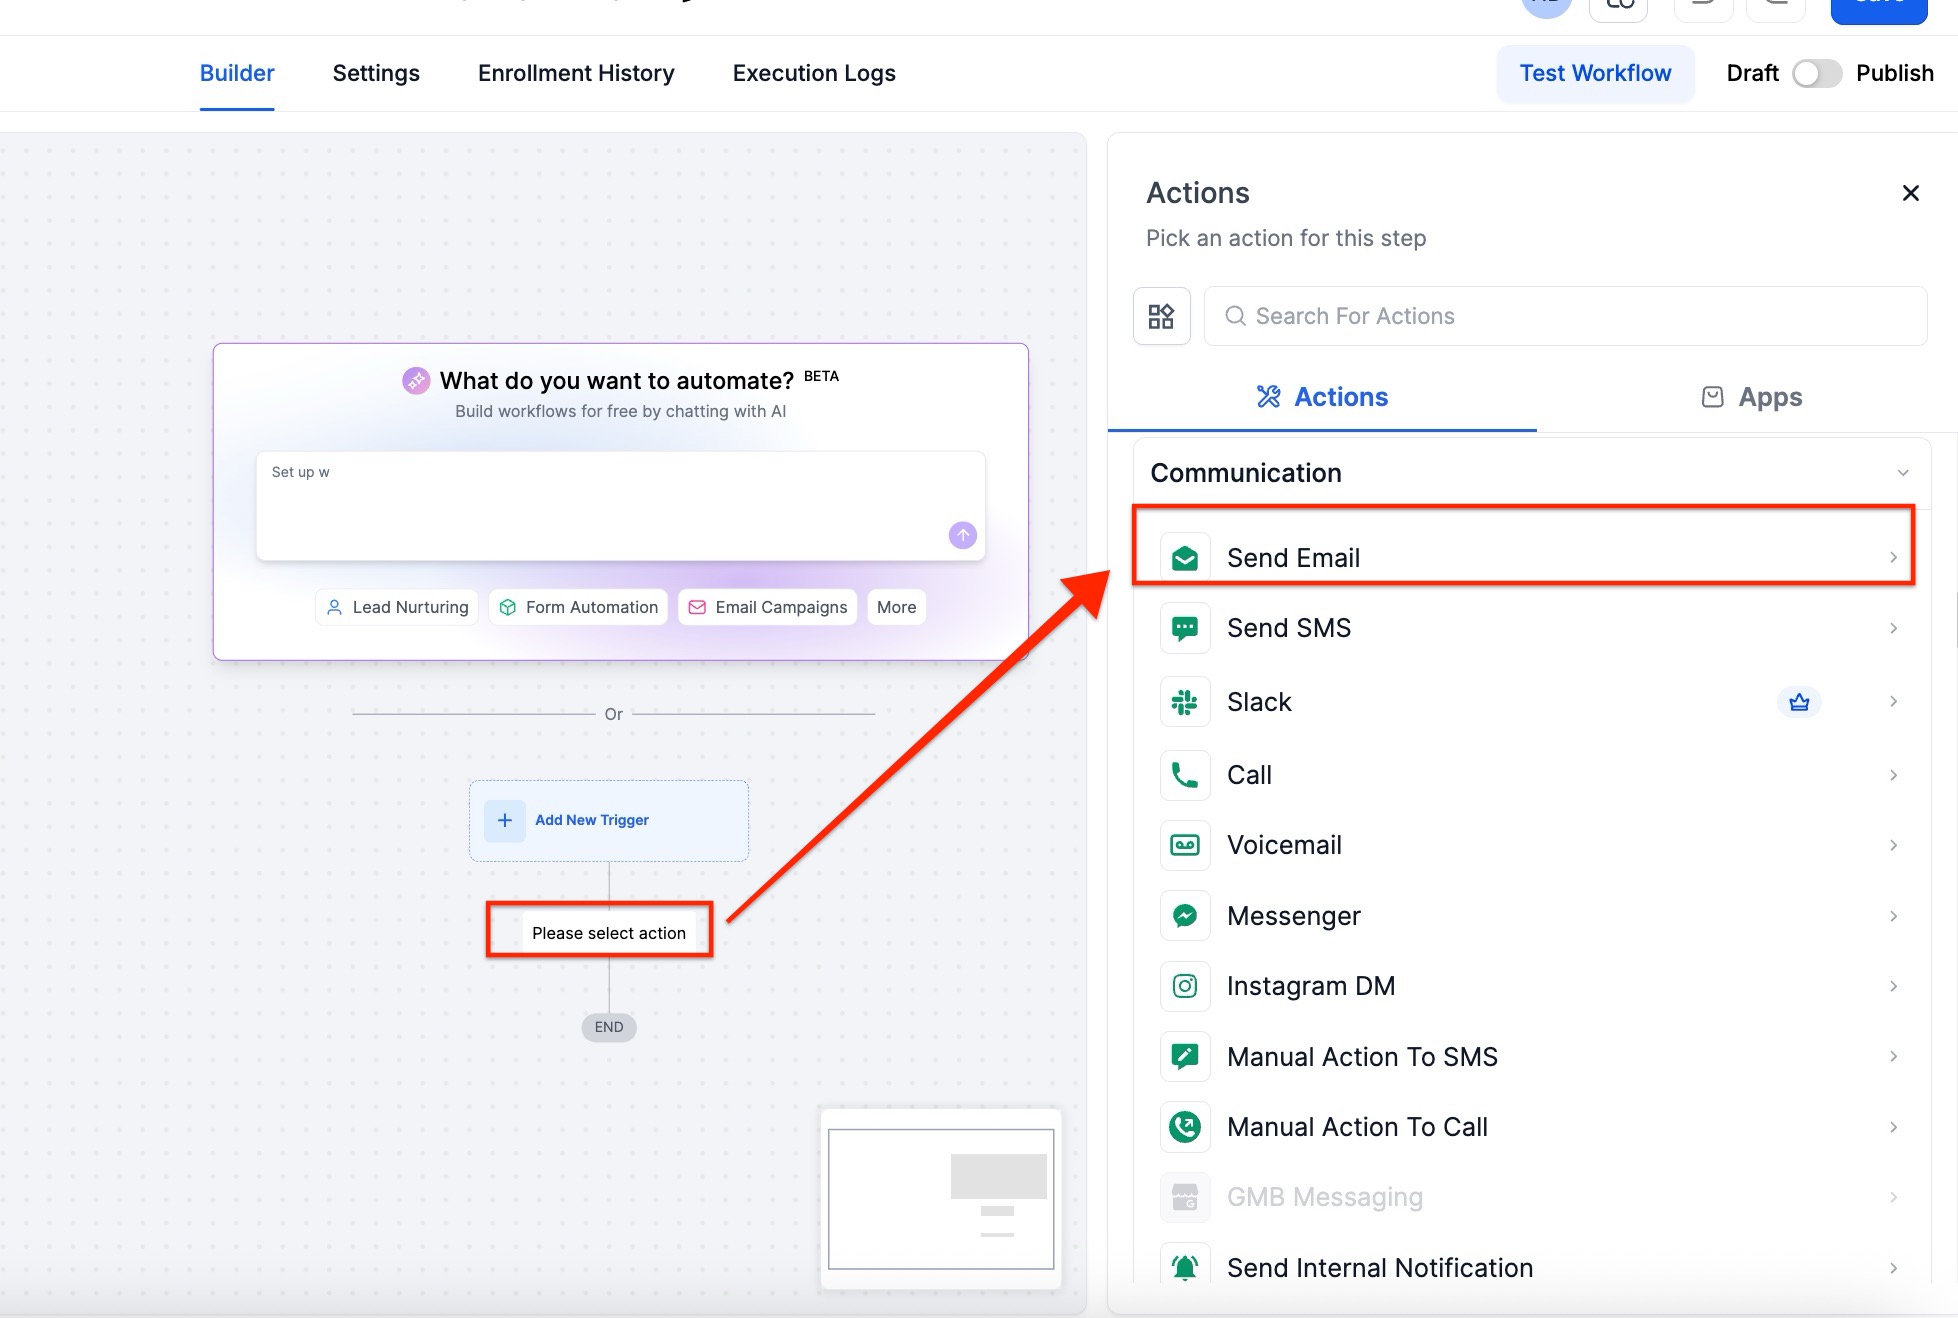
Enter the From Name and From Email

¶ Pro Tips
- Consistent Branding : To enhance recognition and trust, ensure that the “From Name” and “From Email” across all email types are consistent with your brand.
- Testing Templates : Always test your email templates by sending test emails to yourself or a small group before rolling them out. This helps to ensure that the “From Name” and “From Email” appear correctly across different email clients.
- Check Priority Settings : Review the priority settings for automated and manual emails to ensure that the correct “From Name” and “From Email” are used in all cases, particularly for automated workflows and review requests.
- Update in Bulk : If you need to update the “From Name” or “From Email” across multiple templates or workflows, use bulk actions or global settings where available to save time and maintain consistency.
¶ FAQs
Question: How do I configure the sender’s email for manual emails?
Answer: For manual emails, the “From Email” field will default to the logged-in user’s email. To customize, go to the Conversation tab or the email configuration settings while composing the email.
Question: How can I set the sender’s email for automated emails?
Answer: To edit your template for automated emails, navigate to Marketing > Emails > Templates. Click Settings from the three dots menu and configure the “From Name” and “From Email” as needed.
Question: Can I customize the sender’s email for workflow emails?**
Answer:** Yes, you can customize the sender’s email for workflows by going to Automation > Workflows, creating or editing a workflow, and configuring the sender details in the Settings section.
Question: What should I do if I want to change the sender’s email for review request emails?**
Answer:** Review request emails will always use the logged-in user’s email as the sender’s address. This setting cannot be customized.
Question: How do I handle sender email settings for appointment request emails?
Answer: For appointment request emails, the sender’s email will be [email protected] or an SMTP-integrated email, depending on the subdomain setup for the location. This cannot be customized directly.
Question: How can I test my “From” settings before sending a campaign?**
Answer:** Send a test email to yourself from the template or workflow. Check how the sender name and email appear across different email clients (like Gmail, Outlook, and Apple Mail).
Question: Any tips for managing sender emails consistently?
**Answer: **
- Use consistent From Names and From Emails across campaigns for branding.
- Check priority settings for automated and manual emails.
- Use bulk updates or global settings to maintain consistency across multiple templates or workflows.
Question: How can I check if a specific contact is assigned to a user or remains unassigned?**
Answer:** You can verify this by navigating to Contacts > Smart List and searching for the contact. Inside the contact record, look at the “Owner” field; it will either display the assigned user’s name or show that the contact is unassigned. Alternatively, you can view this in the Conversations tab by clicking the contact icon to view their full record.
Question: Can I use a variable like {{user.email}} in the “From Email” field?
Answer: Absolutely! This is a powerful way to make your emails dynamic. By using {{user.name}} and {{user.email}}, the system will automatically “impersonate” whoever is assigned to that specific contact. This allows one single workflow to feel like a personal message from ten different sales reps.