¶ How to Add a Next Page Link for Calendar and Funnel or Website Integration
When creating a smooth and seamless experience for your users, one important feature is the “Next Page” link, which helps guide visitors from one page to another within your website or funnel. Whether you’re using a calendar to schedule appointments or utilizing a funnel for marketing purposes, you can easily integrate a “Next Page” link directly within the funnel builder or calendar settings.
In this article, we will walk you through how to set up a “Next Page” link in two common scenarios: for a calendar and when using funnels or websites.
Steps to Add a Next Page Link from the Calendars Tab:
1- Navigate to the Calendars Tab:**
**
- In your LeadMagicX, go to the Calendars Settings section from the main menu and click on the Pencil icon where you’d like to configure your next page link.

2- Configure the Next Page Link:**
**
- In the Calendar editing section , look for an option Forms & Payment that will allow you to set a link for after an action has been completed (e.g., after an appointment is booked).

3- Add the URL for the Next Page:**
**
- In the link field, add the URL of the page you’d like users to be directed to after interacting with the calendar. This can be a page in your funnel or another part of your website.

4- Save Your Changes:**
**
- Once you’ve entered the URL for the next page, make sure to save your settings to confirm the changes.
By following these steps, you can easily set up a “Next Page” link within your calendar settings, ensuring a smooth transition for your users to the next step in the process.
¶ Steps to Add a Next Page Link from Funnels or Website:
1- Navigate to the Funnel or Website Builder:**
**
- Open your funnel or website editor where your calendar page is located.
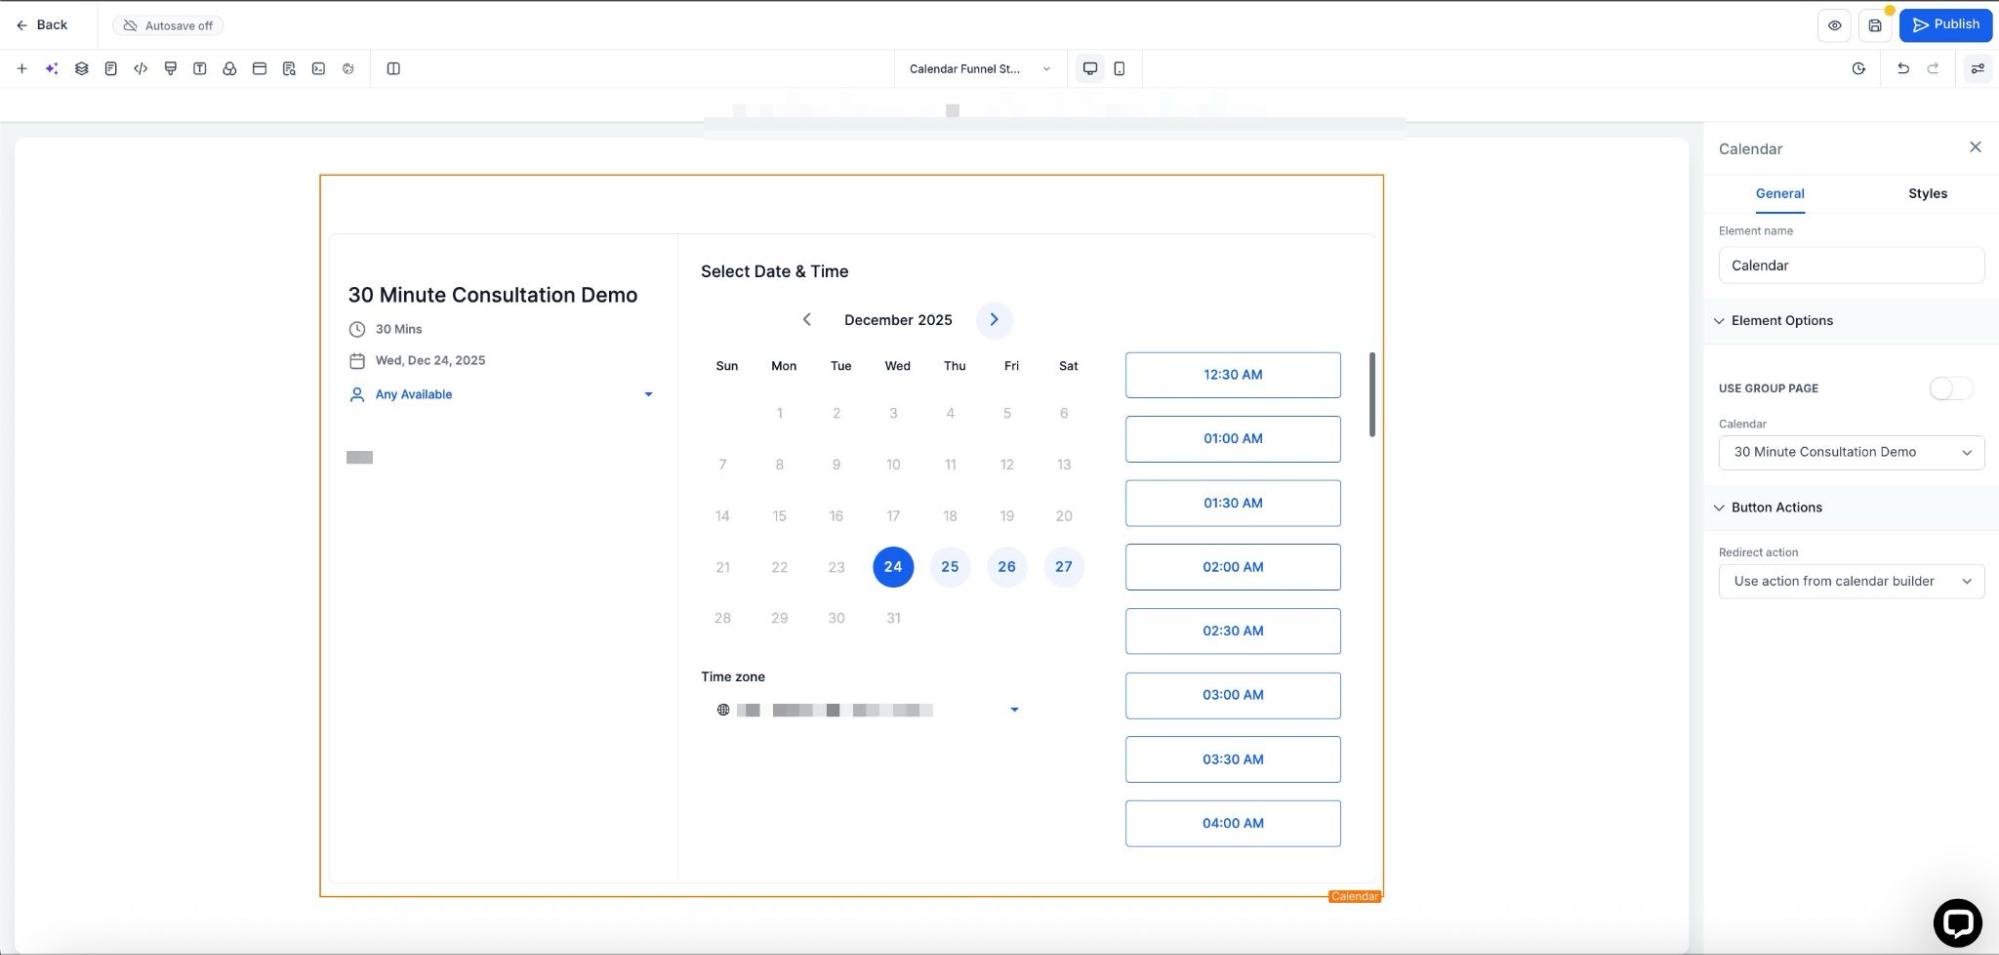
2- Add the Next Page Link:**
**
- In the calendar settings, look for an option to add links or customize buttons.
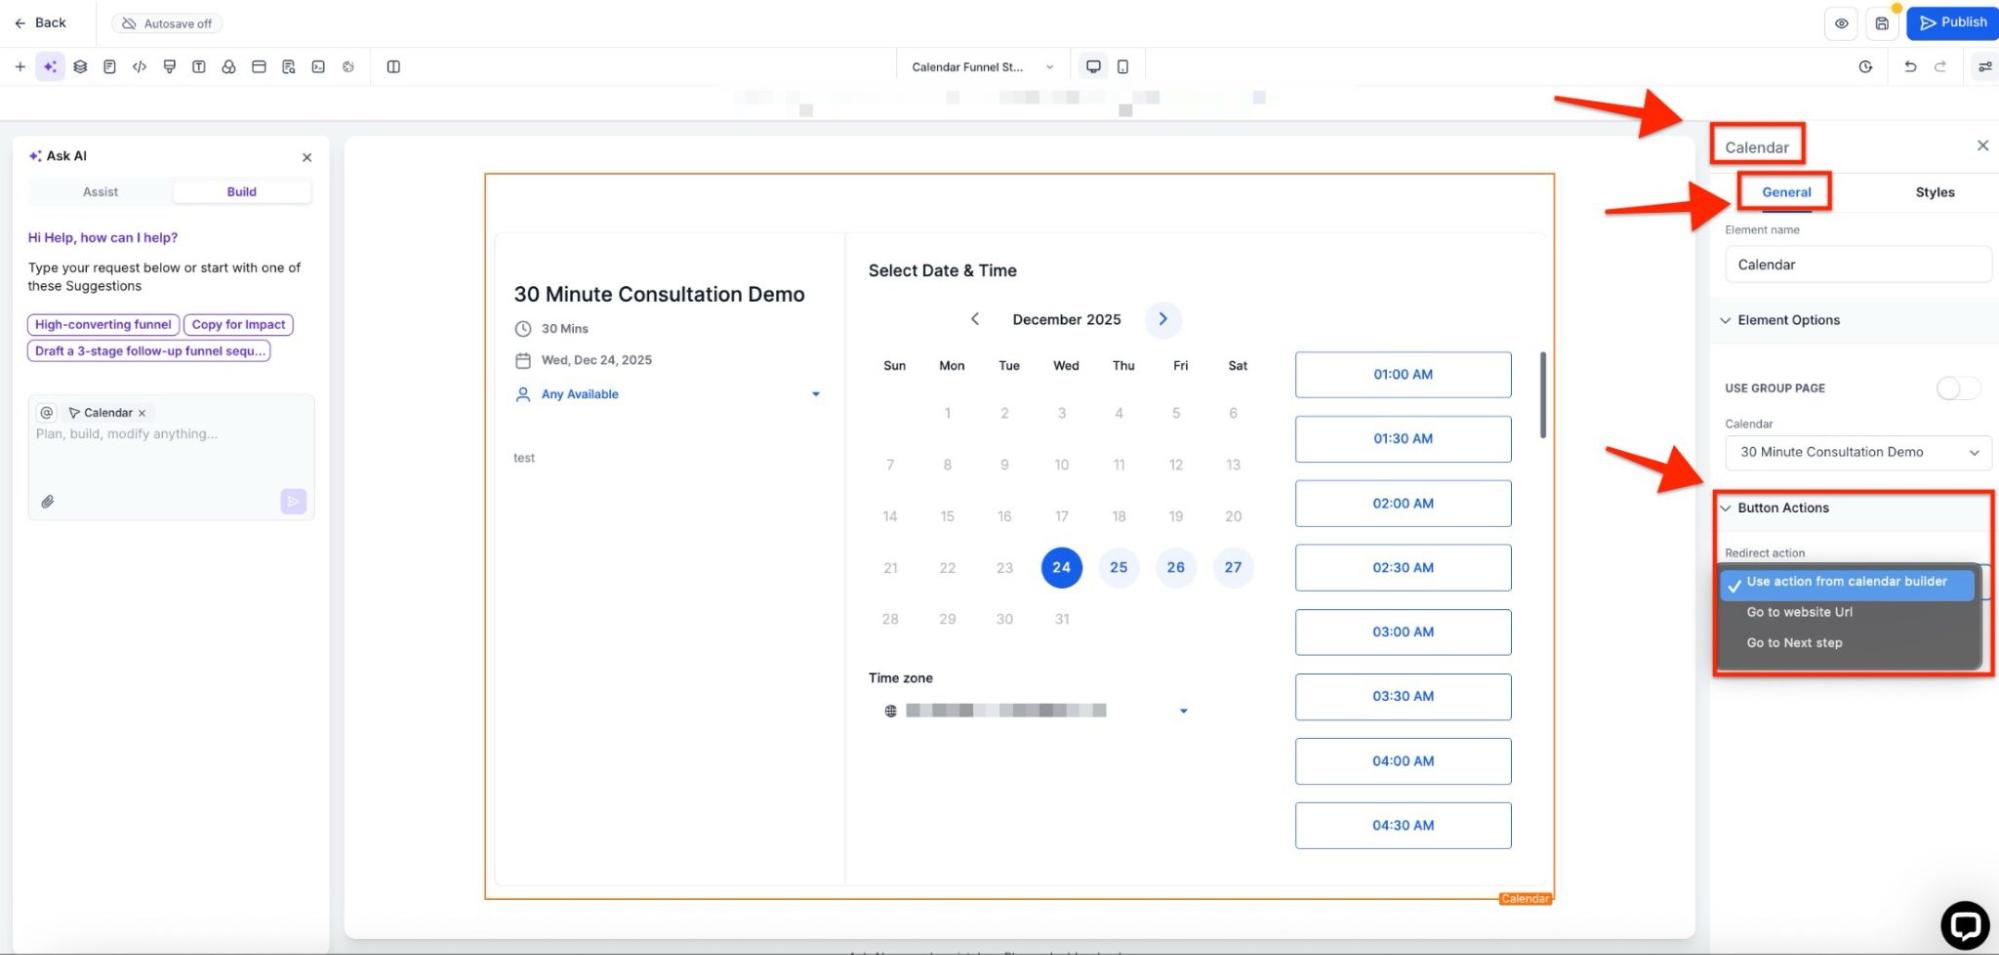
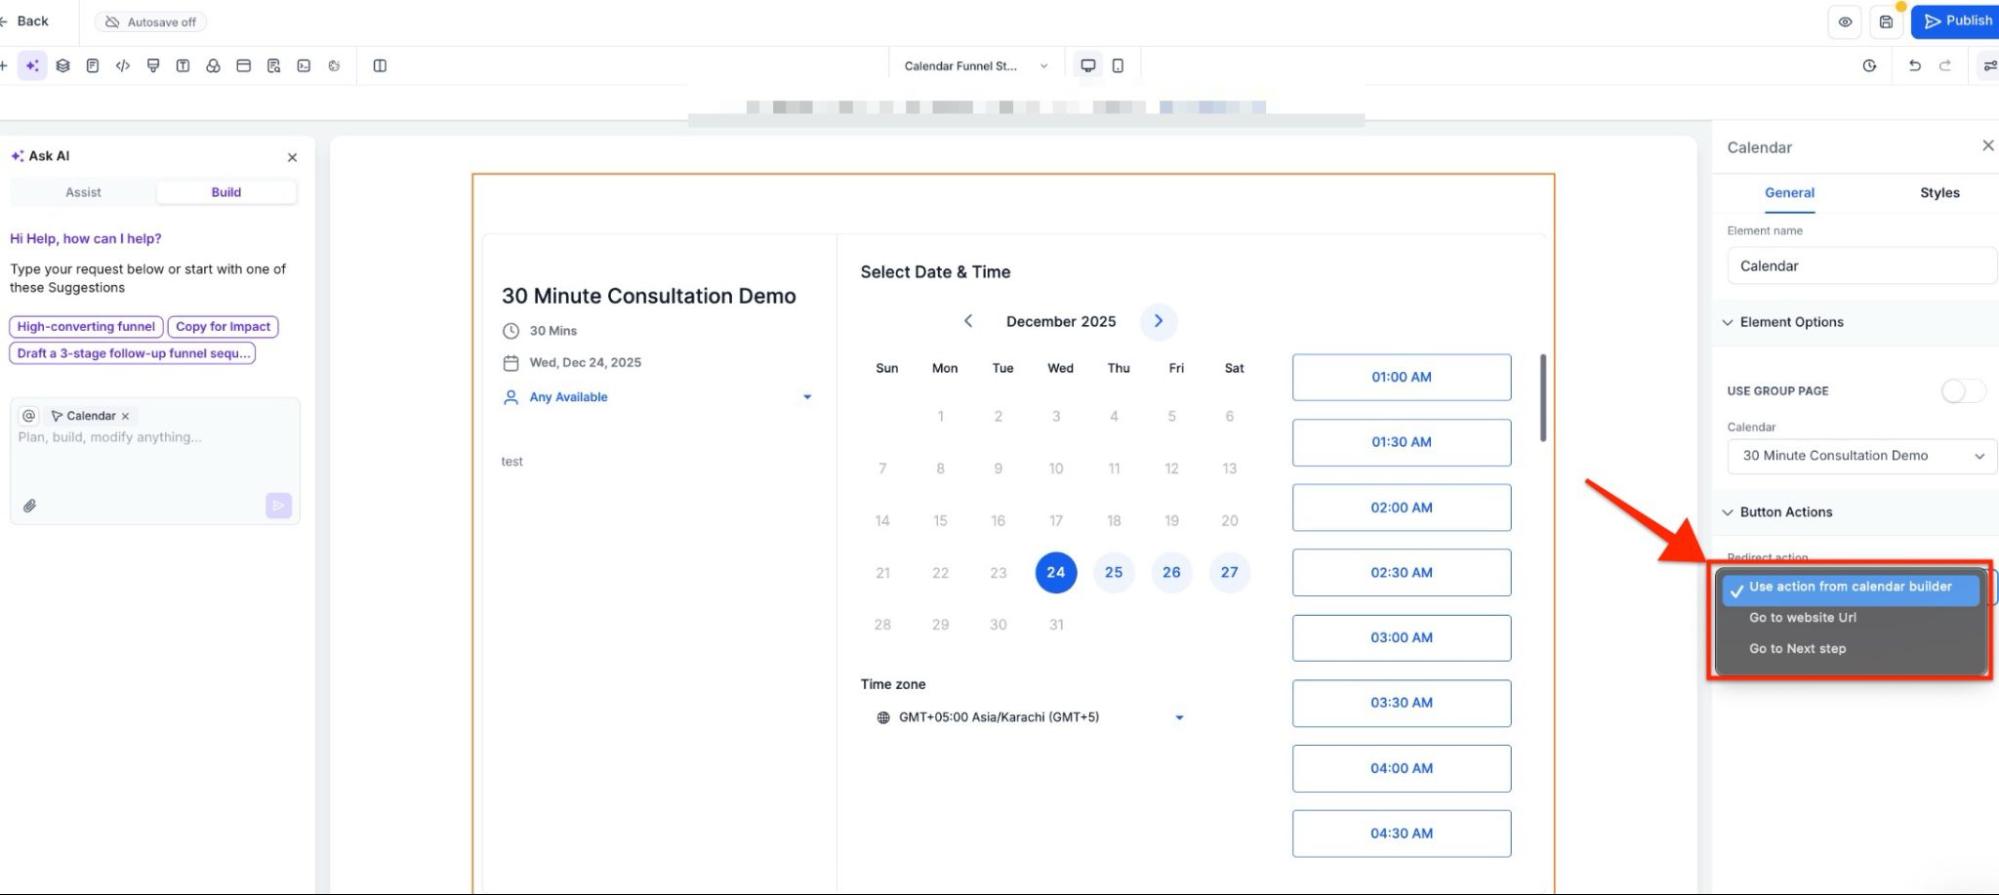
3- Configure the Link to the Next Page:**
**
- In the link settings, input the URL or funnel step where you’d like the user to be directed after scheduling their appointment or interacting with the calendar. This could be a thank-you page, payment page, or another step in your funnel.
4- Save Your Changes:**
**
- After configuring the next-page link, ensure to save your changes and preview the calendar page to ensure the link works as expected.
By following these steps, users can easily navigate from the calendar page to the next relevant page, providing a seamless experience in the booking process.
¶ FAQ’s
Question: What is the “Next Page” link, and why is it important?****
Answer: The “Next Page” link helps guide users to the next step in your process, ensuring a smooth transition between pages within your website or funnel. It is essential for creating a seamless user experience, especially when using calendars for appointments or funnels for marketing.
Question: How can I add a “Next Page” link in the calendar settings?****
Answer: To add a “Next Page” link in the calendar, go to the Calendars Tab in your system, then click the Pencil icon to edit the calendar. In the Forms & Payment section, you’ll find an option to input the URL of the next page. After adding the URL, be sure to save your changes.
Question: Can I configure the “Next Page” link to go to a funnel or another part of my website?****
Answer: Yes, you can set the “Next Page” link to direct users to any page on your website or a specific funnel step, such as a thank-you page, payment page, or additional funnel steps after scheduling an appointment.
Question: How do I set up a “Next Page” link within my funnel or website?****
Answer: To add a “Next Page” link in a funnel or website, open the Funnel or Website Builder where your calendar page is located. In the calendar settings, look for an option to add links or customize buttons. Enter the URL for the next page you want users to go to and save your changes.
Question: Do I need to save my changes after configuring the “Next Page” link?****
Answer: Yes, once you have configured the “Next Page” link, ensure you save your changes. This will confirm the link is properly set up and ready for users to navigate to the next step.
Question: How can I test if the “Next Page” link works correctly?****
Answer: After configuring and saving your changes, preview the calendar page to ensure the link works as expected. You can also test it by completing the action (e.g., booking an appointment) and checking if users are correctly redirected to the next page.
Question: Can I add multiple “Next Page” links in different funnel steps?****
Answer: Yes, you can add multiple “Next Page” links at different stages of your funnel or calendar. Each step can have a unique redirect based on your workflow and user actions.
Question: Is it possible to use tracking or custom parameters in the Next Page URL?****
Answer: Yes, you can include UTM parameters or tracking codes in your redirect URL to monitor performance in analytics tools.
Question: Which specific section within the Calendar settings allows me to set the redirect link?
Answer: You can find this option under the “Forms & Payment” section of the Calendar editing menu. This is where you configure the specific action that occurs after an appointment is booked.