¶ Calendar Widget Customization
Personalizing your calendar widget can significantly enhance user experience and align the tool with your branding. This article explores the features and benefits of calendar widget customization, providing step-by-step instructions to help you make the most of these options. Whether you want to tweak colors, hide unnecessary details, or integrate custom forms, this guide has you covered.
¶ Features and Benefits of Calendar Widget Customization
1. Personal Branding**
**Customize the primary and background colors to reflect your brand identity. This enhances visual consistency across your tools and platforms.
2. Improved User Experience**
**Adjust the text, visibility of elements, and layout to streamline navigation and booking processes.
3. Flexibility in Design**
**Incorporate custom forms, adjust themes, and even modify button text to meet your specific business needs.
4. Control Over Display**
**Hide or display key calendar details such as duration, date & time, or the logo to keep the widget clean and focused.
5. Visual Preview and Reset**
**Preview your updates in real time or reset the widget to default settings to start fresh when needed.
¶ How to Customize Your Calendar Widget
1. Access the Customization Settings
- Navigate to the calendar settings of your LeadMagicX account.
- Select the calendar you wish to customize and click “Edit.”
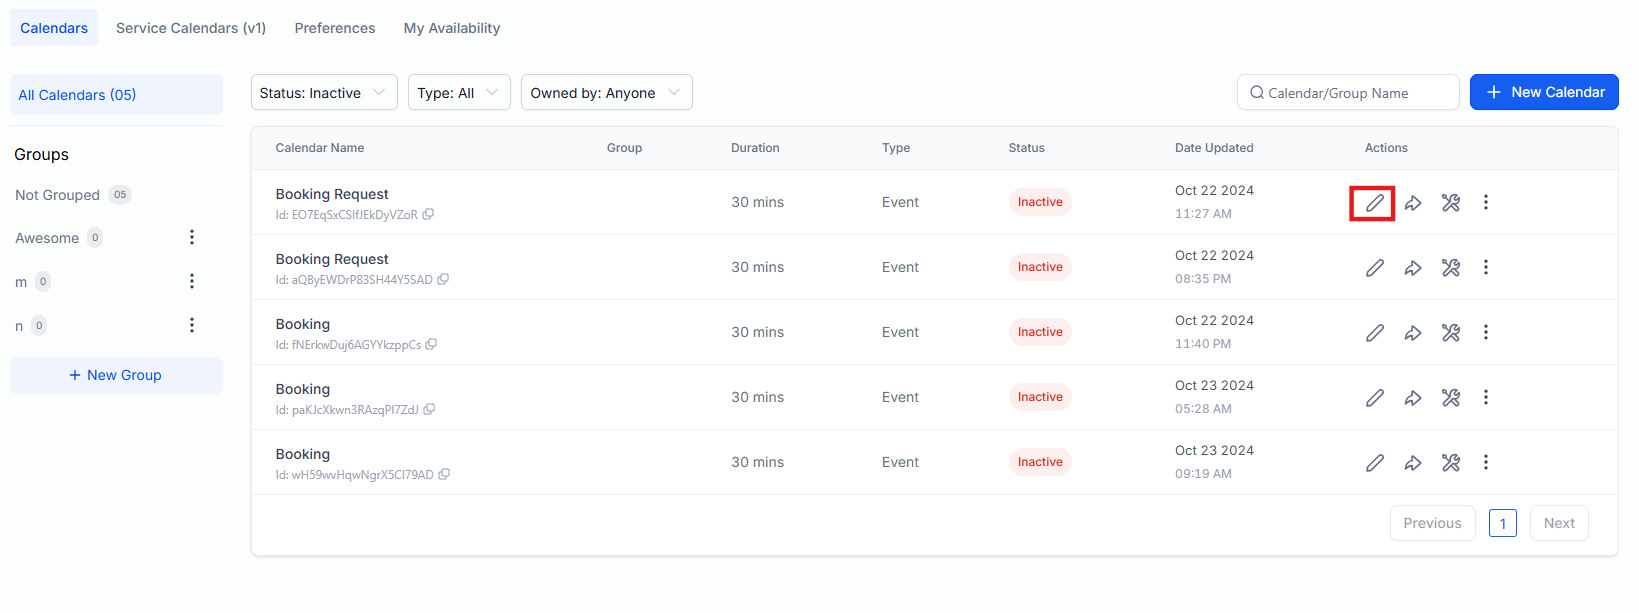
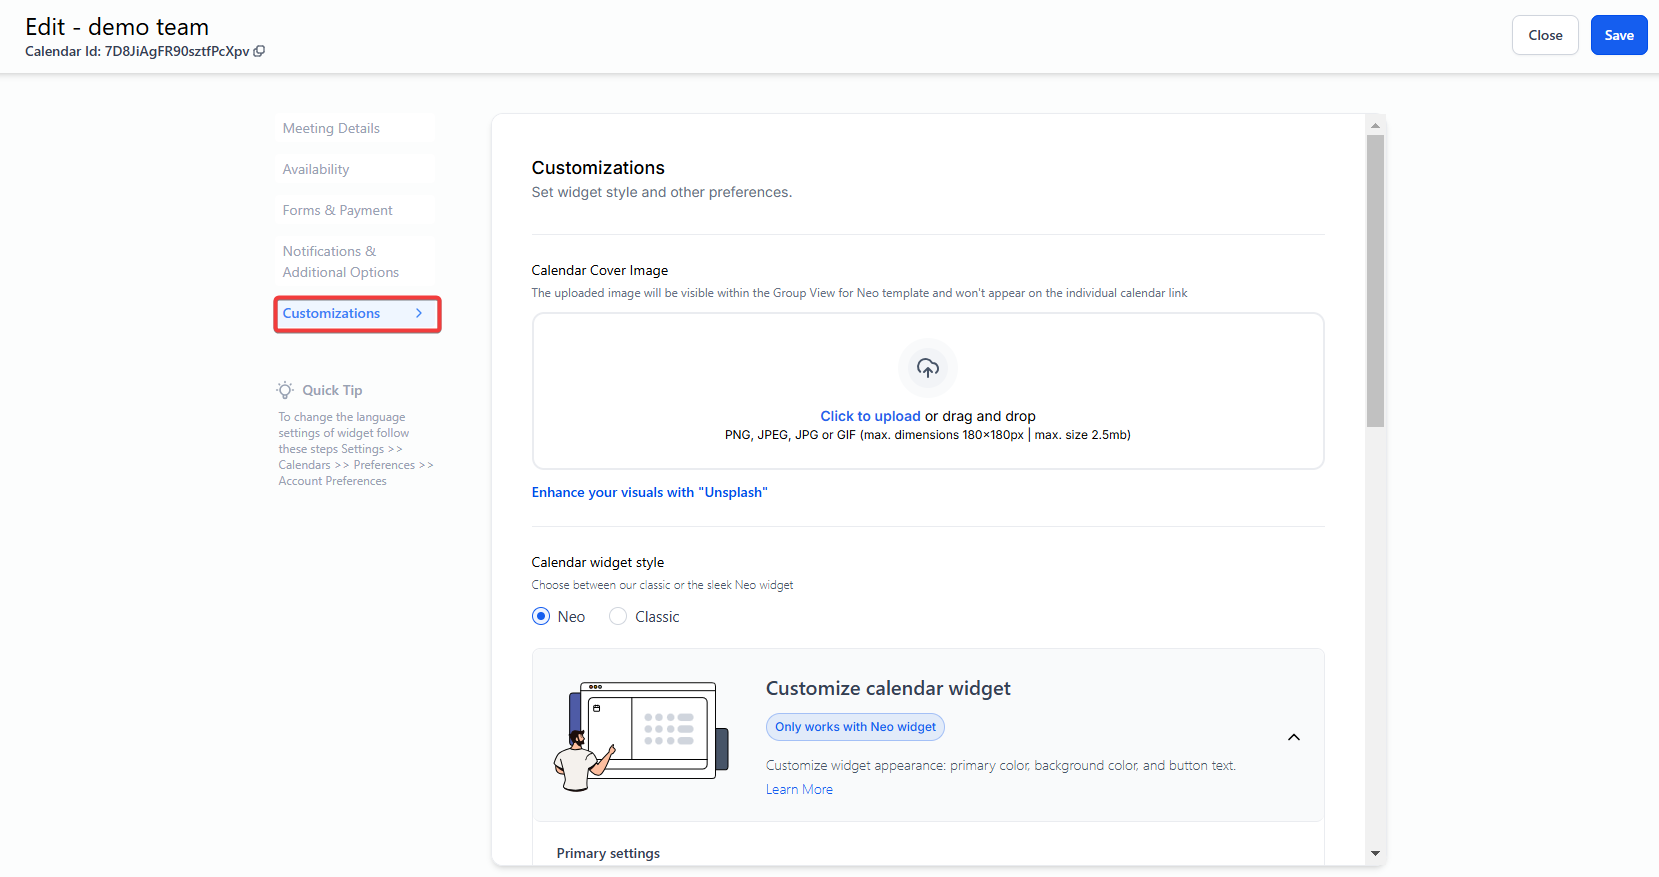
2. Choose the Customizations Tab
- Open the “Customizations” tab to access various options for tailoring your widget.
Note: Widget Customizations work ONLY with NEO WIDGE
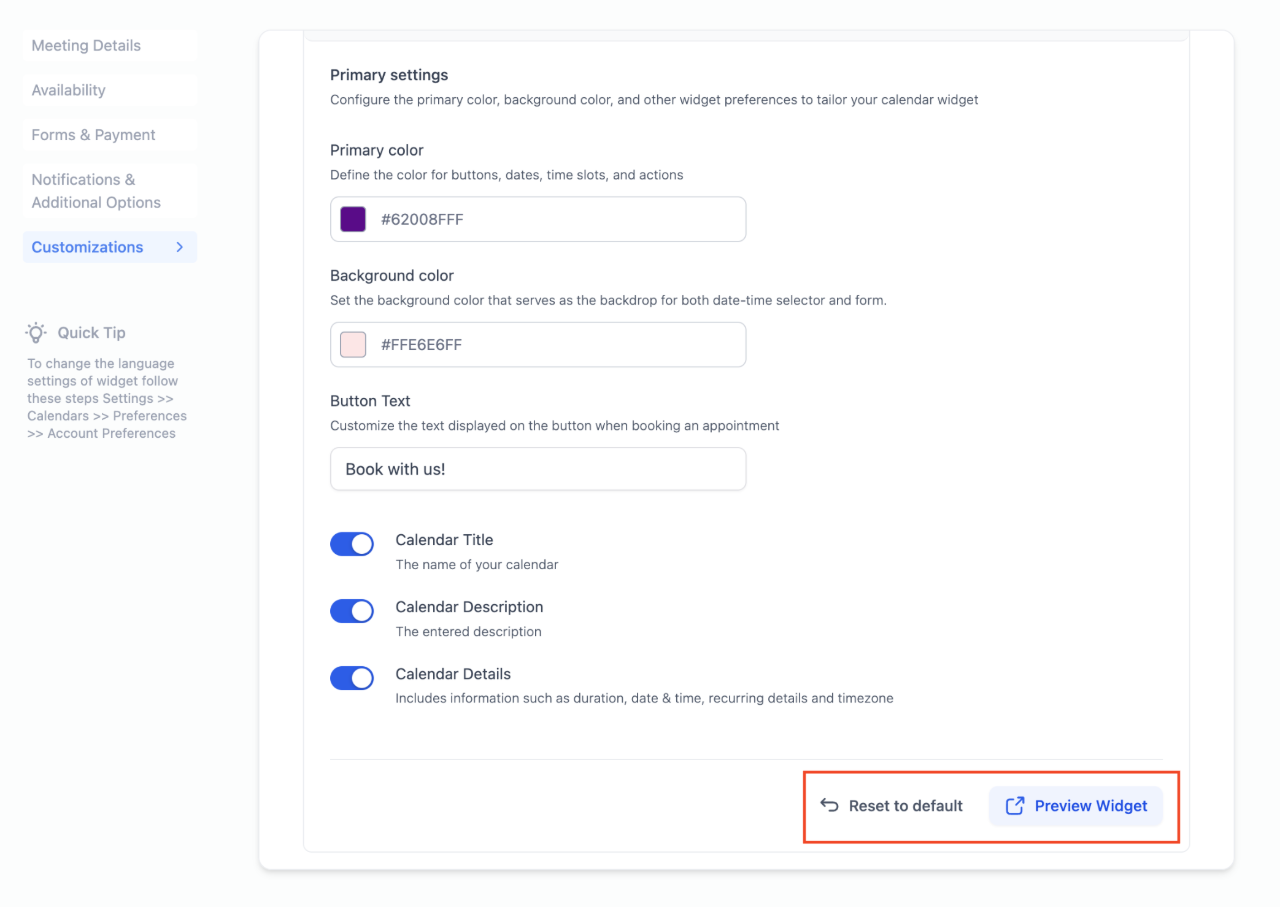
3. Customize Colors
- Primary Color : Impacts buttons, time slots, and interactive elements.
- Background Color : Defines the tone for the date-time selector and any attached forms.
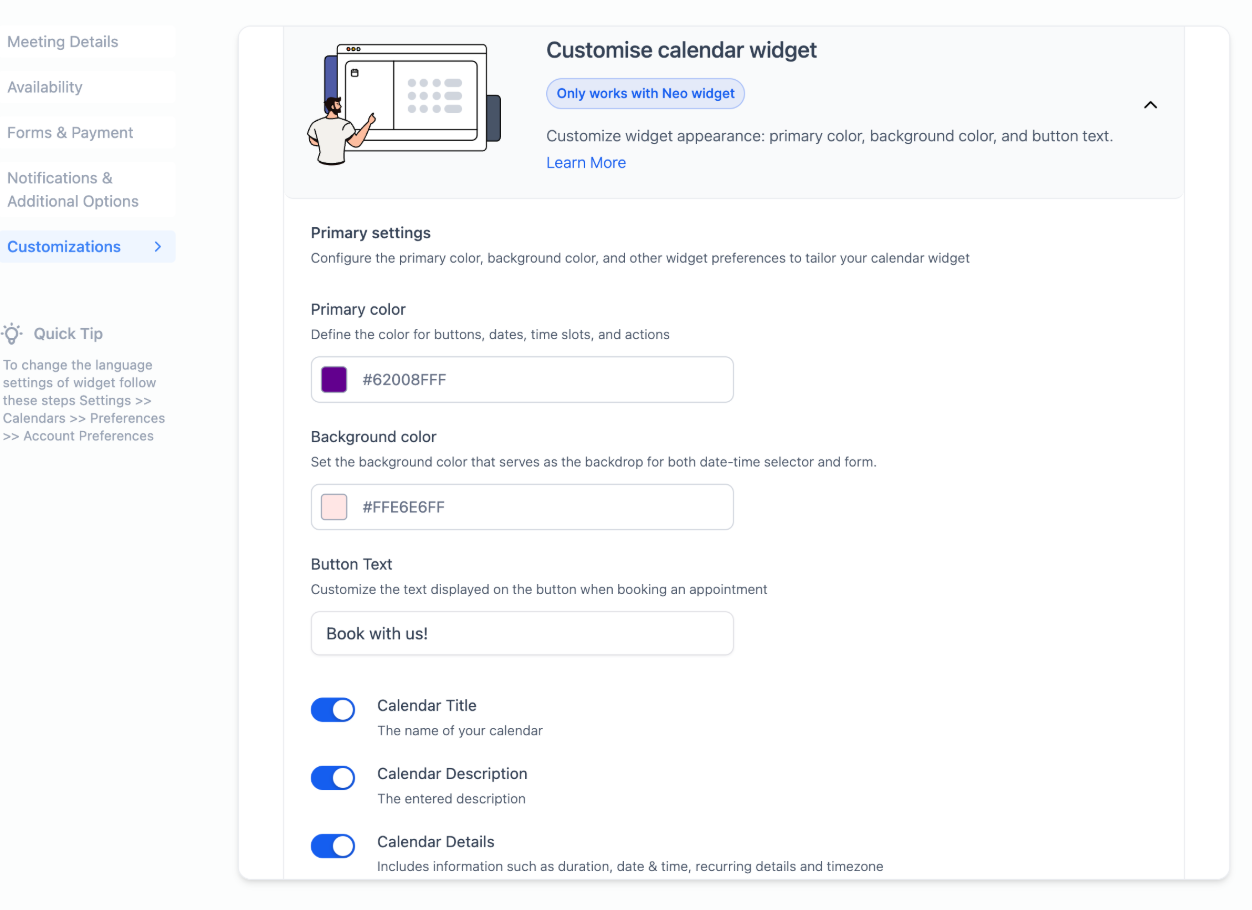
Note: Make sure custom forms match your widget design for a consistent look.
Custom Form Example:
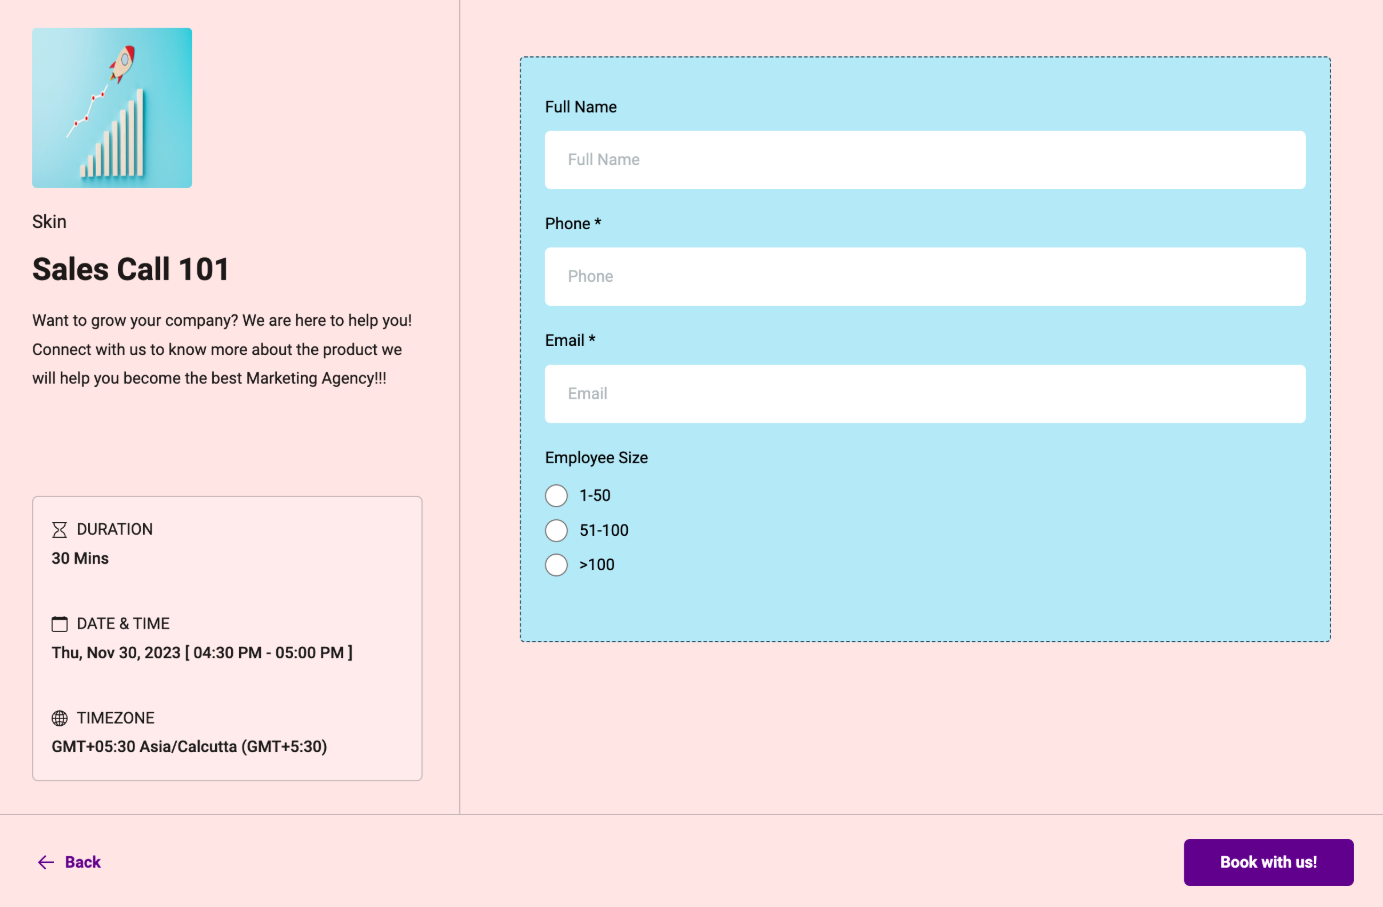
4. Modify Text and Visibility Options
- Button Text : Change the text displayed on booking buttons (e.g., “Book Now,” “Schedule Appointment”)

- Hide Details : Toggle settings to hide elements like duration, date & time, recurring details, and timezone from the left panel.
Note: If you wish not to show the logo, simply remove it from the meeting details tab
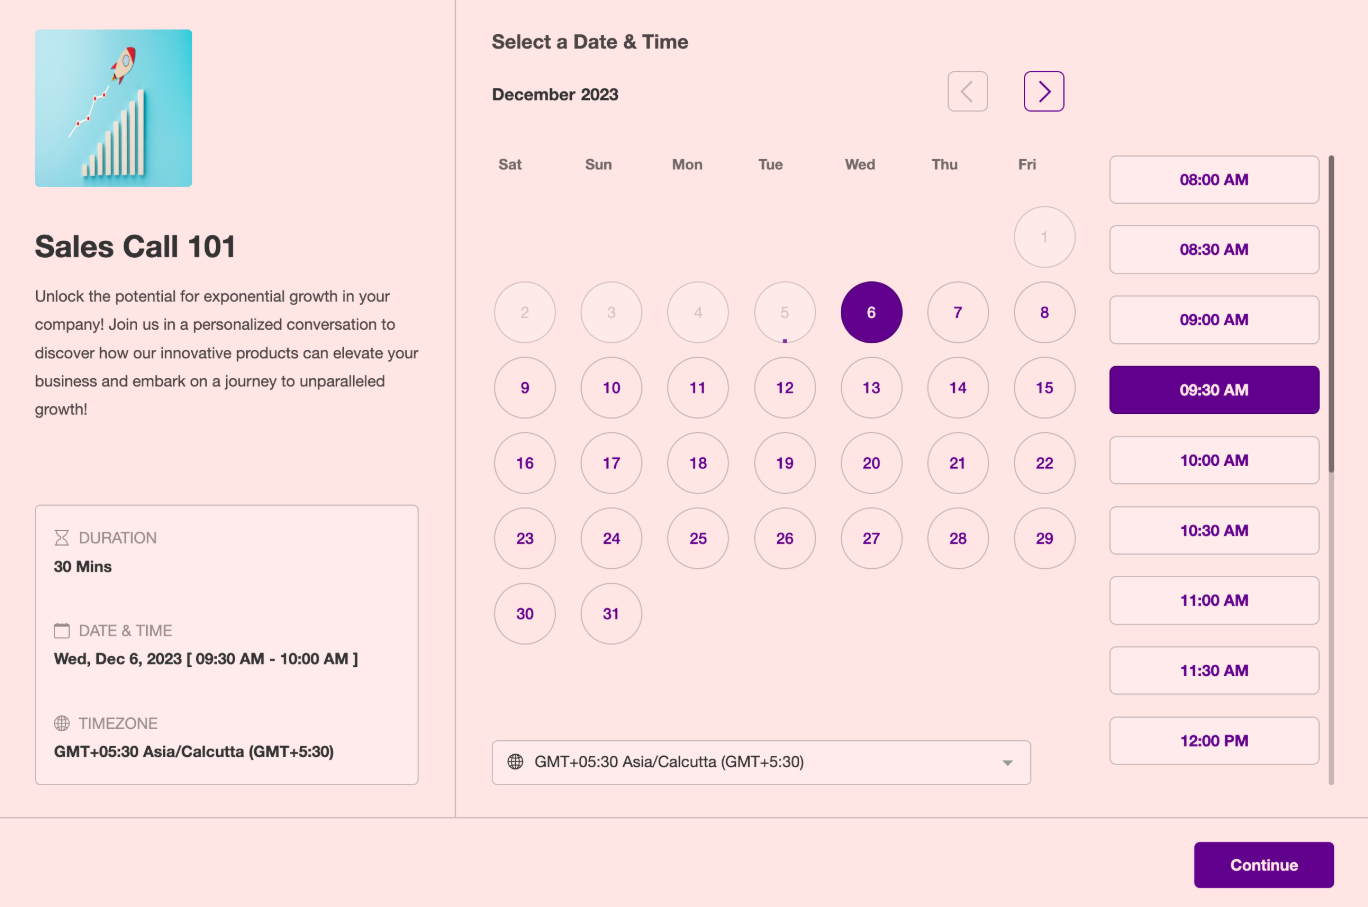
5. Preview Your Customizations
- Use the “Preview Widget” feature to visualize the final look and make any necessary adjustments.
6. Save Changes
- After reviewing your widget, save the settings to make them live.
7. Resetting to Default:
- Use the “Reset to Default” option to restore all settings to the original blue and white calendar widget design.
¶ Payment Element Integration in Classic and Neo Widgets
The integration of the Payment Element into the Classic and Neo Widget enables seamless payment functionality, aligning it with the capabilities of the advanced widgets for a consistent user experience.
The supported gateways include Stripe (Card, Apple Pay, Google Pay, iDEAL, Bancontact), NMI, Authorize.net, Square, and Razorpay.
Functional Capabilities :
- Saving cards for future transactions
- Processing zero-value payments to save card details
- Handling full and partial payments
- Charging payments for recurring appointments
To use this feature, ensure your widget settings are configured correctly, and verify that your selected payment gateway is supported. Note that this functionality requires the widget to be compatible with payment integration.
¶ Pro Tips
- For an eye-catching design, use contrasting primary and background colors. A light background with a darker primary color often works best.
- If using custom CSS, verify its compatibility with the widget’s settings to avoid design conflicts.
- Always preview your changes before saving to ensure a seamless user experience.
- When integrating custom forms, ensure the fields and fonts match your widget’s overall theme.
- Reset to default settings if extensive customizations become overwhelming or deviate from your brand’s aesthetics.
¶ FAQs
Question: Which calendars support customization?**
**Answer: All calendar types, including Event, Class Booking, Round Robin, and Collective Calendars, support customization. However, some features may not work with service menu configurations.
Question: How do custom forms integrate with the widget?**
**Answer: Custom forms can be attached to the widget, provided the form’s theme aligns with the widget’s design settings.
Question: How can I completely disable the left panel if it still appears after turning off settings?**
**Answer: To fully disable the left panel, ensure the following settings are adjusted:
- Calendar Details Settings :
- Turn off the Calendar Name.
- Turn off the Calendar Description.
- Disable Calendar Details.
- Logo Settings :
- Remove any logo linked to the calendar.
- Customizations Tab :
- Disable the “Allow Select Staff” option.
Question: Will my CSS customizations override widget settings?**
**Answer: Yes, CSS takes precedence over standard widget customizations, allowing for advanced styling.
Question: How can I ensure the widget matches my brand?**
**Answer: Experiment with different color schemes and button text while keeping the preview feature handy. Reset to defaults if necessary to maintain consistency.
Question: Are zero-value payments possible?**
**Answer: Yes, zero-value payments are supported for saving card details without initiating a charge.
Question: What’s the difference between Classic and Neo Widgets?**
**Answer: The Neo Widget is the latest version that supports advanced customization and payment integrations. Classic Widgets may not include all these features. Widget customization options work only with Neo Widgets.
Question: What payment gateways are supported for integration with the widget?
Answer: The widget supports several major gateways, including Stripe (which handles Credit Cards, Apple Pay, Google Pay, iDEAL, and Bancontact), NMI, Authorize.net, Square, and Razorpay.