¶ Appointment Booking Process
Appointment Booking Process
You can book appointments for any of your Calendars in the Calendar tab. This is a great way to stay organized and easily add appointments to your day. In the left-hand sidebar, choose Calendars, and click the “Book Appointment” option in the top right corner.
¶ Step 1: Choose the contact you’d like to book with.
- Choose the contact you’d like to book with.
- Find them in your contact list or add a new contact.
- To add a new contact, you’ll want their name, time zone, phone, and email for a complete profile. However, you only need either phone or email to continue.
¶ Step 2: Fill out appointment details
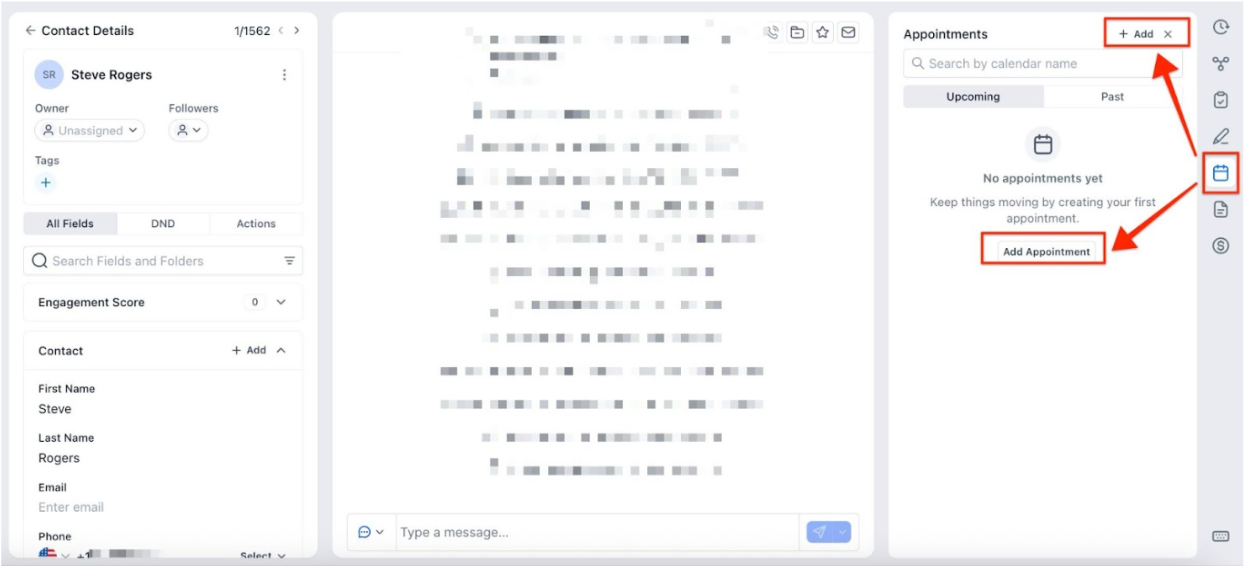
- Go to the contact’s profile.
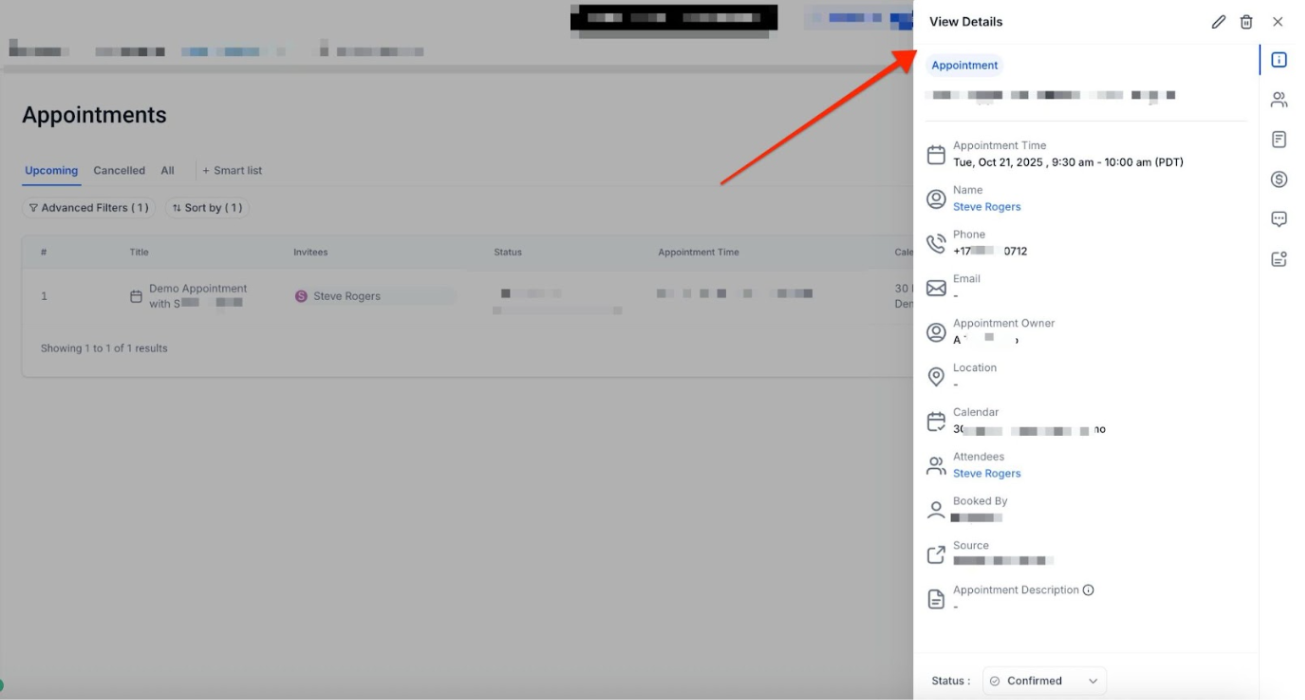
- On the right side, click on the Appointments tab and click “Click here to create one”.
- Fill in all the important data, such as which calendar you will be booking, if this will be assigned to a user, the time zone of the meeting, the meeting location, the appointment name, the status of the booking, and more.
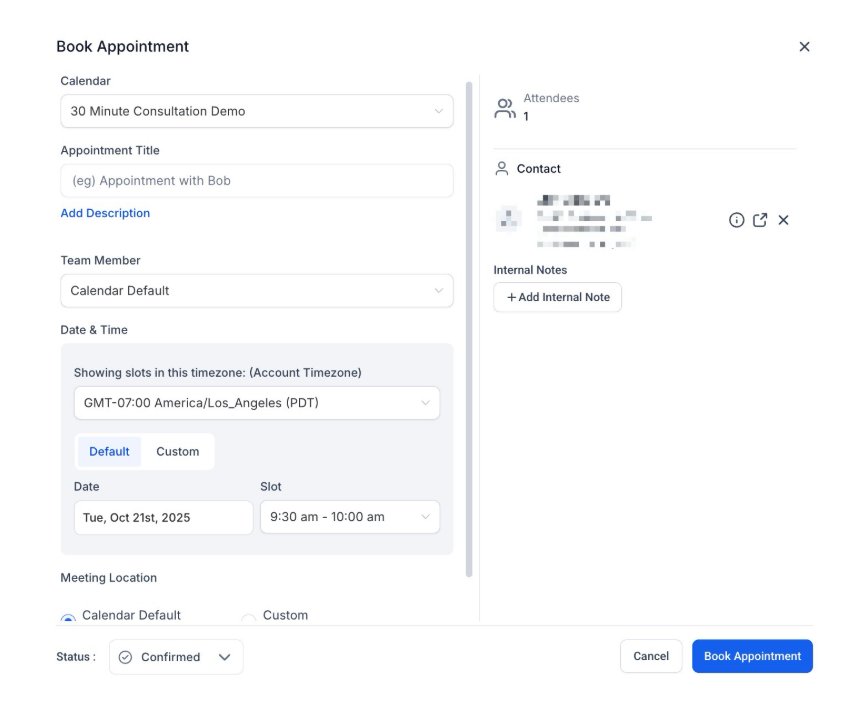
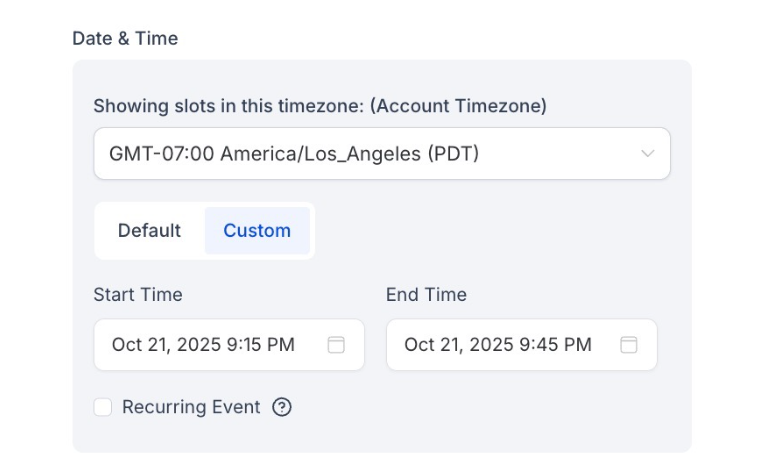
- Set the date and time. You can create a custom time for a client that’s different from the calendar’s standard slots by clicking “Custom” below the time slot.
-
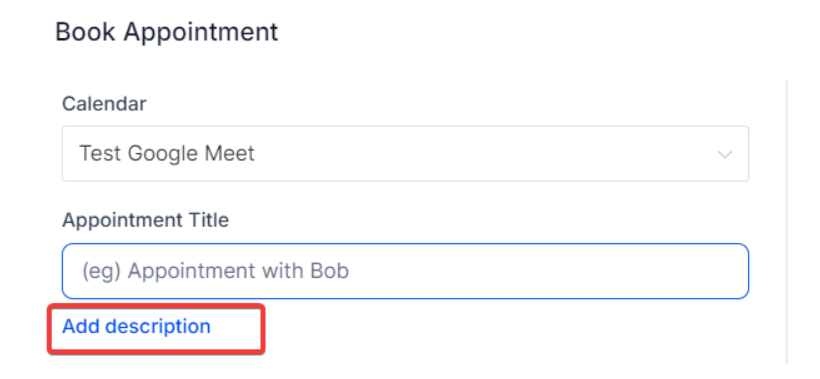
Add the appointment title that you and your client will see. If you leave this blank, the appointment title you used when you created the calendar will auto-populate once you book the appointment.
-
You can also include an Appointment Description by clicking on “Add Description”.
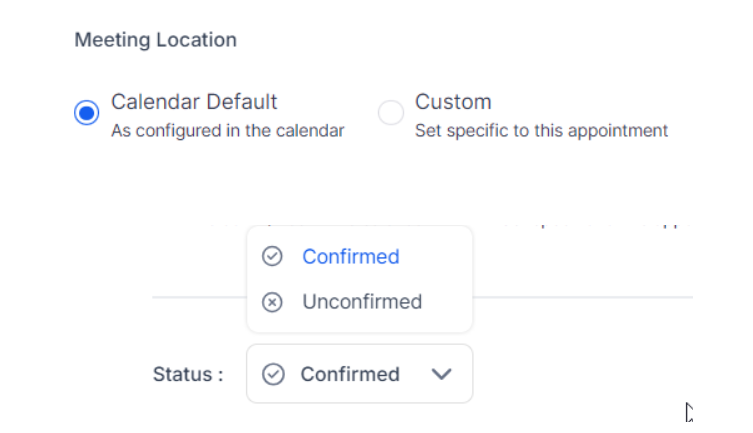
- Under Additional Preferences, you can customize the Meeting Location (if it’s different than the location specified in that calendar’s settings) and set the appointment status (confirmed/unconfirmed)
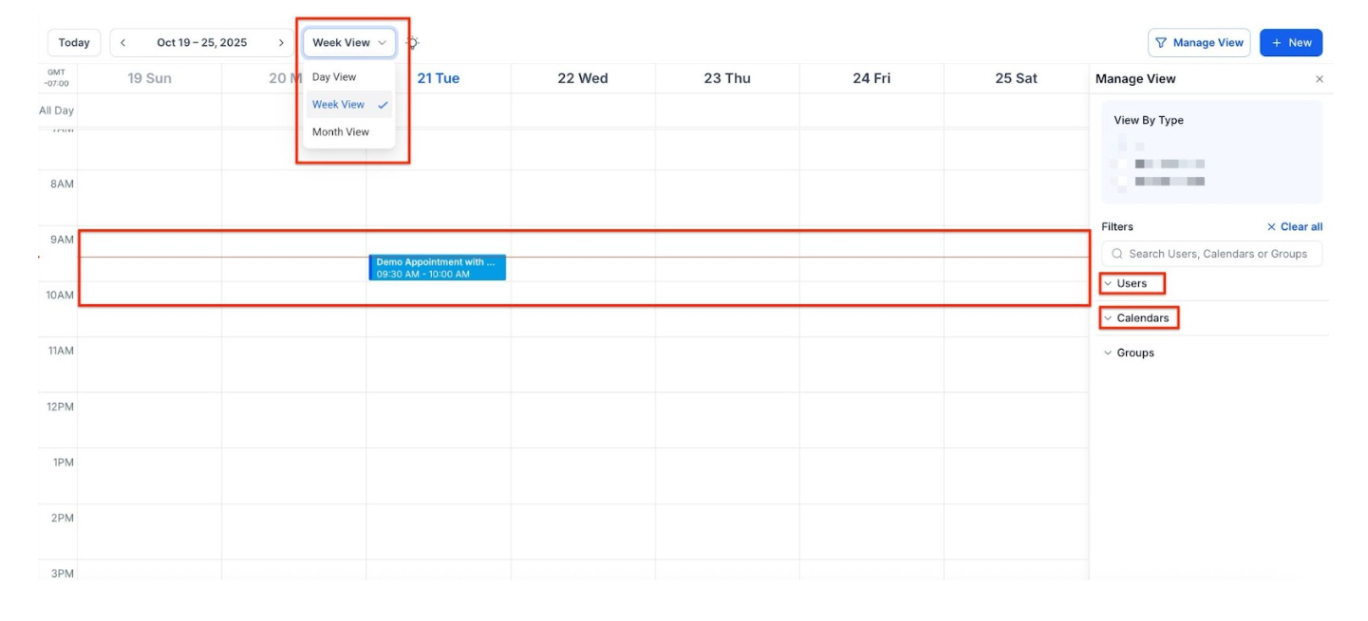
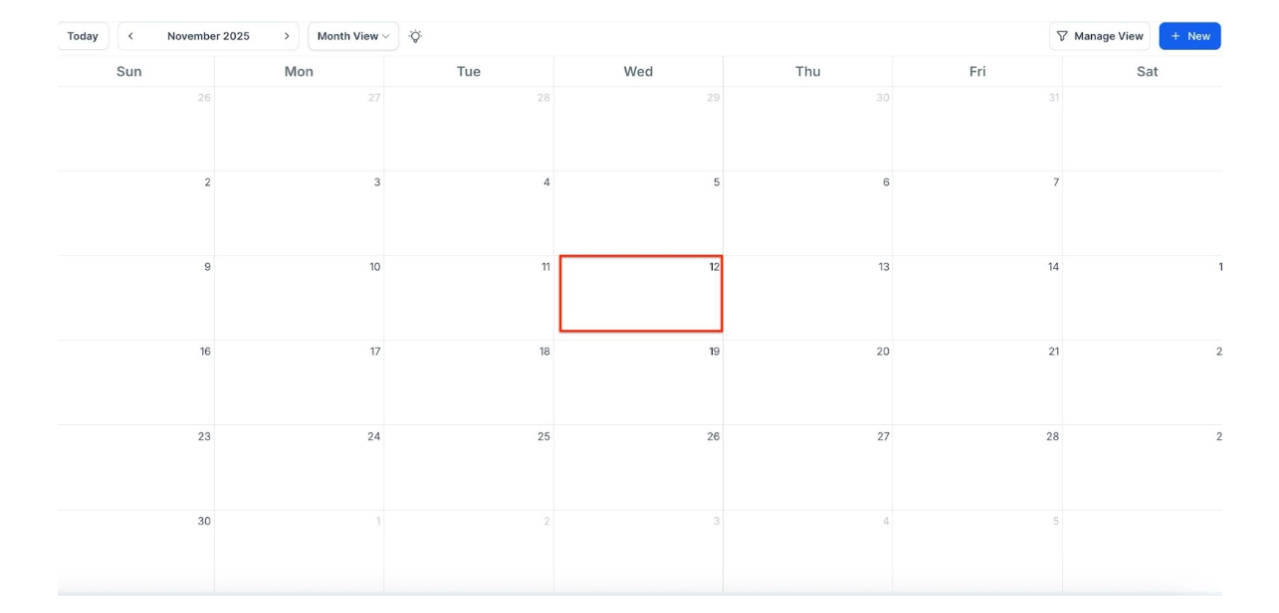
¶ Step 3: View your appointment summary under Calendars
- You can filter by date, users, calendars, and groups to find your appointment faster.
- Keep in mind that you can also edit appointments and add guests as needed if it fits the calendar type.
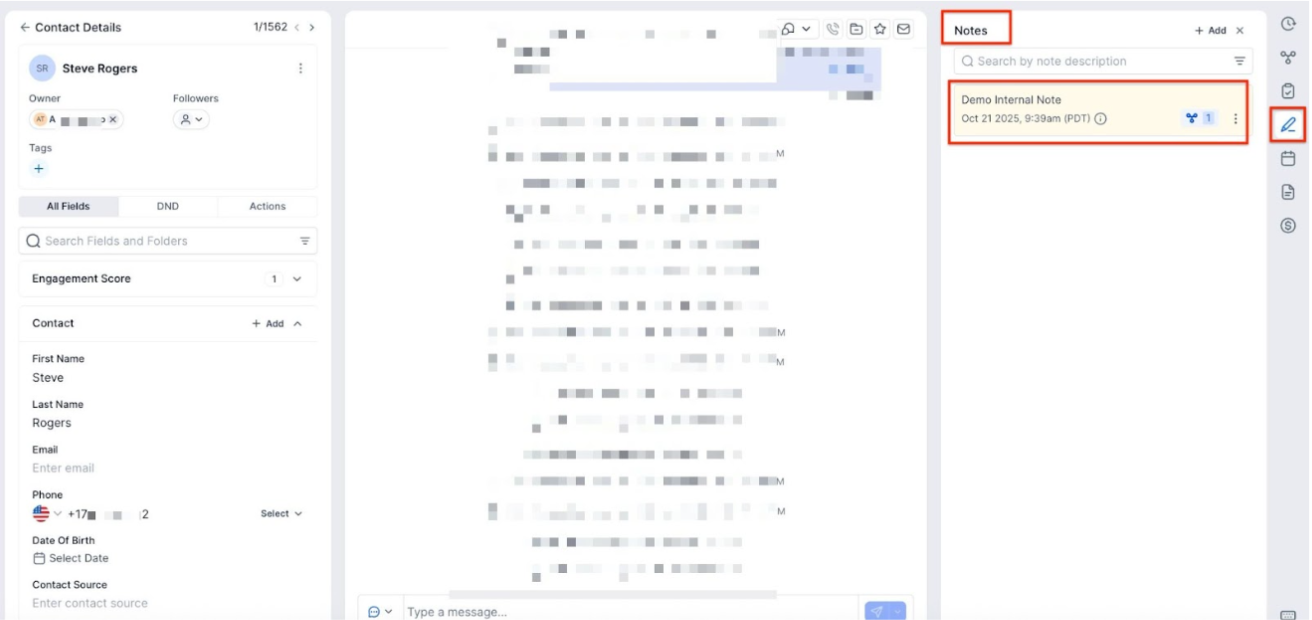
- Notes are visible within the Appointment Modal and are also accessible in the Notes section under Contacts & Conversations, ensuring information is centralized for better coordination. These notes can be viewed, edited, and deleted.
Important: Notes added in appointments are synced to the associated contact within the Contacts, Opportunities, and Conversations tab. However, notes added directly in the contact will not sync back to the appointment.
Notes added via two-way sync from third-party calendars (such as Google or Outlook) will automatically appear in the system. Additionally, responses from bookers in the “Additional Information” field of the default booking form are displayed in the appointment’s notes section for quick and easy access.
Important: Notes added in the Appointment Modal’s notes section are for internal use and do not sync to Google Calendar invites. However, notes or descriptions added to Google Calendar will sync back into your system if two-way sync is enabled.

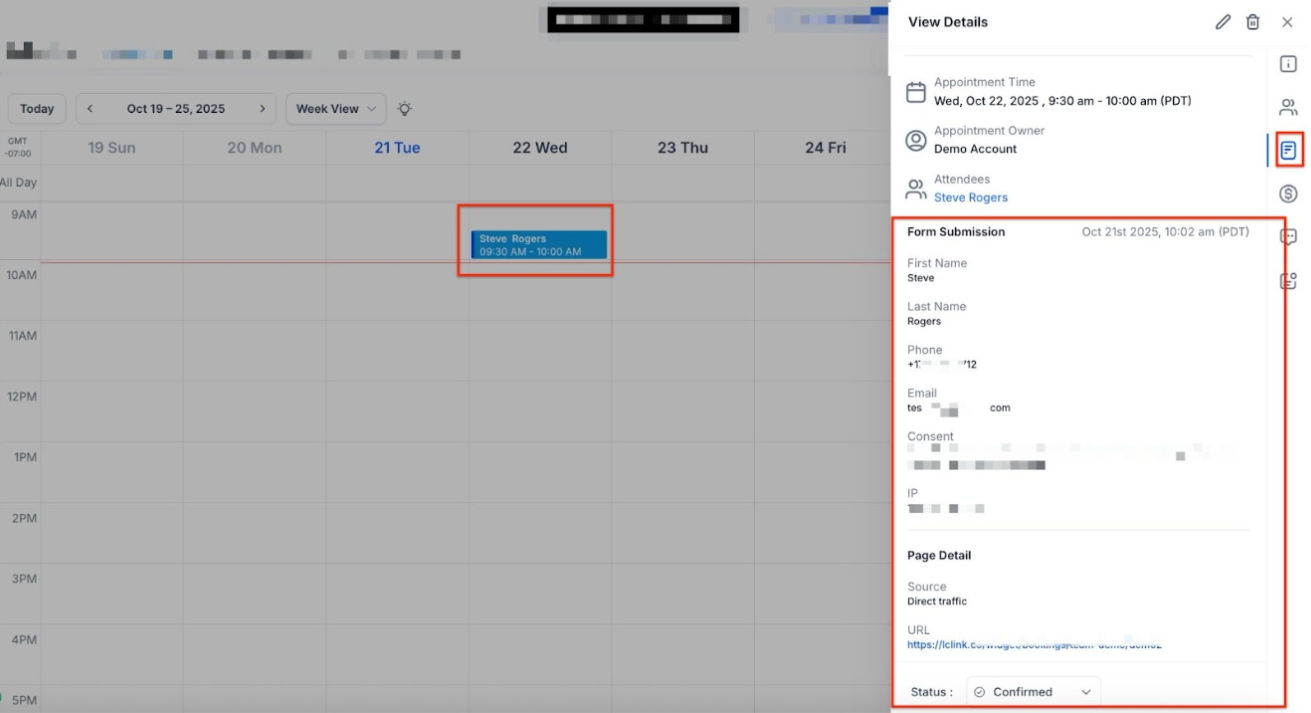
- Form Submissions: You can view form submissions directly in the Appointment Modal, offering a simplified way to access booking information without needing to switch between modules.
Please note that this applies only to newly created appointments going forward, and existing appointments won’t display submission data. Submissions from the default booking form that only capture Name, Email, and Phone are currently excluded.
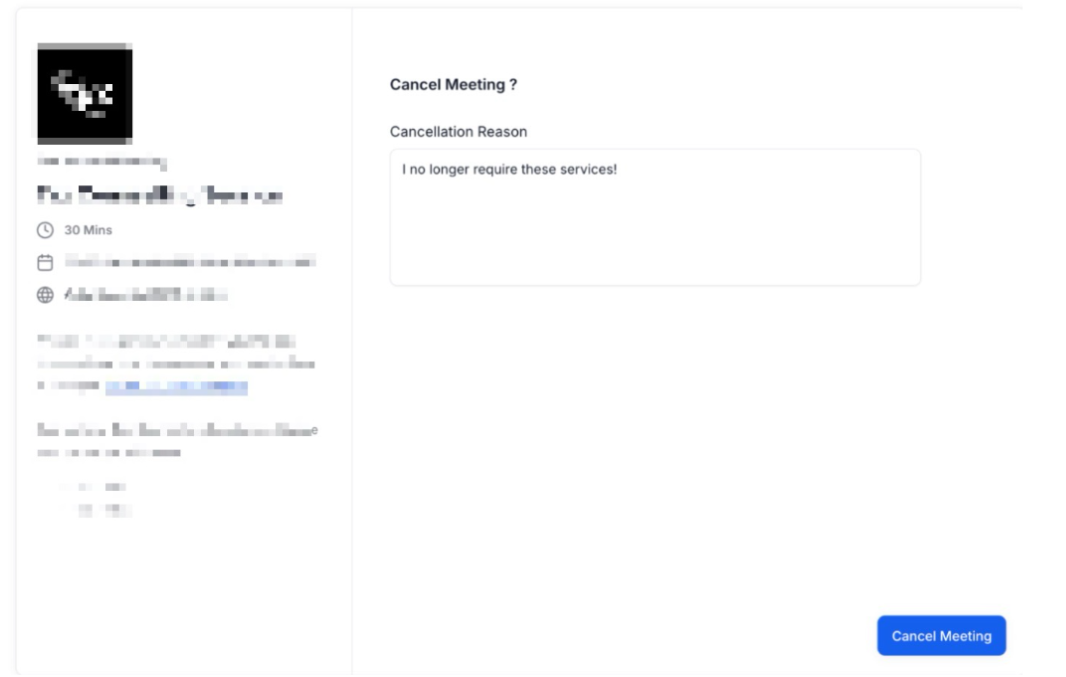
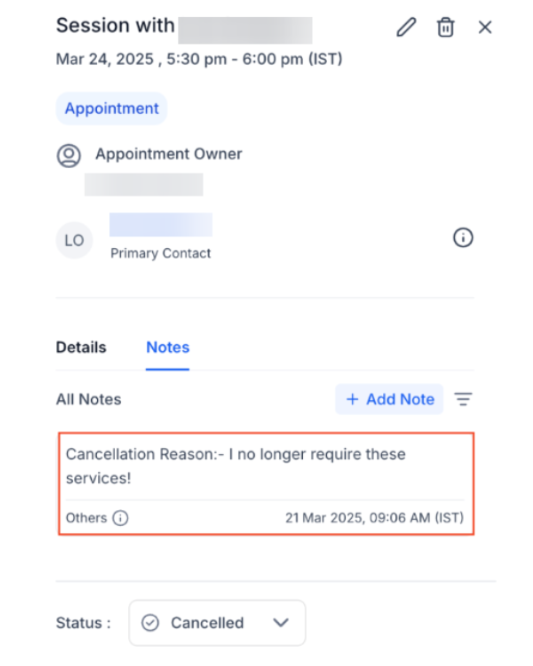
- Reason for Cancellation: If a user wishes to cancel the appointment, they will have the ability to select a reason for cancellation while also viewing important appointment information, such as Calendar Name, Duration, Description, and Appointment Date & Time. This improves visibility, allowing teams to identify patterns in cancellations and take steps to reduce them in the future.
¶ Step 4: Going on vacation? Sick? Block off times you become unavailable—even if it contradicts the availability set in each of your calendars—so that no one can book at these times or on these days.
- In any view (daily, weekly, monthly), drag across days or times you’ll be away.
- When the pop-up appears, hit “Add Blocked Off time” (you can also book appointments this way). The Appointment window opens by default but you can select the “Blocked off time” right next to it.
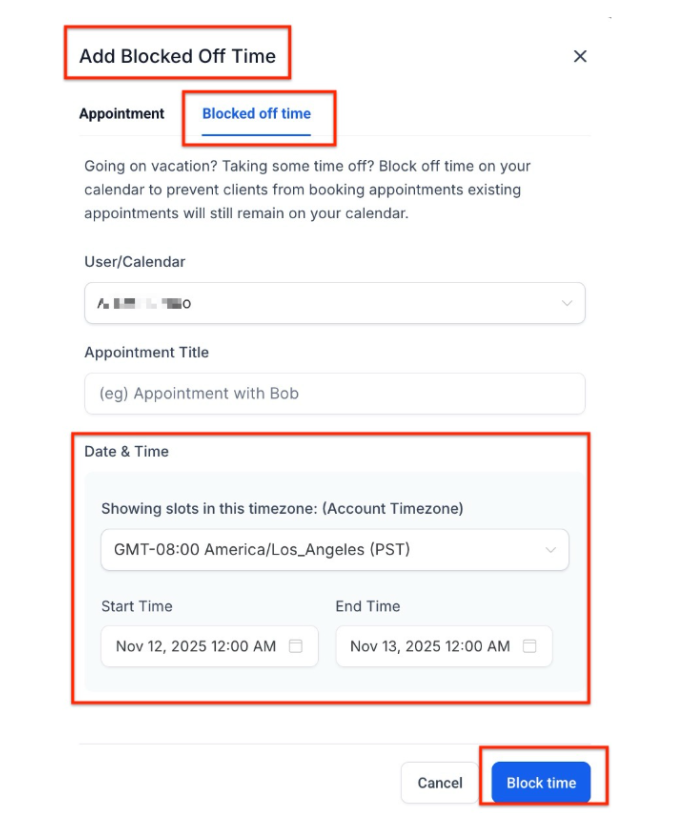
- Select the Team Member who this is for. You can do this for yourself and any team member if you are an admin in your account.
- Specify the Start and End Times for your time away.
- Give it a Title if you’d like for memory and greater transparency.
- Click on “Block Time” to implement the changes.
NOTE: If you have integrated your Google/Outlook calendar into your account, you’ll be able to see events and appointments from these on your calendar, as well as respective date/time updates.
¶ FAQ
Question: How can I book an appointment for a new contact?**
**Answer: To book an appointment for a new contact, click the “Book Appointment” option in the Calendar tab, then select “Add New Contact.” You’ll need their name, time zone, phone, and email for a complete profile, but you can proceed with just a phone or email.
Question: Can I customize appointment times outside of the standard calendar slots?**
**Answer: Yes, you can customize appointment times by selecting the “Custom” option below the standard time slots when filling out the appointment details, allowing for flexible scheduling beyond the predefined slots.
Question: How do I block off time when I’m unavailable?**
**Answer: To block off unavailable times, drag across the days or times on the calendar view, select “Add Blocked Off Time” in the pop-up, specify the time range, add a title if needed, and click “Block Time.” This will prevent bookings during those periods.
Question: Can I see and manage appointments from my integrated Google or Outlook calendar?**
**Answer: Yes, if you’ve integrated your Google or Outlook calendar, you will be able to see and manage events and appointments from these calendars directly within the platform, including date and time updates.
Question: How can I block off time when I am unavailable?**
**Answer: In any calendar view, drag across the days or times you want to block, select “Add Blocked Off Time,” specify the start and end times, optionally add a title, and click “Block Time.” This prevents appointments from being booked during those periods.
Question: Can I edit appointments after booking them?**
**Answer: Yes, appointments can be edited after booking, including changing the time, calendar, guests, or adding notes, depending on your calendar permissions.
Question: Can I track why my appointments are being canceled?
Answer: Yes. When an appointment is canceled in the system, you can select a specific “Reason for Cancellation.” This data is stored so your team can review patterns and improve your booking retention over time.