¶ How to Create a Blog Post
This article will walk you through creating a blog post and adding it to your funnel or website.
¶ Step 1:
- Create a Blog Post with Settings and SEO details
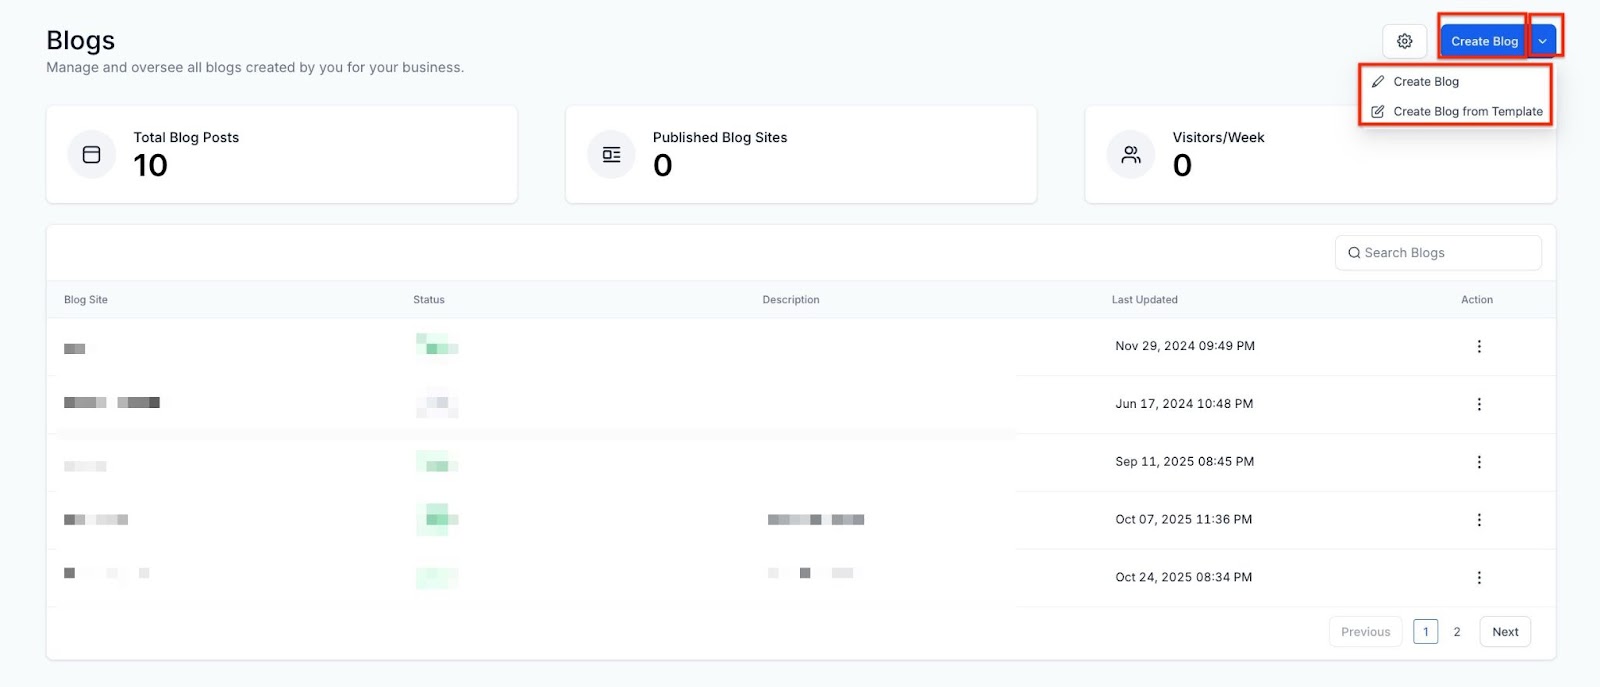
- Navigate to Sites > Blogs and click Create Blog. You also have the option to create from available templates.
- Create a blog site
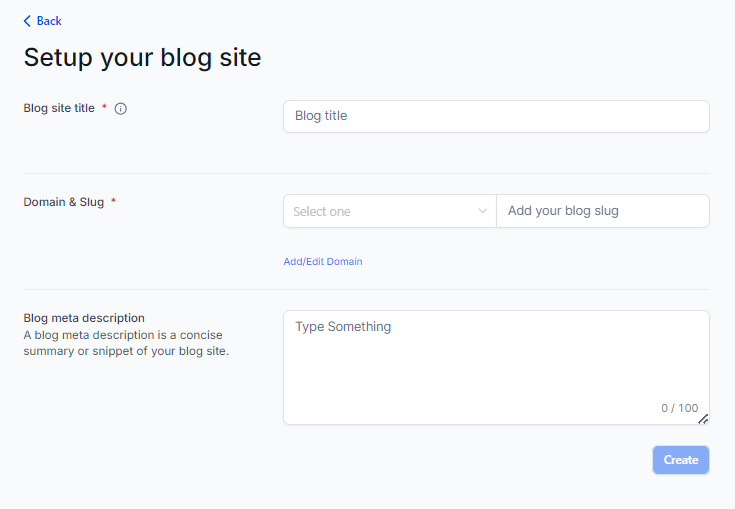
- Create a New Blog Post with a Title, Description, and Blog Post image.
¶ Note - The image size allowed is 10MB
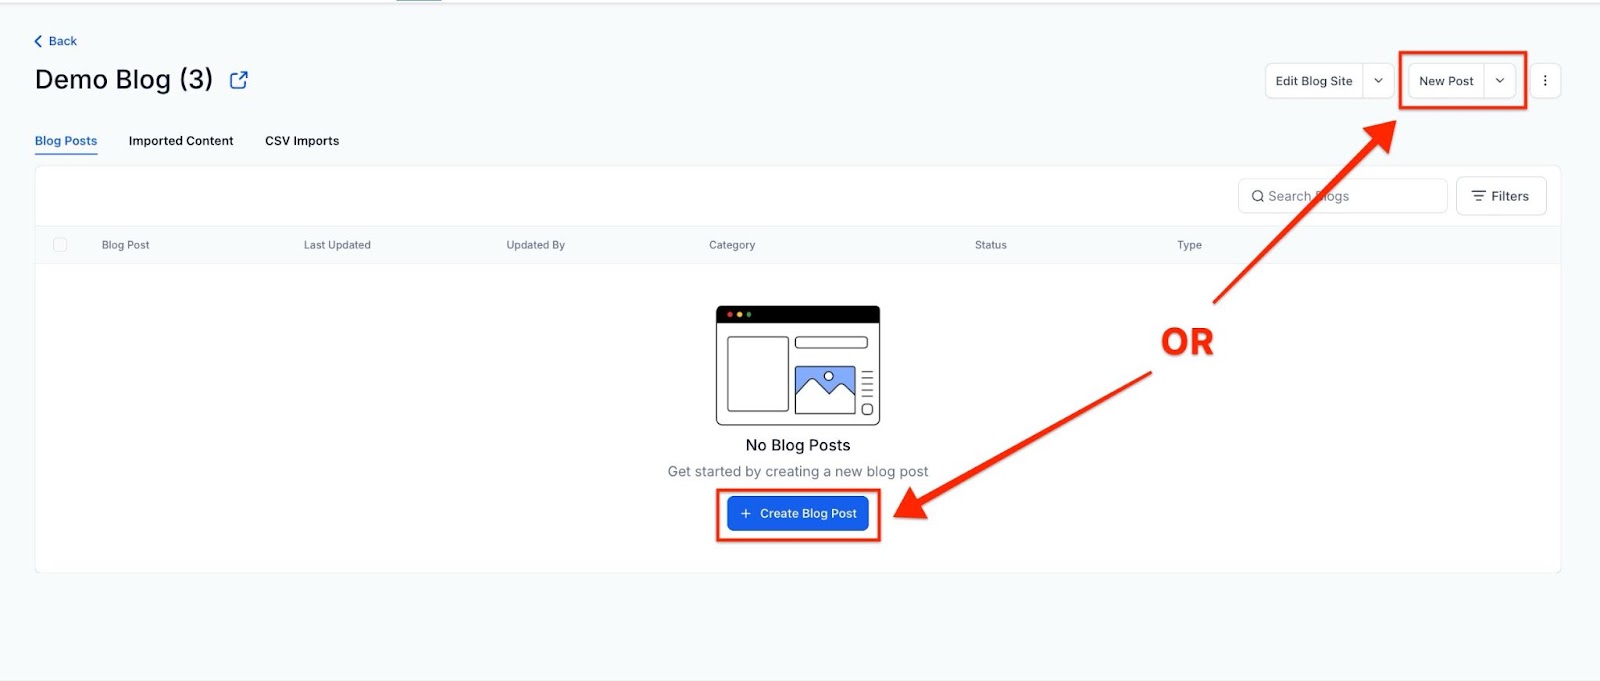
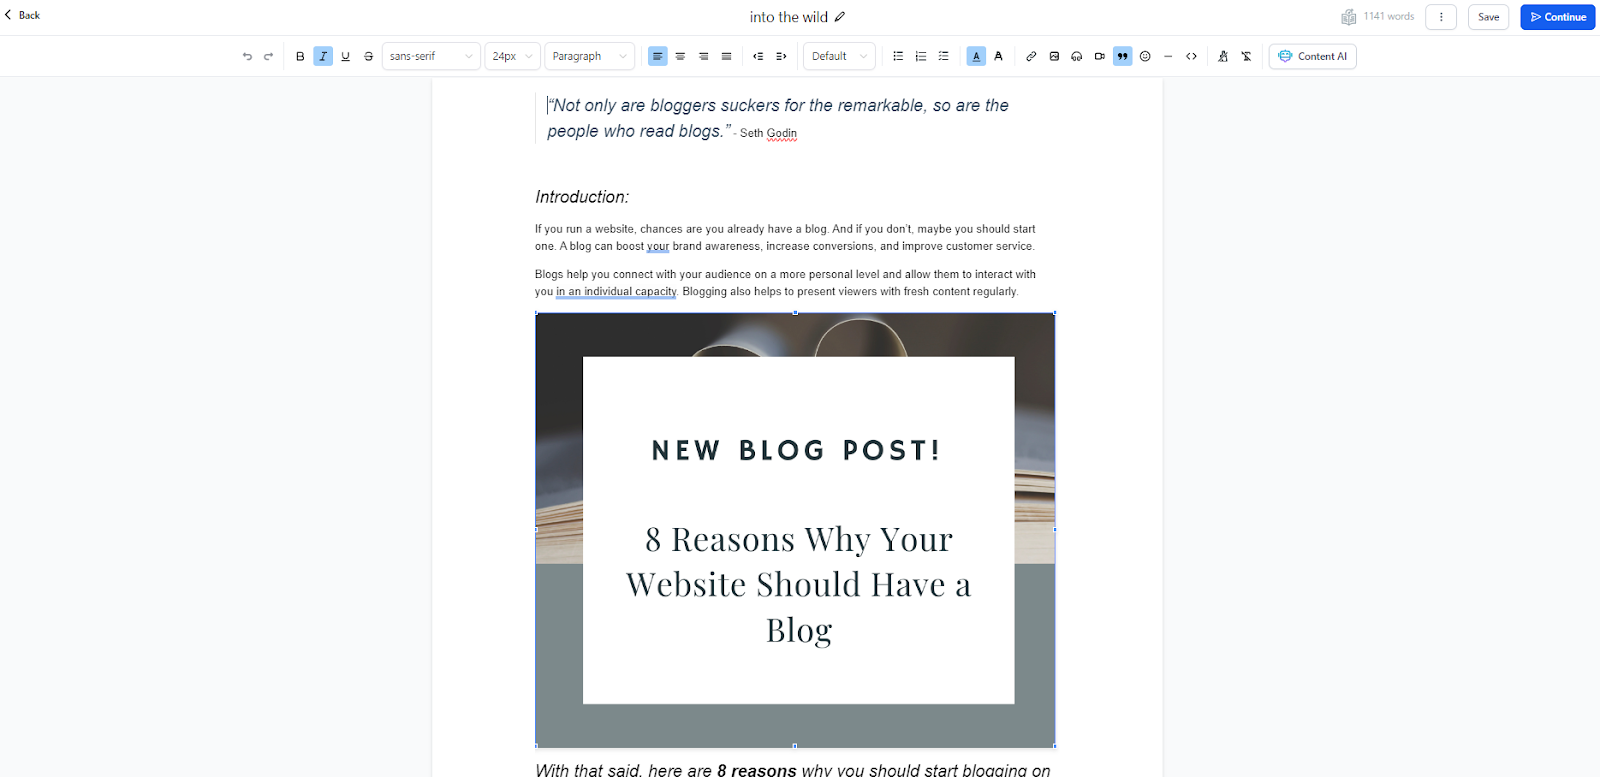
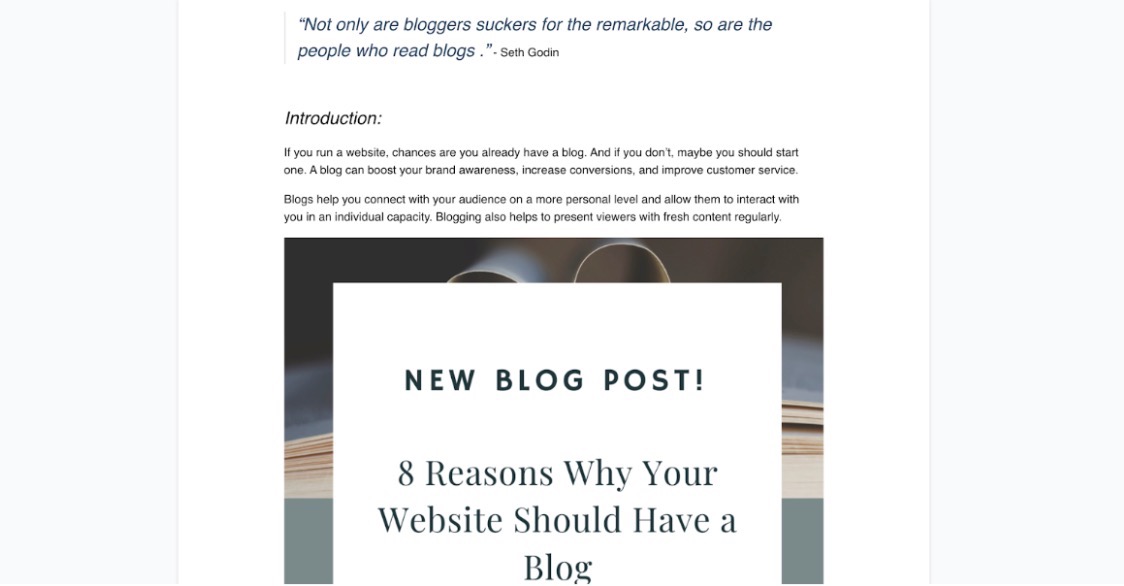
You will be directed to the blog post builder, where you can design your very own blog:
- Automatically Generate a Table of Contents
Create an auto-generated Table of Contents based on your headings.
- Use the Table of Contents icon to choose from three layout options.
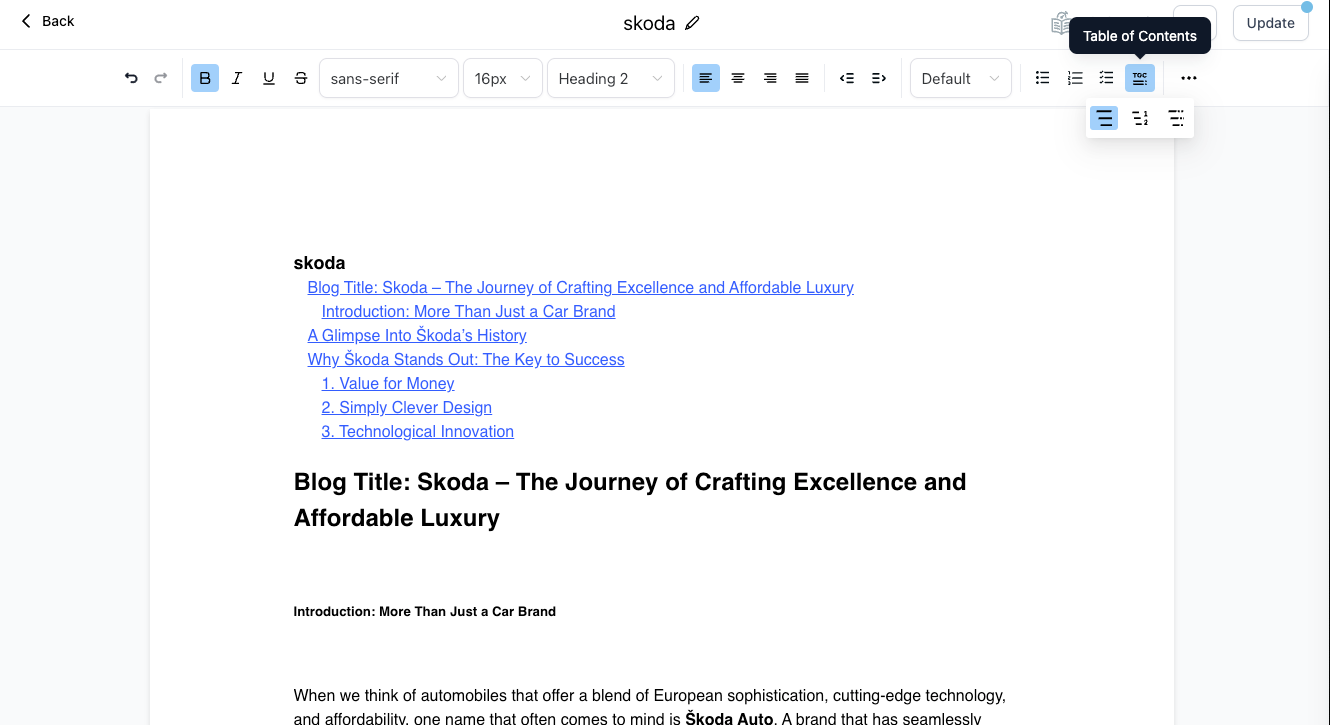
- Customize indentation and hyperlink headings for easy navigation.
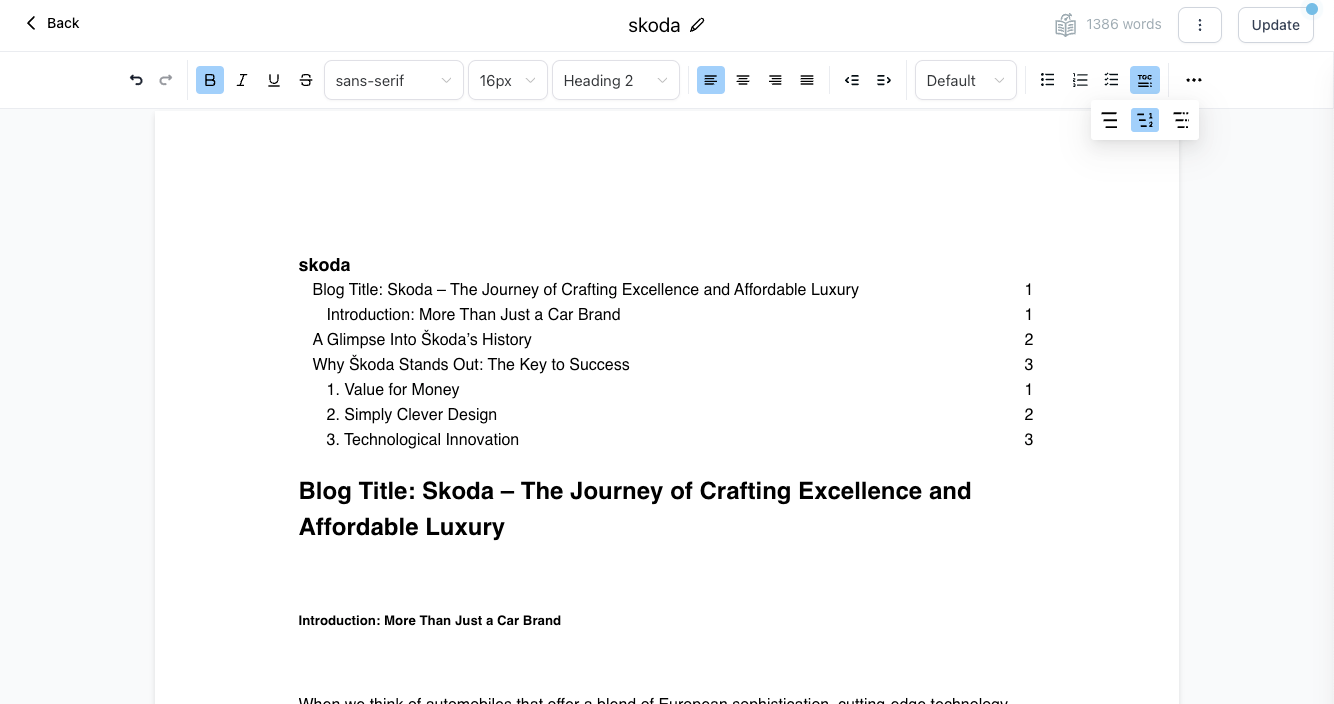
- Adjust styles like font size, bold, and italics to match your blog’s theme.

Once you’re done, you can fill in the publishing details and save your blog/send or schedule to send for later
Note:
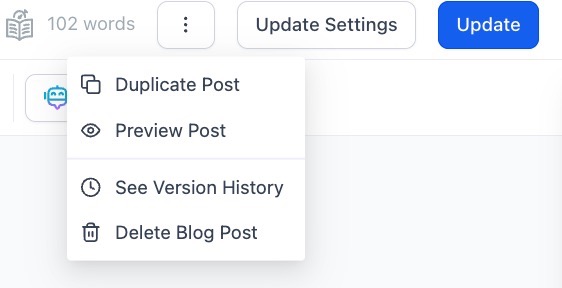
This allows creators to preview their blog posts exactly as they appear once published, ensuring full accuracy for custom code, embedded elements, and layout designs. The preview opens in a separate tab and includes a public, shareable link that can be accessed while the post is still in draft form.

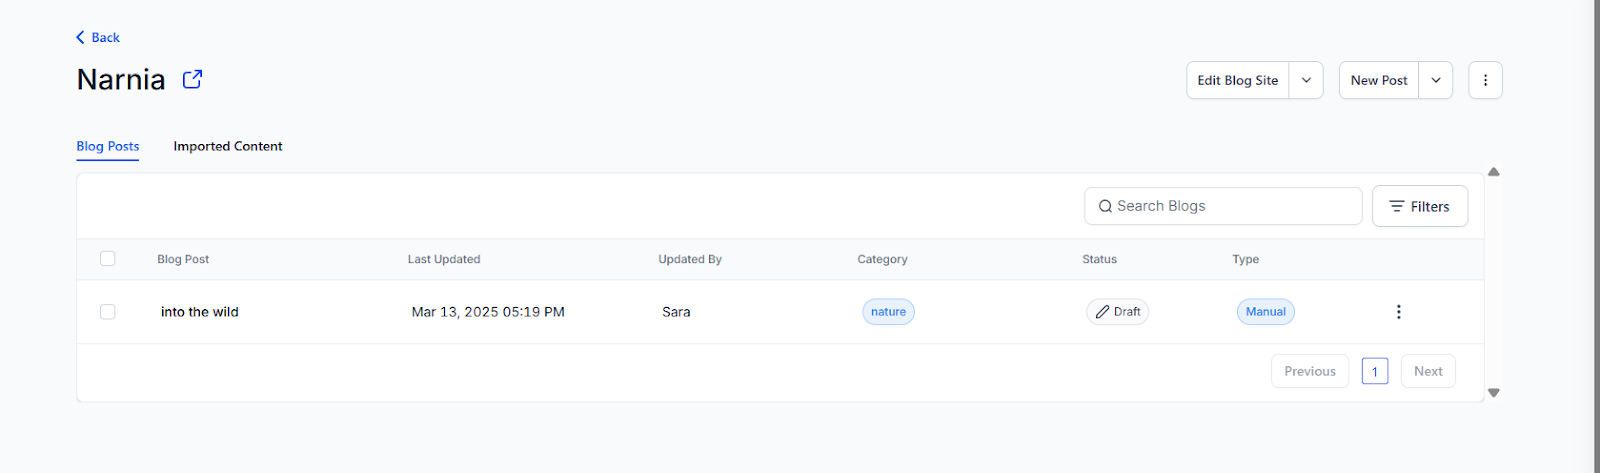
Once saved, it will appear on the main blog tab
Layout and Readability in Blogs
The blog builder also supports pagination and a three-column layout, enhancing control over content layout and readability.
Pagination This enables the division of long posts into multiple pages, helping reduce page load times and improving user engagement. Pagination streamlines the presentation of content, making extensive articles more manageable for readers.
Three-Column Layout The three-column format increases design flexibility, providing additional space for diverse content, images, or advertisements. This layout enriches the blog’s presentation and optimizes the use of screen space.
¶ 2. Canonical Support for Category and Author
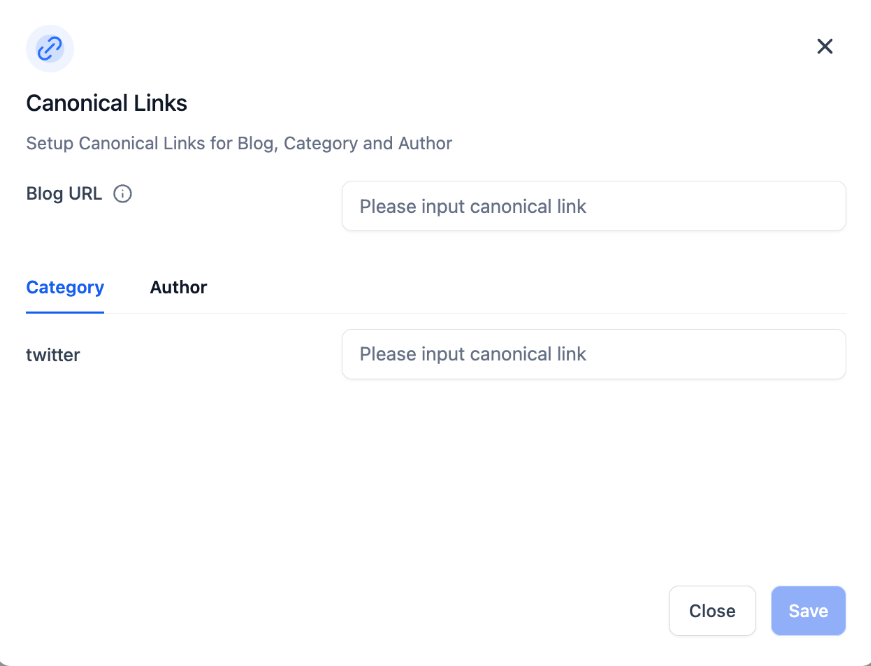
Canonical Links for categories and authors are designed to enhance your website’s SEO by consolidating link equity and directing search engines to the preferred version of your content. This feature helps prevent duplicate content issues, which can negatively impact search rankings, by ensuring that search engines recognize the primary page version.
- To use this feature , navigate to Sites > Blogs, select the blog, and access the Canonical Settings from the three-dot menu.

- Here, you can set canonical links for your blog, categories, and authors.
Please note that tag pages have been removed from the sitemap to prevent content duplication.
¶ 3. Add the content for your blog post using the editor toolbar
- You can add styles with bold , italics , underline, strikethrough text, fonts, styles, and size
- You can add an indent, a numbered list, a bulleted list, or a to-do list
- You can add color and highlight
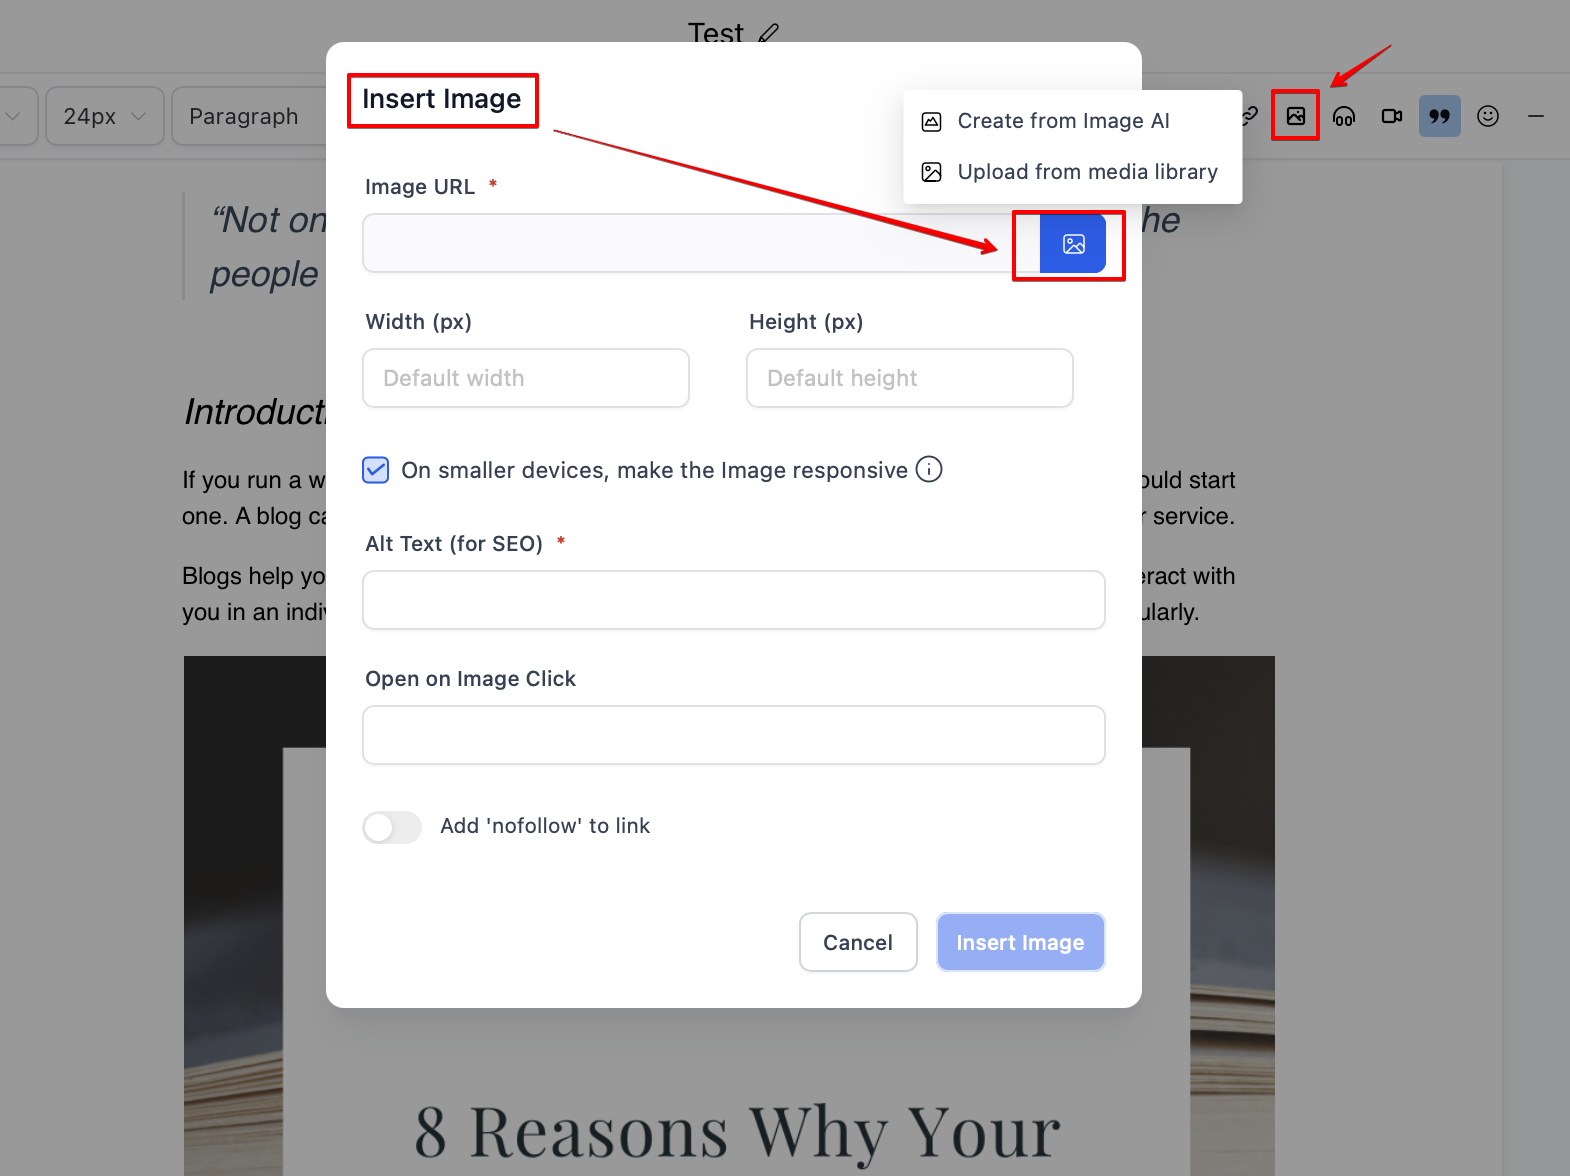
- You can add an image(s) or video(s) from the Media Library and YouTube and insert hyperlinks.
- You can add quotes for specific content
- You can clear a particular format or format everything
¶ 4. Customize your content through various elements
- The Blog Site Builder supports various elements, ie, Text, Form, Blog, Media, Custom, Countdown, Blocks, and Social Element. They are further categorized as under:
Text Element:**
**1- Headline
2- Sub-Headline
3- Paragraph
4- Bullet list
5- Rich text
**
Form:
1- Button
2- Form
Media:
1- Image Slider
2- Video
3- Image
4- FAQ
5- Photo Gallery
6- Logo Showcase
7- Testimonials
Custom:
1- Custom Code
2- Survey
3- Calendar
4- Map
5- SVG
6- Reviews
7- Number Counter
8- QR Code
9- Pricing Table
Countdown:
1- Countdown
2- Minute Timer
3- Day Timer
Blocks:
1- Navigation Menu
2- Divider
3- Progress Bar
4- Image Feature
Social:
**1- Social Icons
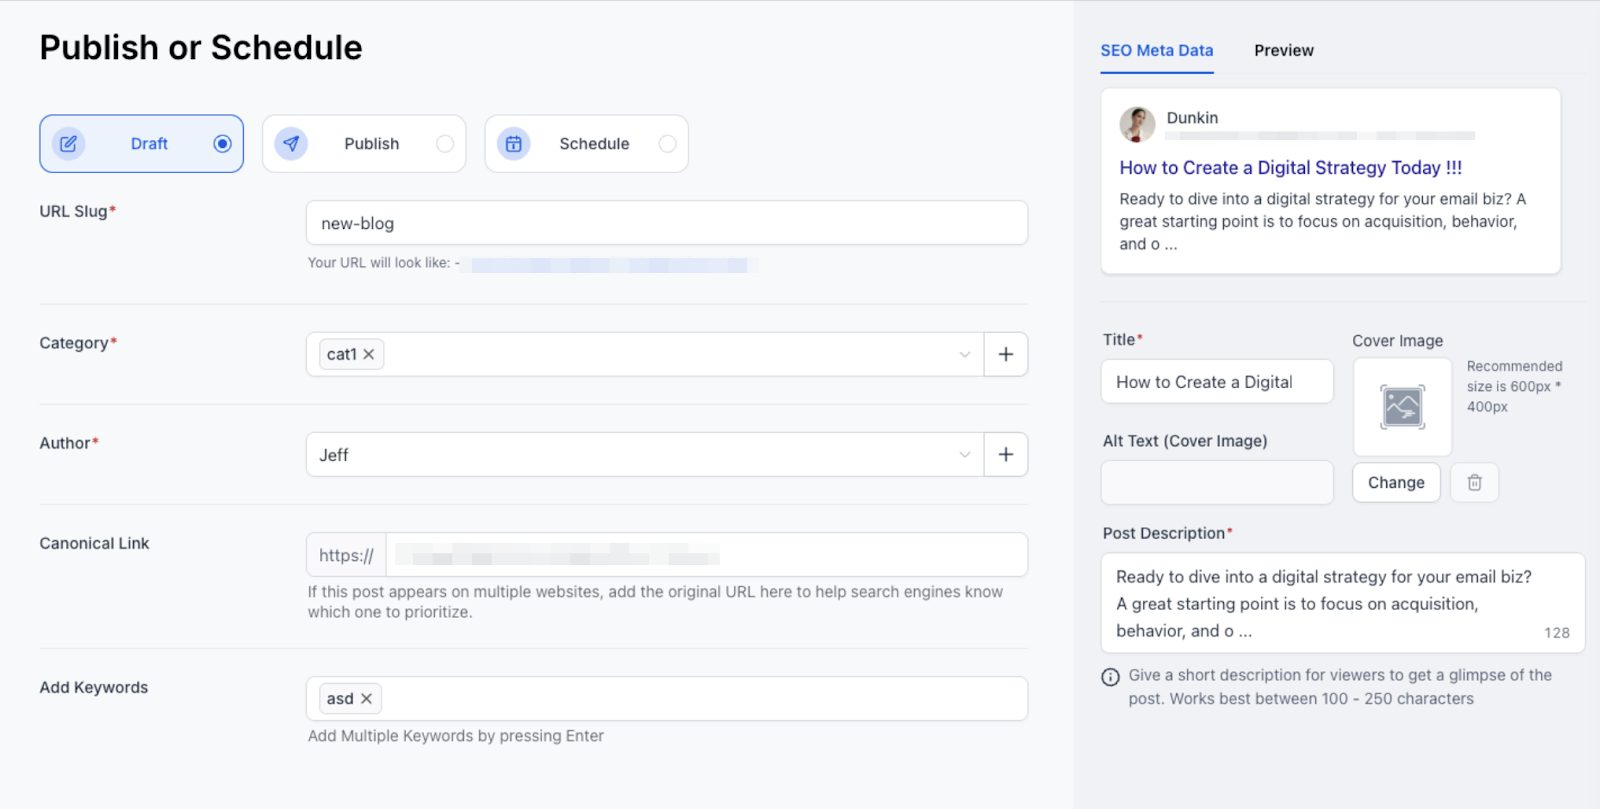
¶ 5. Following adding and customizing the content, you will be required to set up the details
- URL Slug - This will be the path for your blog post
- Category (this is set up in blog settings)
- Keywords
- Author (this is set up in blog settings)
- Once the blog details are reviewed, you can publish them with the specific past date or save them by keeping them in draft.
- Blogs support section templates; sections can be used as templates between funnels, websites, and blogs.
¶ Step 2: Add a Funnel or Website with the Blog Post List element
Please Note:
This funnel or website page is going to be your main Blog page, which contains all your blog posts added to the Blogs section.
¶ 1. Create a new Funnel / Website or add a step/page to an existing one
¶ 2. Once the funnel step is added, go to the edit button to land on the editor
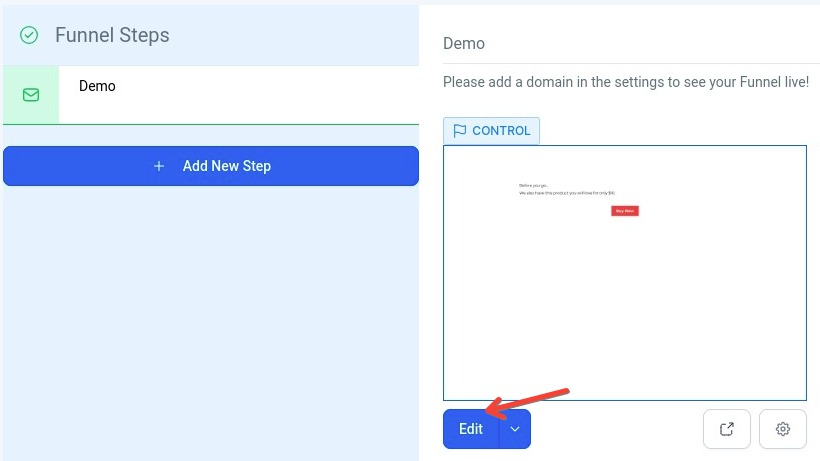
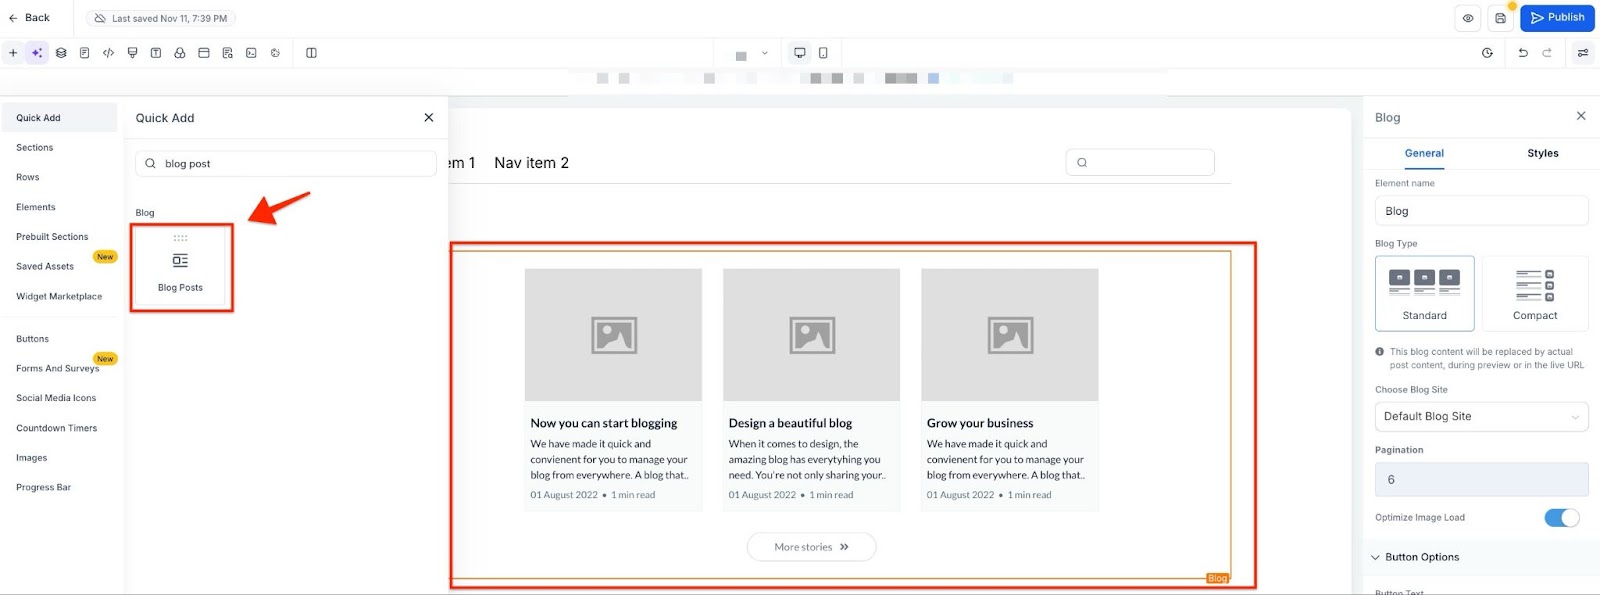
¶ 3. Click on the element named Blog Post List
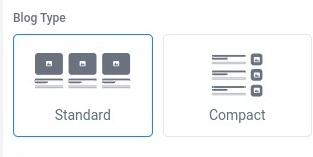
- Choose the element and type of layout between Standard and Compact
- Pagination refers to the number of blog posts shown on the landing page
Please Note
It is recommended that you add a Category Navigation menu and Footer links to your main blog page. You can also rename the ‘More stories’ button.

- The "Blog Post List " element has several options. The blog type allows you to choose between "standard " or “compact.” The Pagination settings will enable you to select the number of blog posts visible on the page, and the button options allow you to edit the button text.
¶ 4. Add Section Template, Global Section Button to the Blog
Adding various elements, such as section templates, social media icons, buttons, and global sections, can significantly enhance the appearance and functionality of your blog.
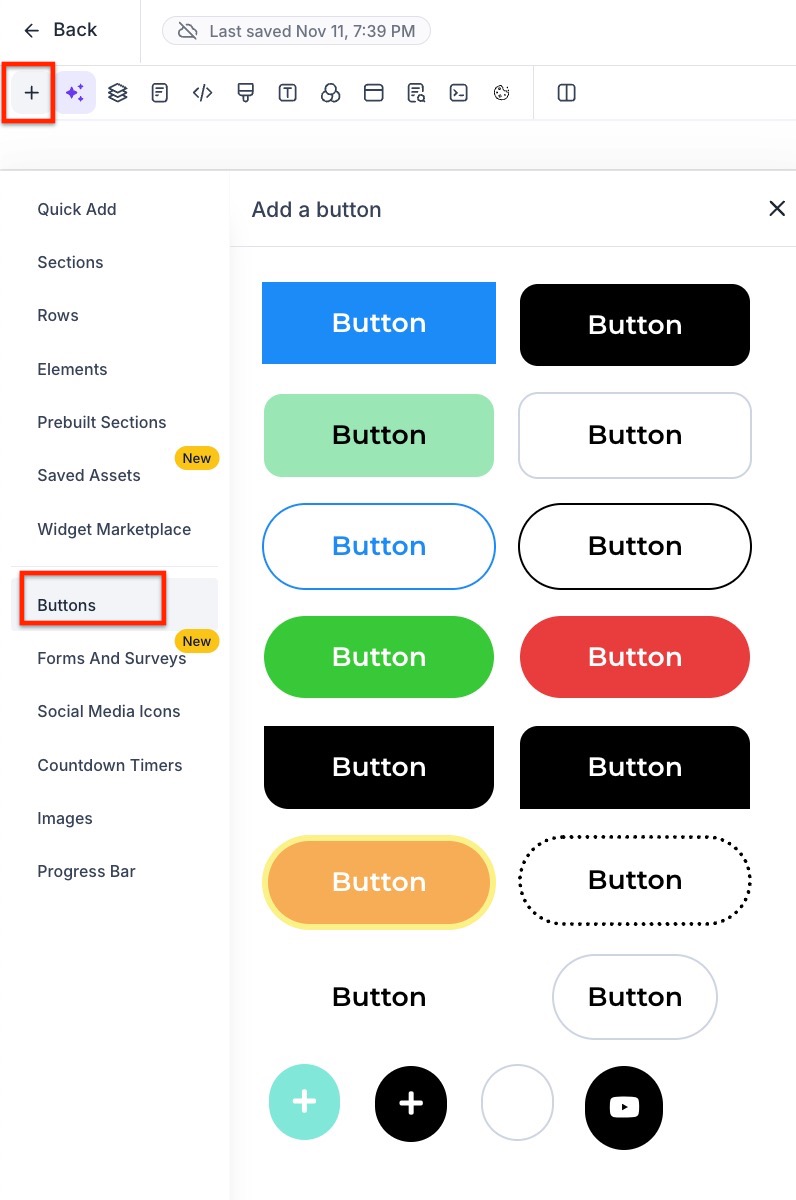
Buttons:
- Interactive elements that prompt users to take specific actions, such as “Read More,” “Subscribe,” or “Buy Now.”They direct user actions and improve navigation, helping to achieve specific goals like increased subscriptions, sales, or content engagement.
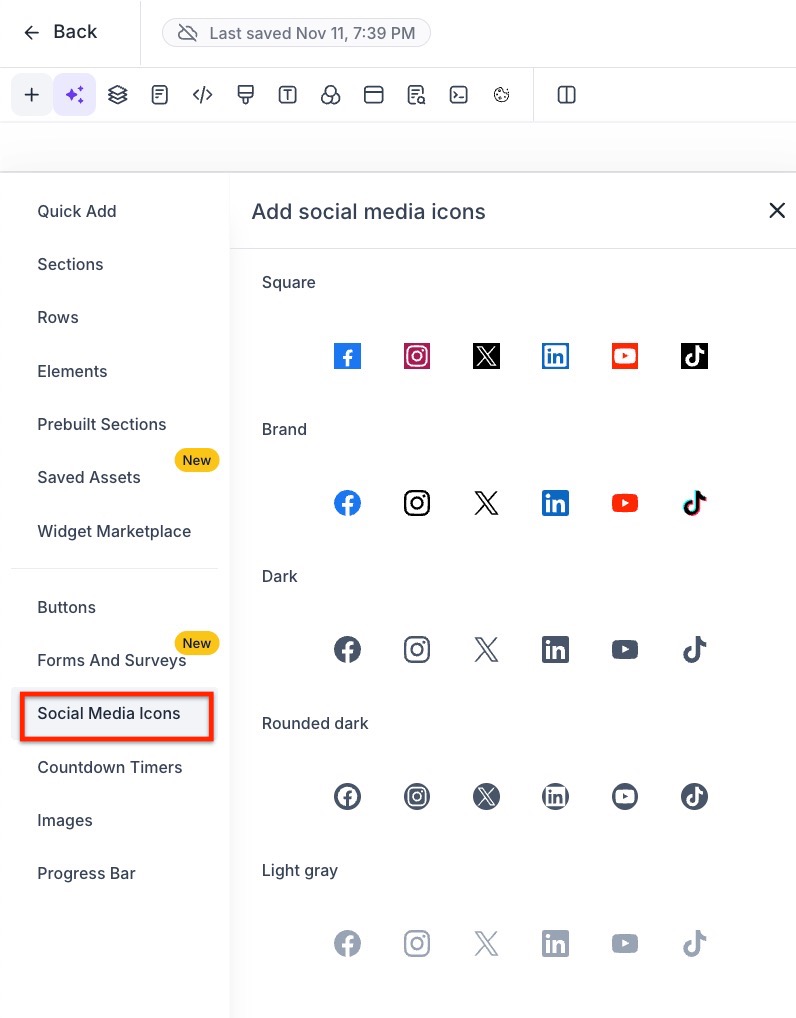
Social Media Icons:
- Small icons representing various social media platforms, typically linked to your social media profiles or sharing options. They make it easy for readers to follow your social media accounts and share your content, increasing visibility and engagement.
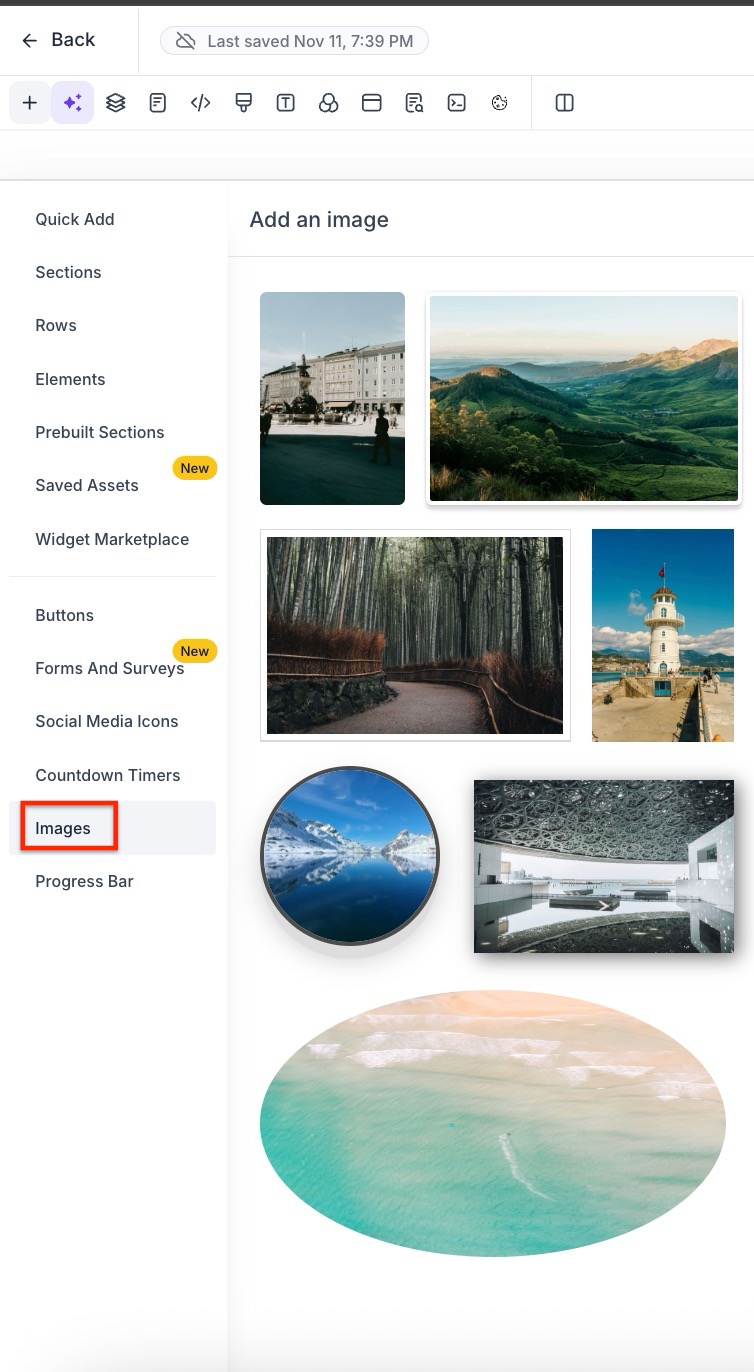
Section Templates in Saved Assets:
- Pre-designed layout sections can be inserted into your blog to structure content quickly and consistently. They help maintain a uniform look and feel, making it easier to create visually appealing pages without designing from scratch.

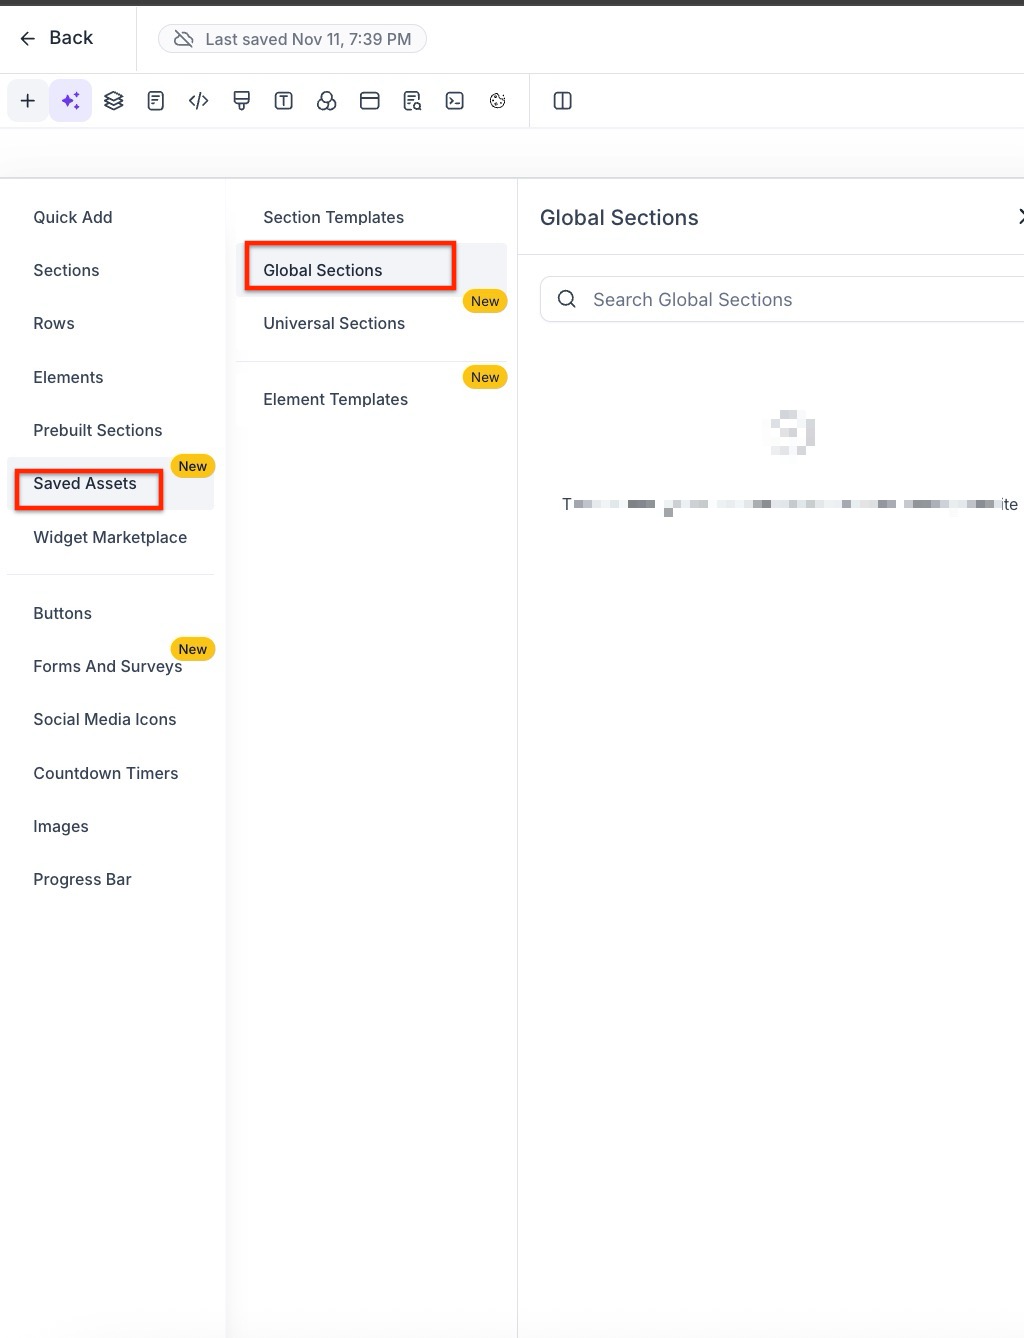
Global Sections in Saved Assets:
- Reusable sections can be applied across multiple pages or posts, such as headers, footers, or navigation bars. They ensure consistency and simplify updates, as changes to a global section automatically reflect wherever it is used.
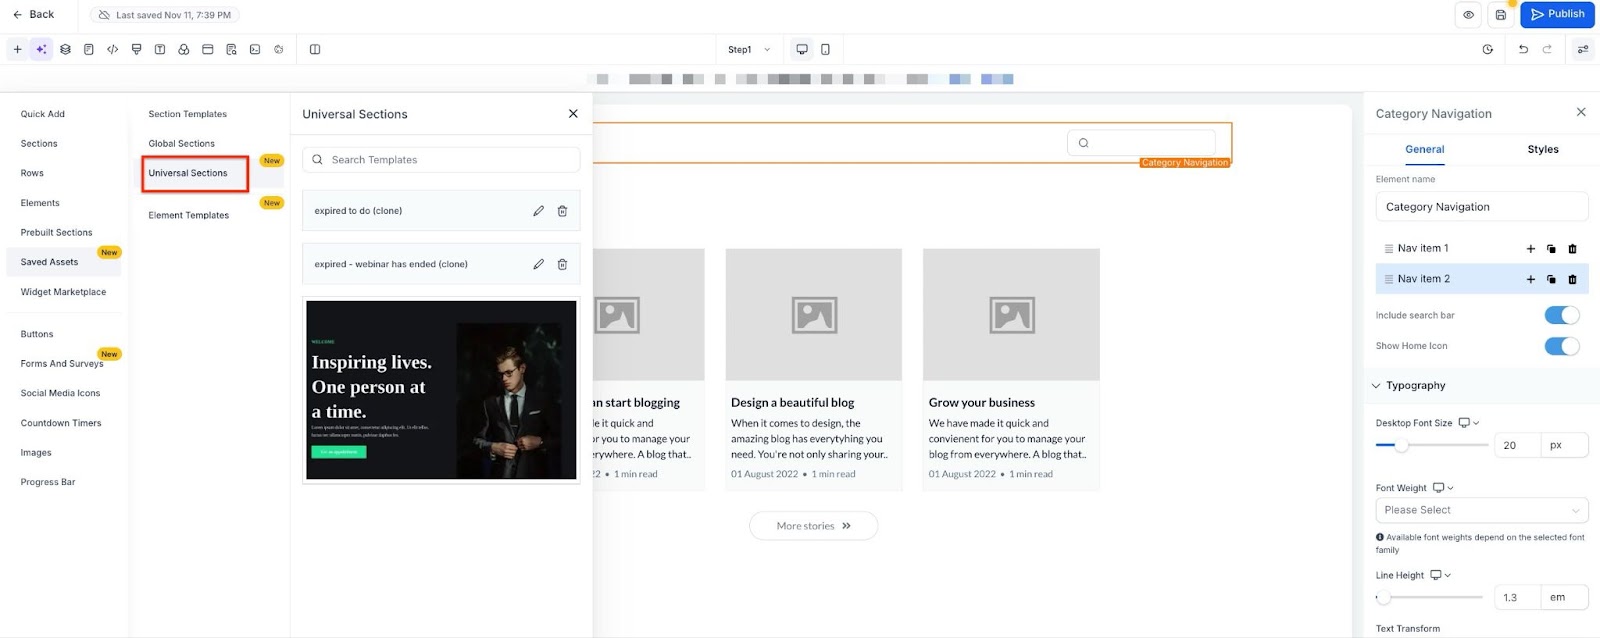
- You can add Universal Sections. You can use Universal sections for saving design elements that sync and update automatically across your entire sub-account, ensuring consistent updates in blogs.
Use Preset Sections for Design Consistency:
- While in the blog editing mode, you can enhance the appearance and structure using preset sections.
- These preset sections can be found in the funnels or websites section of the platform.
- Match these sections to the theme and styling of your blog to ensure consistency and a professional look.
¶ 5. Add the domain to the site from Funnel / Website Settings, if it is not already added
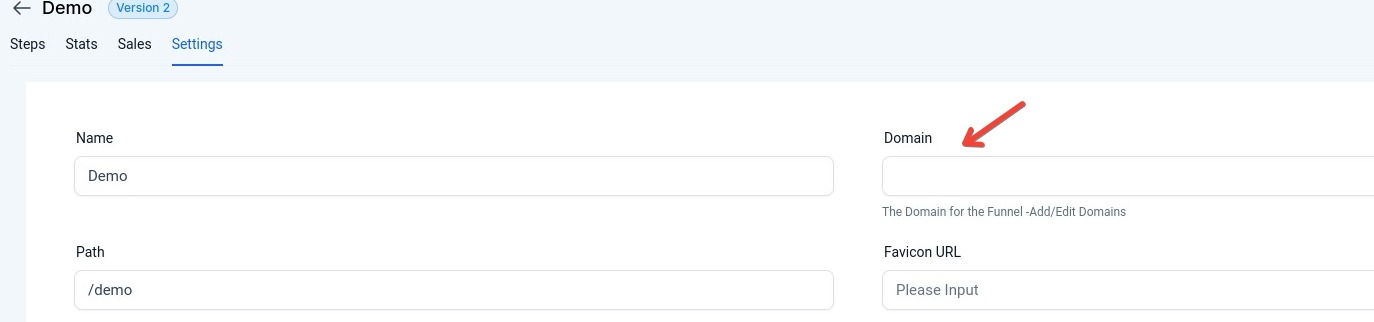
¶ 6. If you want the blog page to open when you enter your domain without any path
- For example, go to blog.mydomain.com instead of blog.mydomain.com/home. Go to Settings > Domains > Edit Domain > Select the blog page as the default page.
Please Note:
Category, Keywords, Author, and Slug CANNOT be updated after the blog has been published.
¶ Import Your Blog Posts
The Blog Importer tool simplifies transferring blog posts from any CMS, allowing users to import content in just three steps. With this tool, you can map essential fields like titles, categories, authors, and media, streamlining the migration process while saving time.
Pre-Checks
Ensure the blog has a sitemap for posts. For example, if the blog is at blog.abc.com , confirm the sitemap by visiting blog.abc.com/sitemap.xml.
3-Step Blog Import Process
1. Setup Your Import
- Navigate to Sites > Blog and select the blog name.
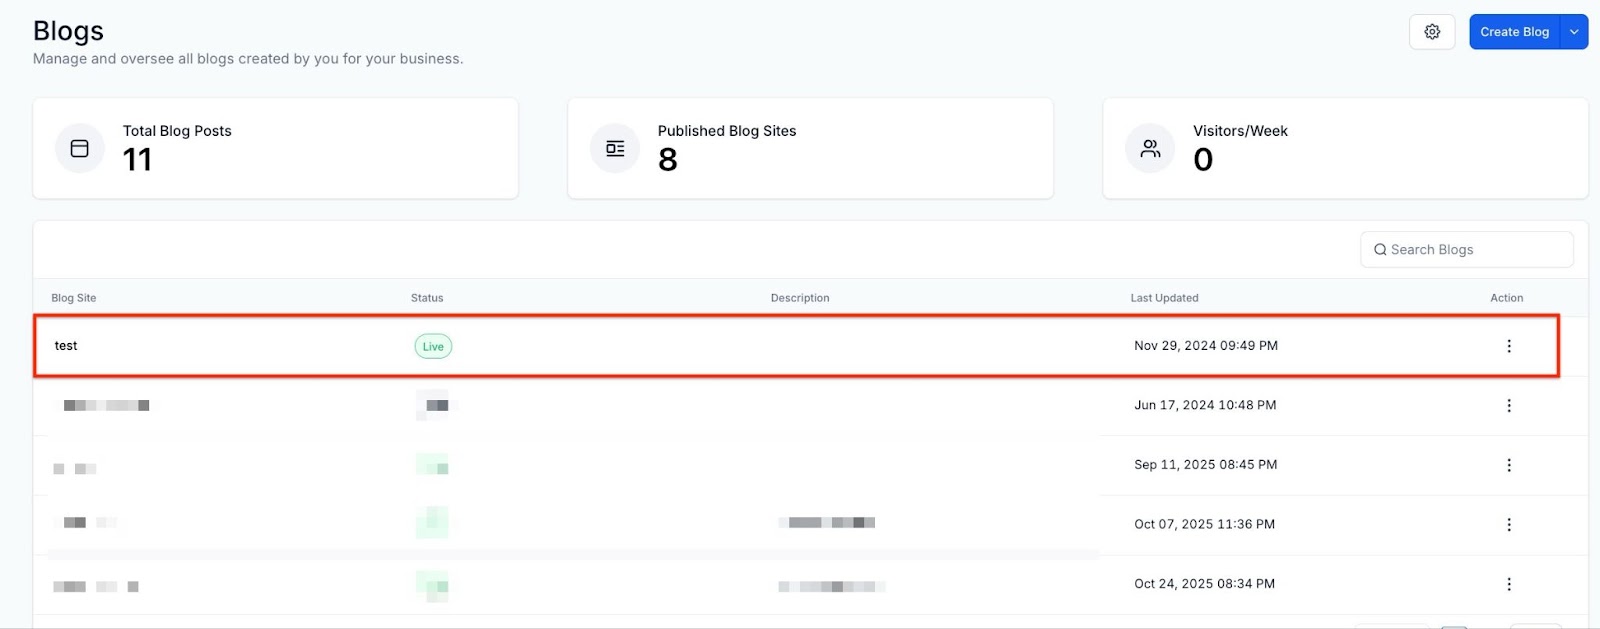
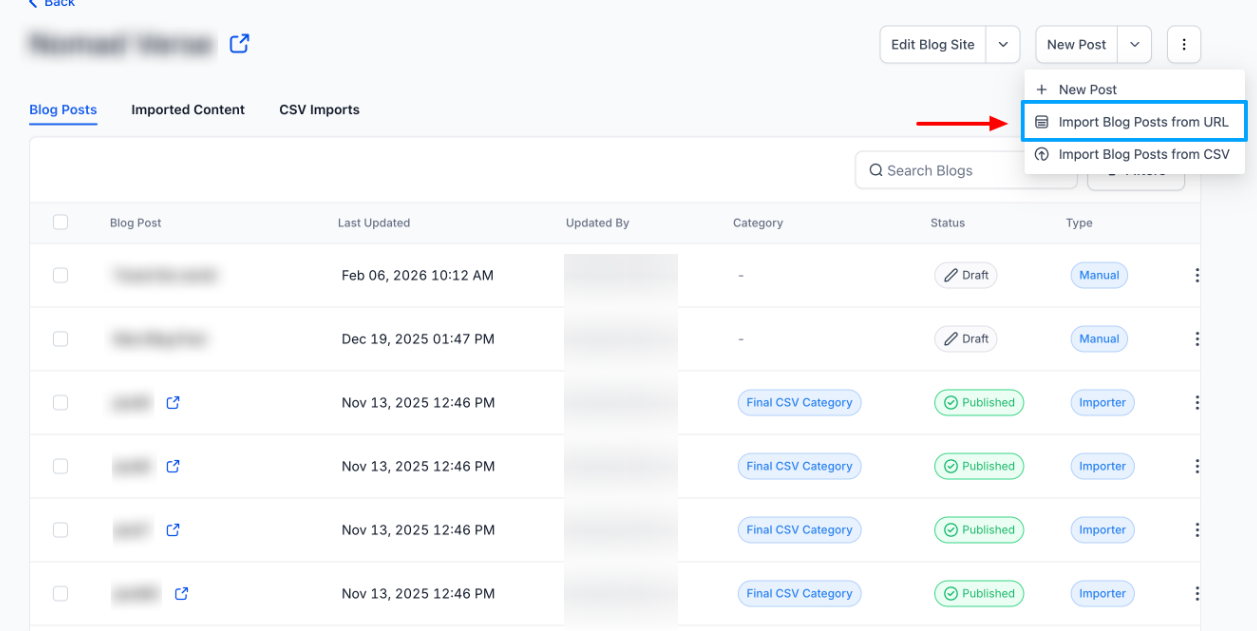
- Go to New Post > Import Blog Post, enter the blog URL, and the recent blog post URL. Confirm the import source.
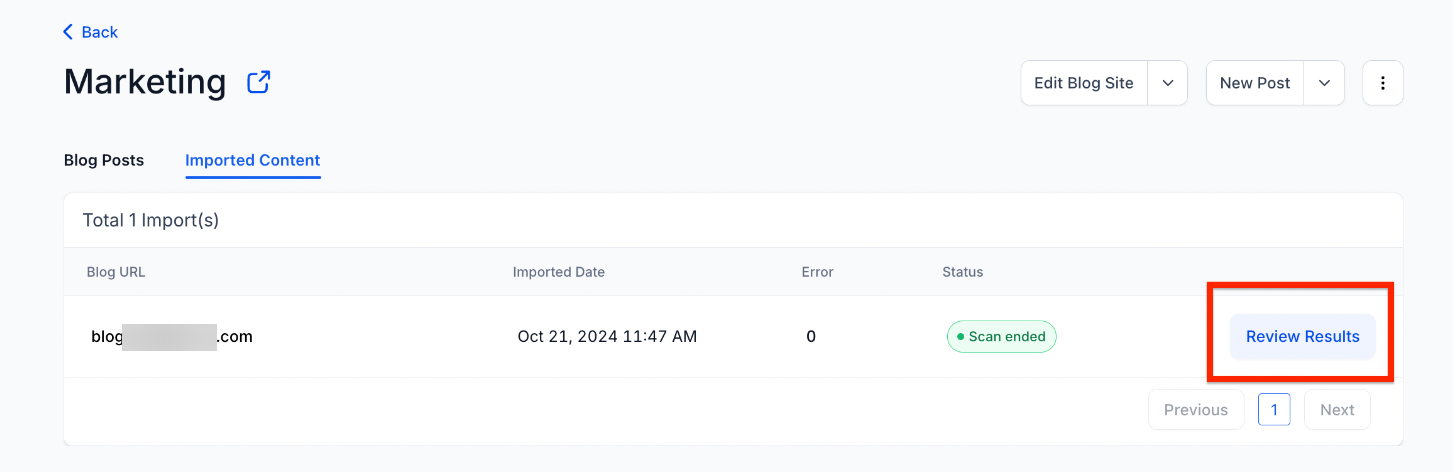
Tip: After setup, you can revisit to see the "Scan in Progress " status in the "Imported Content " section.
Note: If the iframe is blocked, the blog post preview will not be displayed but functionality will work.
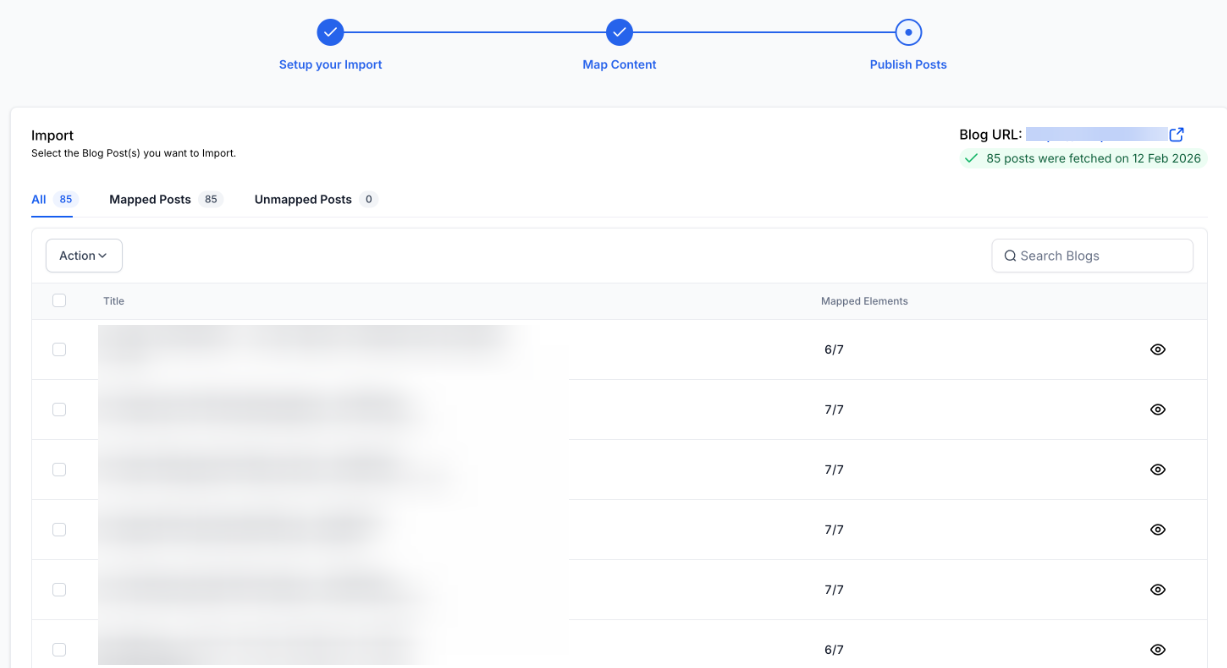
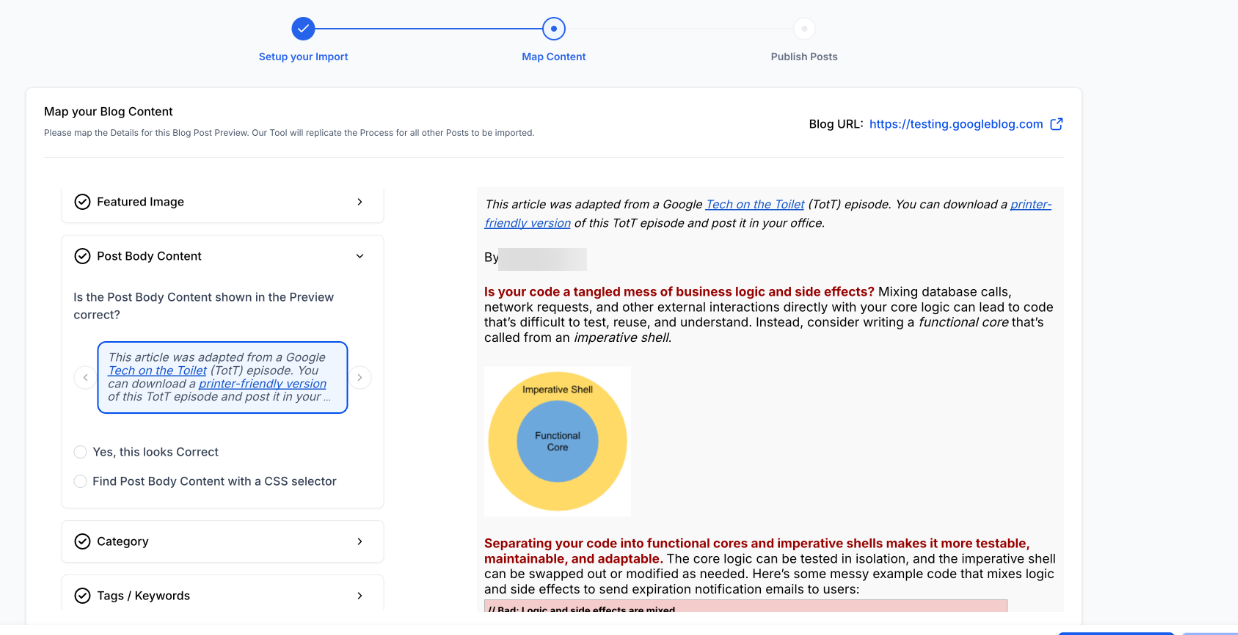
2. Map Content Fields
- Select and map essential fields like blog title, published date, author, content, and category/tag.
- Tip: If needed, use CSS selectors to refine mapping accuracy.
3. Import and Review
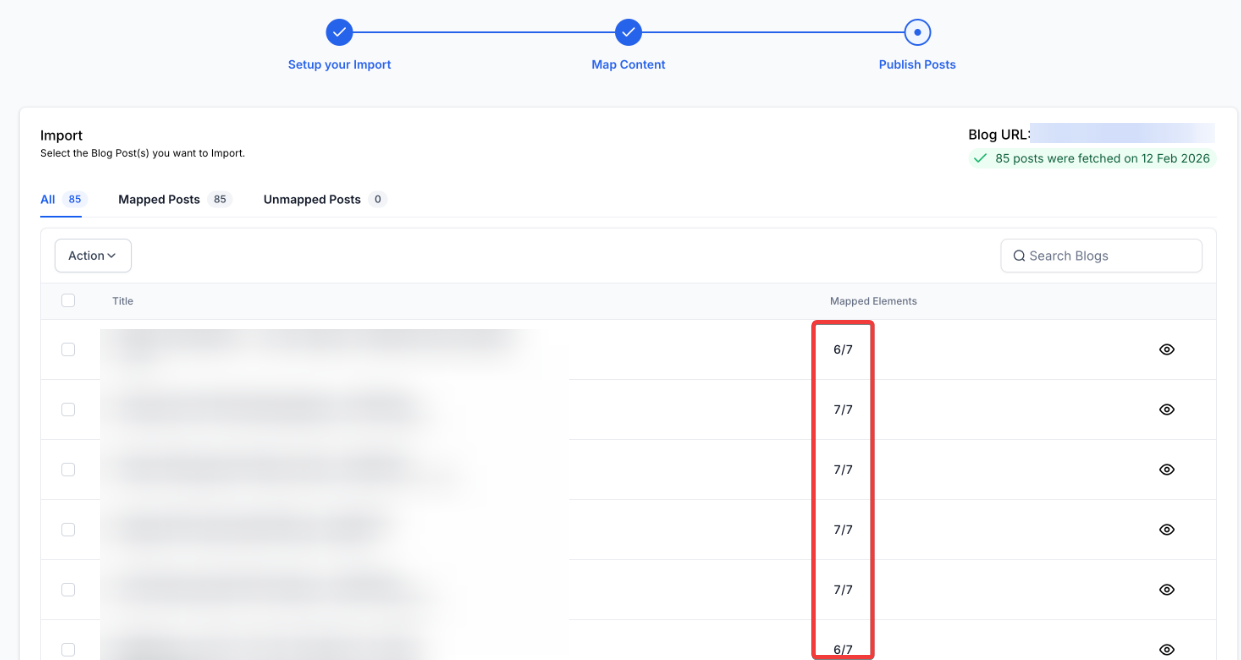
- Once mapping is complete (usually 10-20 minutes for up to 1,000 posts), import posts individually or in bulk. All posts will initially be imported as drafts.
Recommendation:
Review your blog post in preview mode before publishing.
¶ FAQ’s
Question: How does the domain work with the blog?**
**Answer: The Domain will be added to the Funnel or Website where the blog list element is added.
Blog URL formats:
| Domain | Slug of Blog Post | Final URL |
|---|---|---|
| abc.com | b/sample-now | abc.com/b/sample-now |
| abc.com/xyz | b/sample-now | abc.com/xyz/b/sample-now |
| blog.abc.com | b/sample-now | blog.abc.com/b/sample-now |
Question: Can I have separate blog pages for each category?**
**Answer: That is not currently supported.
Question: How do you choose the number of blog posts displayed on the landing page?**
**Answer: The Pagination settings allow you to select the number of blog posts visible on the page, and the button options will enable you to edit the button text. We would recommend keeping it to 6 or 9 blog posts.
Question: Is it optional to add an Author, Category, or Keywords**
**Answer: Blog Post details require Category details like name, slug, and SEO details can be set in Blogs Settings. It is optional to add Author and Keywords. Author details can be set in Blogs Settings with name, photo, and social information. Keywords can be set from the publish screen.
Question: Can I use custom values in a blog post?**
**Answer: No, Custom Values are not supported in blog posts at the moment. You cannot use values like {{contact. name}} or {{custom_values.xyz}}
**
Question: How to add Forms, Surveys, or Custom Code to my blog post?
**Answer: Forms or Surveys cannot be added to blog posts at the moment. However, the Saved Sections feature allows you to easily add custom code for footers, headers, and other elements and share them across funnels, websites, and blogs.
Question: Why can’t I change the blog author?**
**Answer: Category, Keywords, Author, and Slug CANNOT be updated after publishing the blog.
**
Question: What is the recommended image size for a blog post?
**Answer: We don’t have a recommended size. However, the page width inside the blog post editor is 736 px.
**Question:What if the blog preview doesn’t display during the Blog Post Import process?
**Answer: If the iframe is blocked, the preview won’t appear, but you can still proceed with mapping and import as usual.
**Question:Can I edit the imported posts before publishing?
**Answer: Yes, all imported posts are initially saved as drafts, allowing you to review and edit before publishing.
**
****Question:How long does the import process typically take?
**Answer: Importing usually completes in 10-20 minutes for about 1,000 posts, depending on blog size and content structure.
Question: What is the maximum file size allowed for a blog post image?
Answer: The maximum allowed image size for a blog post is 10MB.